

Plum Chocolate
Plum Chocolate
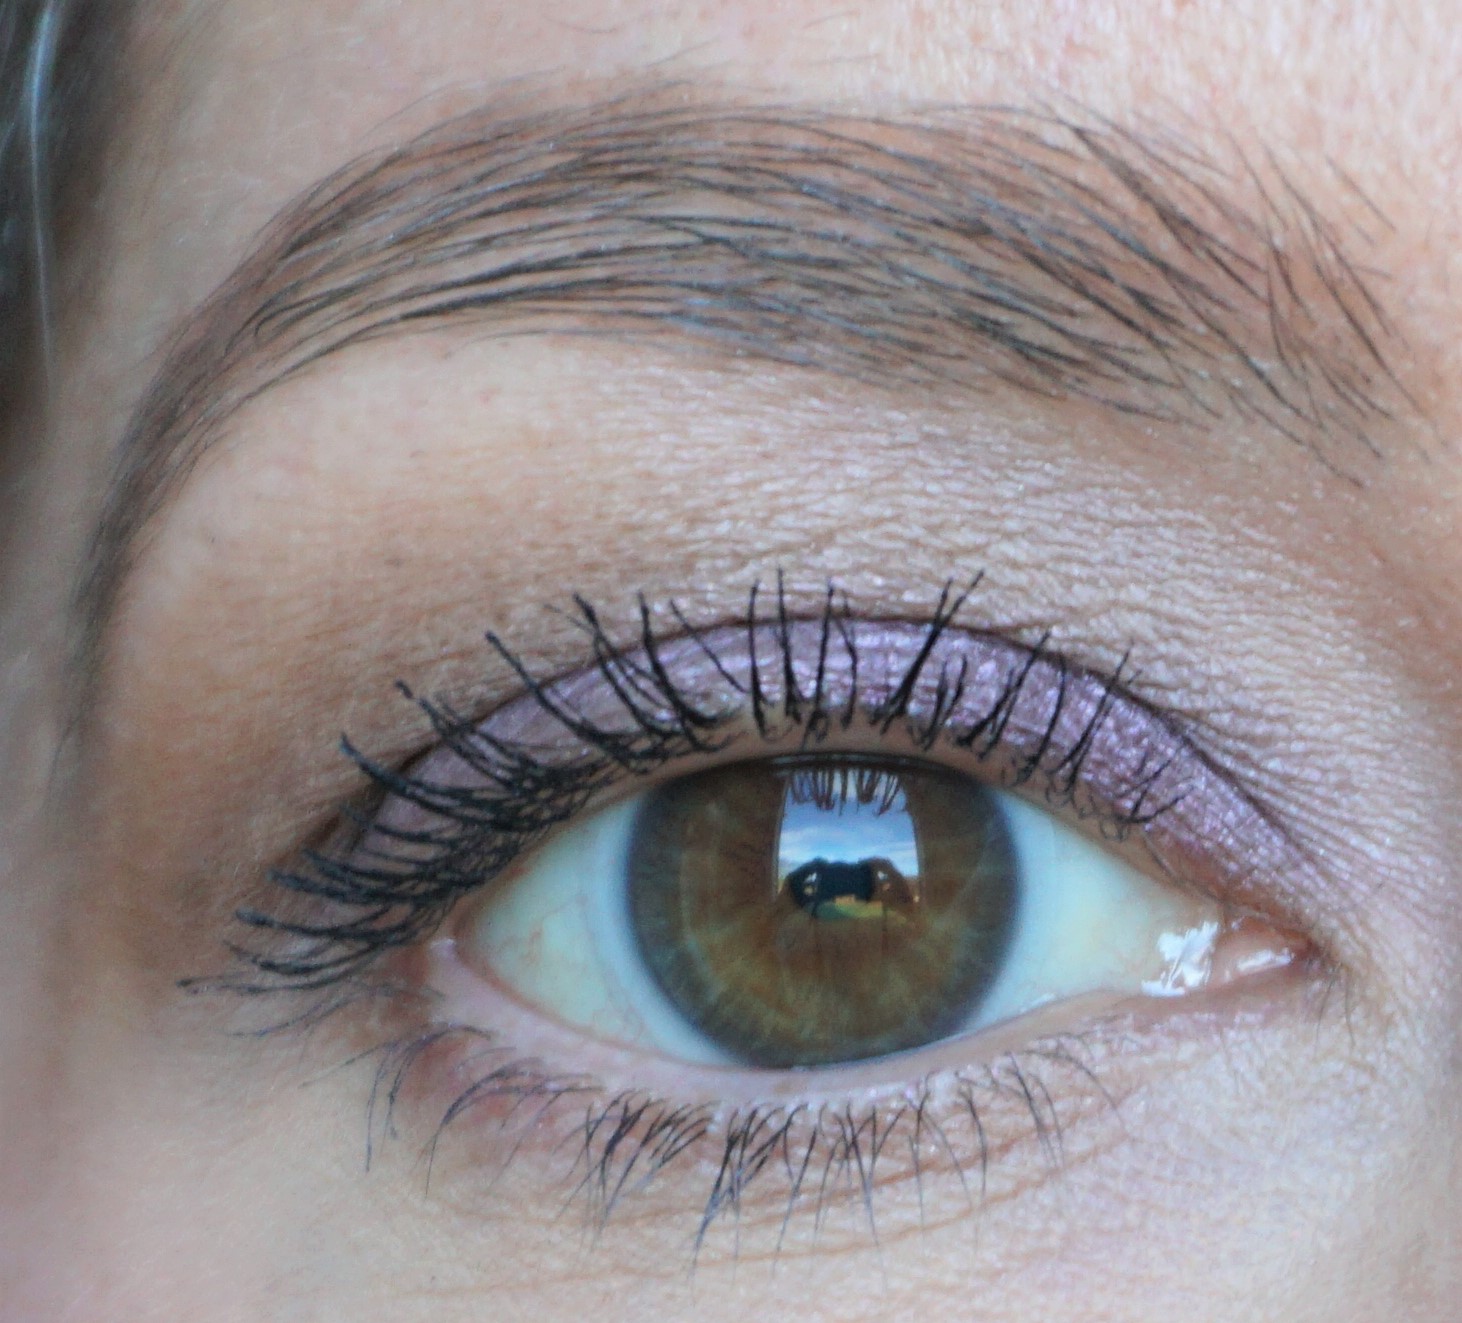
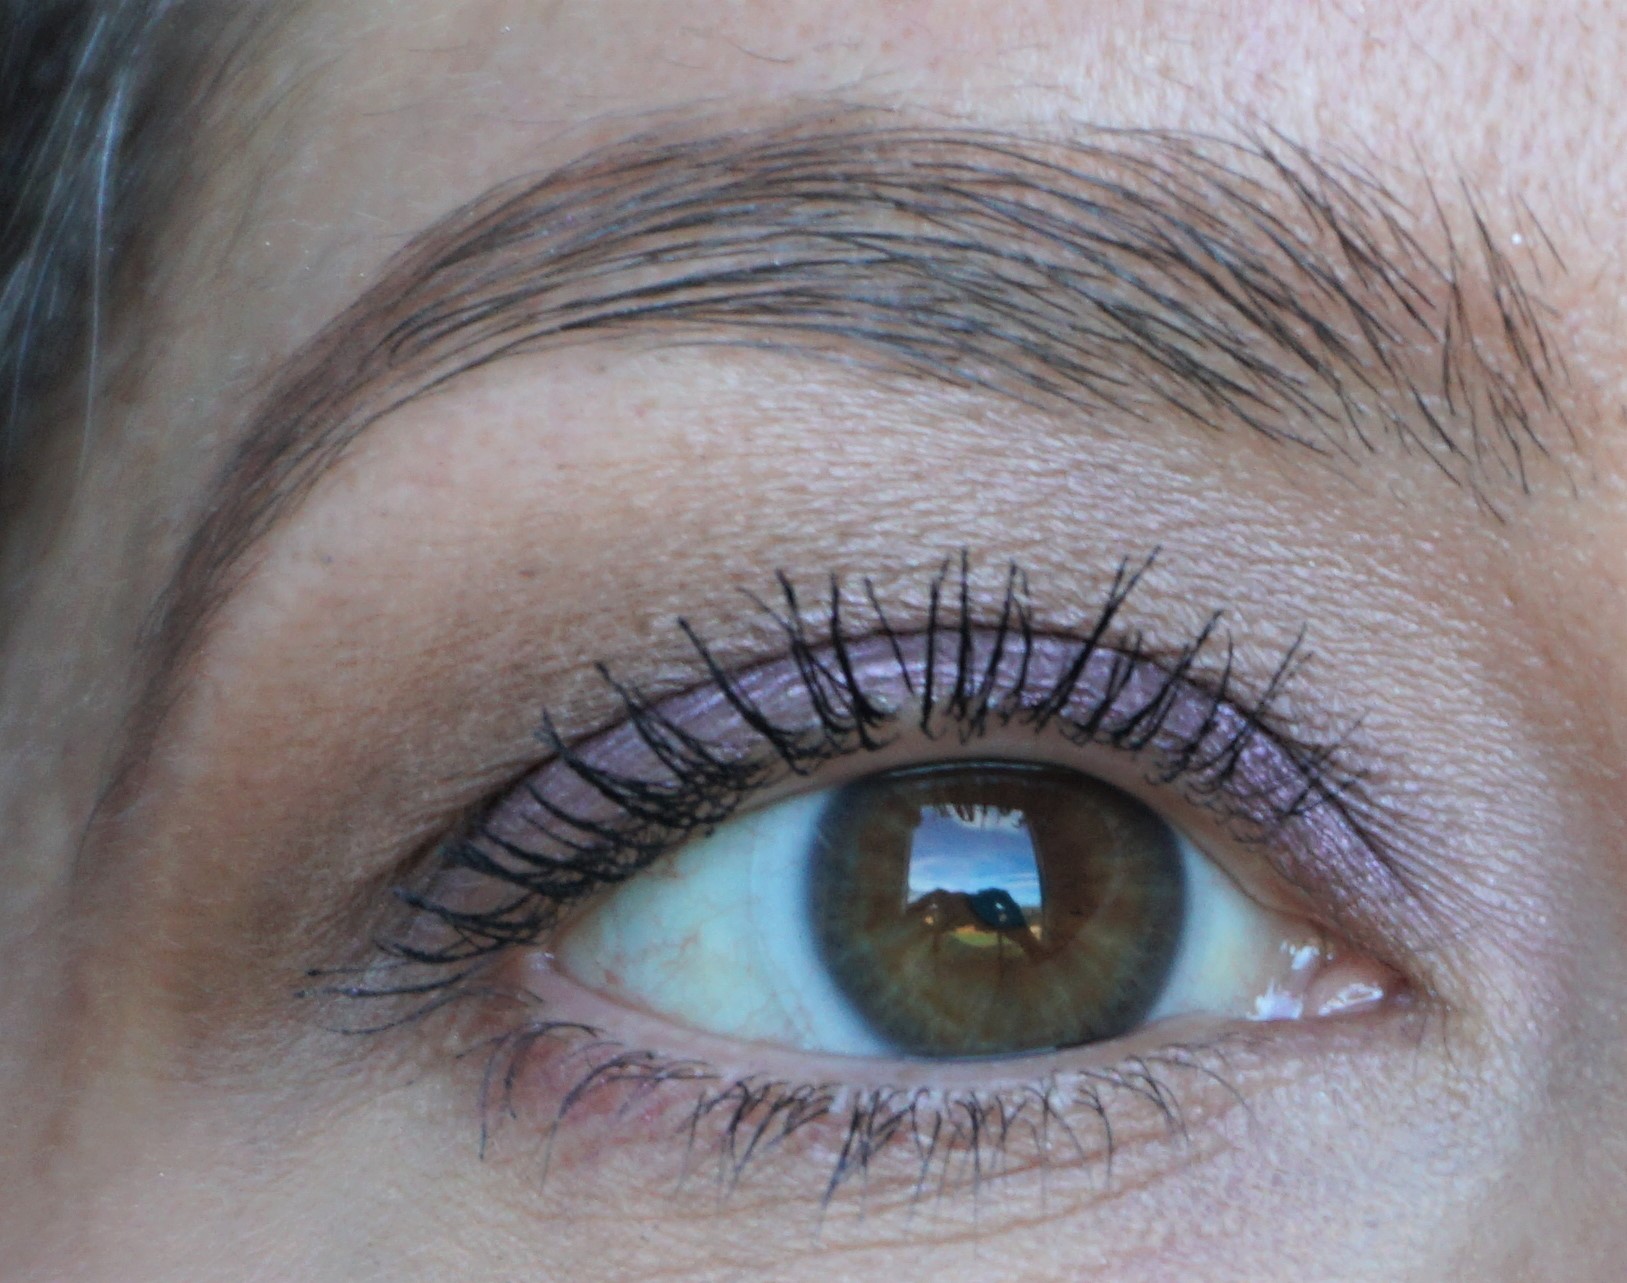
For this look, I used a deep purple eyeshadow with medium and deep chocolate browns in the crease to create a soft, colourful smokey eye. I used the Urban Decay Vice 3 palette to create this look but you can use any brand of eyeshadow you like which has similar shades.
This look is part of The Chocolate series, which shows how you can experiment with a different lid colour to change up an existing look. You can find the full Chocolate series here.
If you are interested in how these combinations look on other people, then I’d recommend taking a look at @shinebridabeauty on Instagram! @shinebridabeauty tagged me to show she was inspired by The Chocolate Series and re-created the looks on her Instagram page. It’s so wonderful to see the combinations on someone else. @shinebridabeauty also uses different products, which that you don’t need the same items to re-create a look. She also came up with her own extra Chocolate look – Coconut Chocolate – so look out for that one on her Instagram page!
Here’s how to re-create this look:
Click here to read my article ‘Parts of the Eye’ for help on where to place eyeshadow colours.
Products
Base: Urban Decay Primer Potion in Original
Crease: Urban Decay Downfall eyeshadow (medium matte neutral brown)
Lid: Urban Decay Vanity eyeshadow (smokey metallic deep jewel purple)
Deepen Crease: Urban Decay Reign eyeshadow (satin deep dark chocolate brown)
Highlight: Urban Decay Truth eyeshadow (pale matte pink-nude)
Steps
1. Apply Urban Decay Primer Potion all over the lid as a base.
2. Apply Downfall eyeshadow in the crease of the eye with a crease/blender brush using a windshield wiper motion (e.g. MAC 217).
3. Pat Vanity eyeshadow onto the lid, using a flat shader brush (e.g. MAC 239).
4. Concentrate Reign eyeshadow on the tip of your crease/blender brush (e.g. 217) and use this to deepen the crease. This adds extra dimension to the eye and also helps to blend the blue and neutral brown eyeshadows together more seamlessly.
5. Using a crease/blender brush (e.g. MAC 217) or a pointed crease brush (e.g. MAC 226), sweep Truth on to the browbone to highlight. Take this down into the inner corner as well to brighten the eye.
6. Apply mascara to the top and bottom lashes.
Here is one more close-up of the eyes:
Plum Chocolate
Here are the full face pictures to show how the look comes together:

Plum Chocolate (full face)
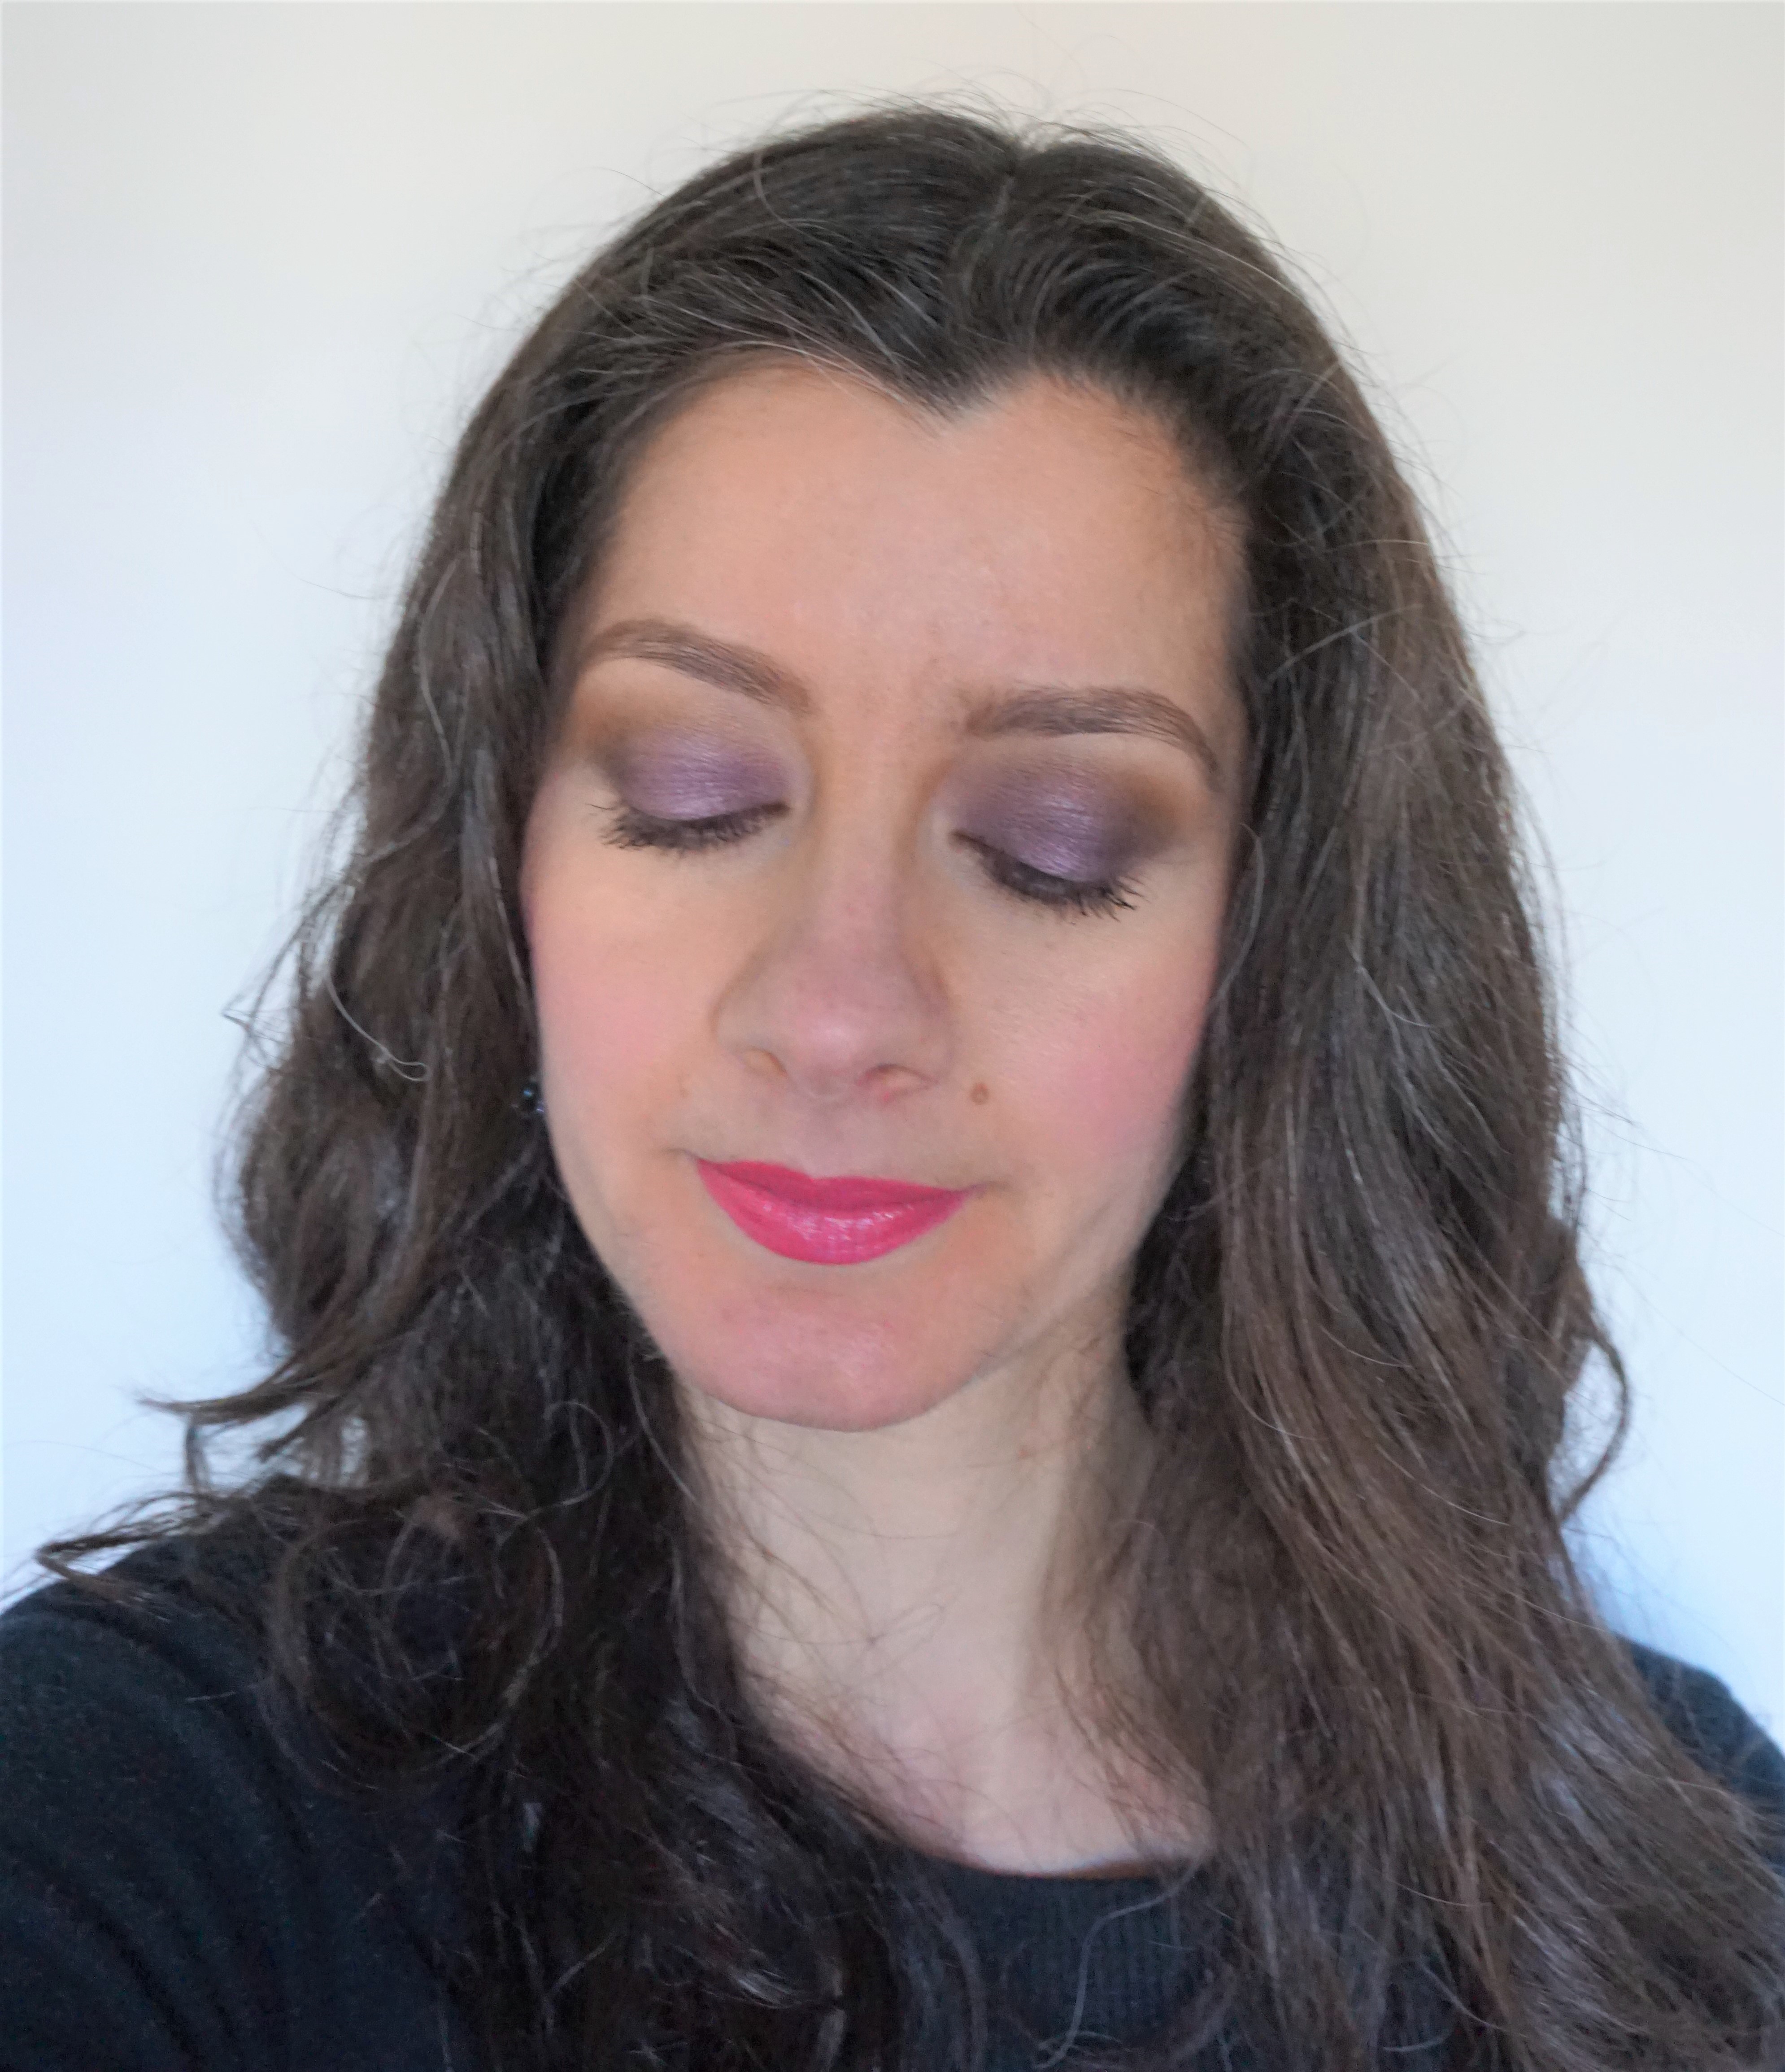
Plum Chocolate (full face)
To complement the look: I used Benefit Galifornia blusher on the cheeks (you can read more about this product, see photos and view swatches here), Pixi Glow-y Gossamer Duo in Subtle Sunrise (shade on left hand shade) to highlight and MAC Speak Louder Lipstick on the lips.
