
This article explains how to apply eyeshadow to the various parts of the eye. Different techniques, such as patting (for lid colour), using a back and forth ‘windscreen wiper’ motion (for crease/highlight colours) and drawing in the v (for the outer v colour) help eyeshadow to apply and blend more effectively.
Click here to read my series ‘All About Eyeshadow Brushes‘ to read more about the brushes discussed and featured in this article.
Lid Colour
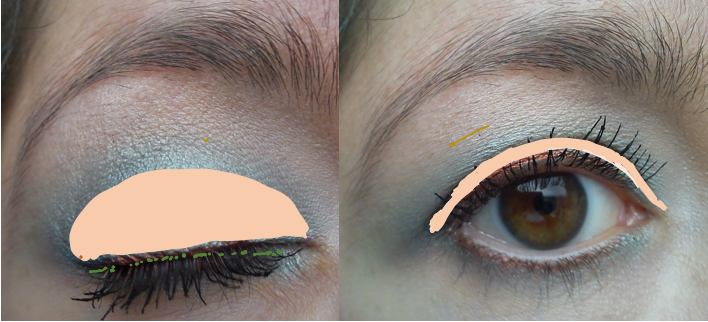
Lid area highlighted in Peach colour

Flat Shader Brushes
When applying eyeshadow to the lid area, take some colour on a flat shader brush and use a gentle patting motion to place the colour on the lid. Patting the eyeshadow on ensures that the colour stays in the correct place, goes on evenly and does not spread to other areas. Try to avoid swiping the brush side to side when applying lid colour, as this means that the colour will apply unevenly and go elsewhere.
Crease Colour
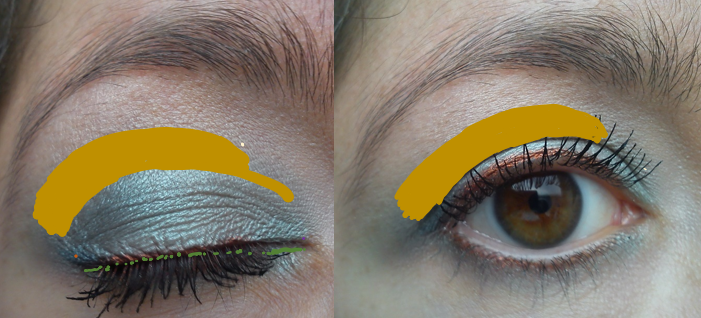
Crease area highlighted in Golden Brown colour

Crease Brushes
When applying eyeshadow to the crease area, take your crease brush and start the colour off in the outer corner using a small circular motion. Take the crease brush up into the crease and use a gentle back and forth ‘windshield wiper’ motion to distribute the colour evenly. It can also help to use small circular motions to blend the colour in evenly. Applying a little colour to the outer corner, as well as the crease, helps the crease colour to blend more naturally with your lid colour.
If you find that some of your lid colour has come off from applying your crease colour, simply pat on a little more lid colour. This can also help the colours overlay and blend more evenly.
If you find it difficult to blend the crease colour in with the lid colour or if you wish to create a more defined shape, try applying the crease colour first and then patting on your lid colour. This can help the colours to overlay and blend more evenly.
Applying Eyeshadow to the Outer v
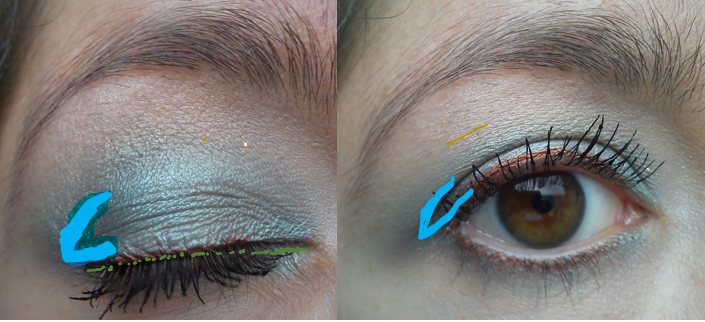
Outer v area in Blue colour

Outer V Brushes
Applying eyeshadow to the outer v helps add extra smokiness and depth to an eyeshadow look. When applying eyeshadow to the outer v, take your brush and draw a ‘v’ shape on the eye (as shown in the photo above).
A good tip for ensuring the outer v colour blends well is to start with the outer v, apply the crease colour and then the lid colour. Applying eyeshadow to the other parts of the eye afterwards helps soften any harsh edges and makes the transition between shades more seamless. Alternatively, you can apply the outer v shade last (after lid and crease) if you want a more concentrated, defined effect on the eyes.
Pencil brushes and tapered crease brushes are smaller (see ‘outer v brushes’ photo above) and so make it easier to apply eyeshadow in the outer v and prevent it from going elsewhere. The bristles also tend to be more tightly packed, ensuring a more concentrated application of colour. Flat shader brushes can be used in the outer v by gently patting the eyeshadow into the ‘v’ section of the eye; you just need to be more precise as they are more paddle shaped rather than tapered. Crease brushes can also be used draw in the outer v; they will give a softer effect as they are fluffier and fuller.
Applying Eyeshadow to the Browbone/Highlight
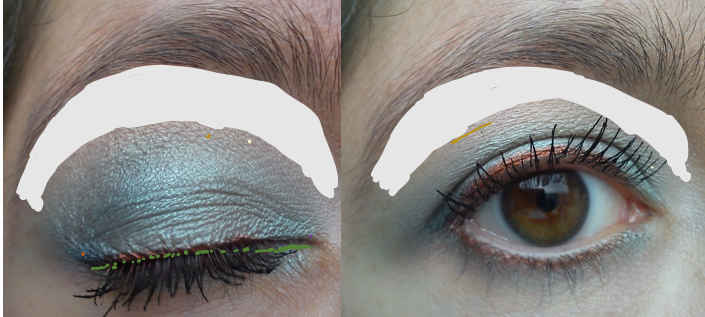
Highlight area in White colour
Highlight/Crease Brushes
When creating any eyeshadow look, it is important to always apply a highlight shade to the browbone. The highlighter shade is one of the key steps in blending. Applying a highlighter helps to pull the eyeshadow look together, helping to finish the look. It also softens any edges from the lid and crease colour. You can also add a little of the browbone highlighter shade to your inner corner to brighten your eyes.
When applying eyeshadow to the browbone/highlight area, select an eyeshadow shade which is close to your skin tone. It is often most flattering to highlight the browbone with a finish which is different from the eyeshadows applied to the rest of the eye. For example, a matte finish eyeshadow helps to balance out an otherwise shimmery eye. Similarly, using a satin finish eyeshadow adds a little brightness to a matte finish eyeshadow look. Mixing your finishes (matte with satin or shimmer/satin with matte) also helps add extra dimension to the eye.
Take a crease/blender brush, lightly dust into your chosen highlighter eyeshadow and use a gentle back and forth ‘windscreen wiper motion’ to apply your chosen highlighter eyeshadow to the browbone/highlight area. The ‘windscreen wiper’ technique helps to distribute eyeshadow evenly to this area and also makes it easier to blend out the edges of the crease colour.
Tips for Blending
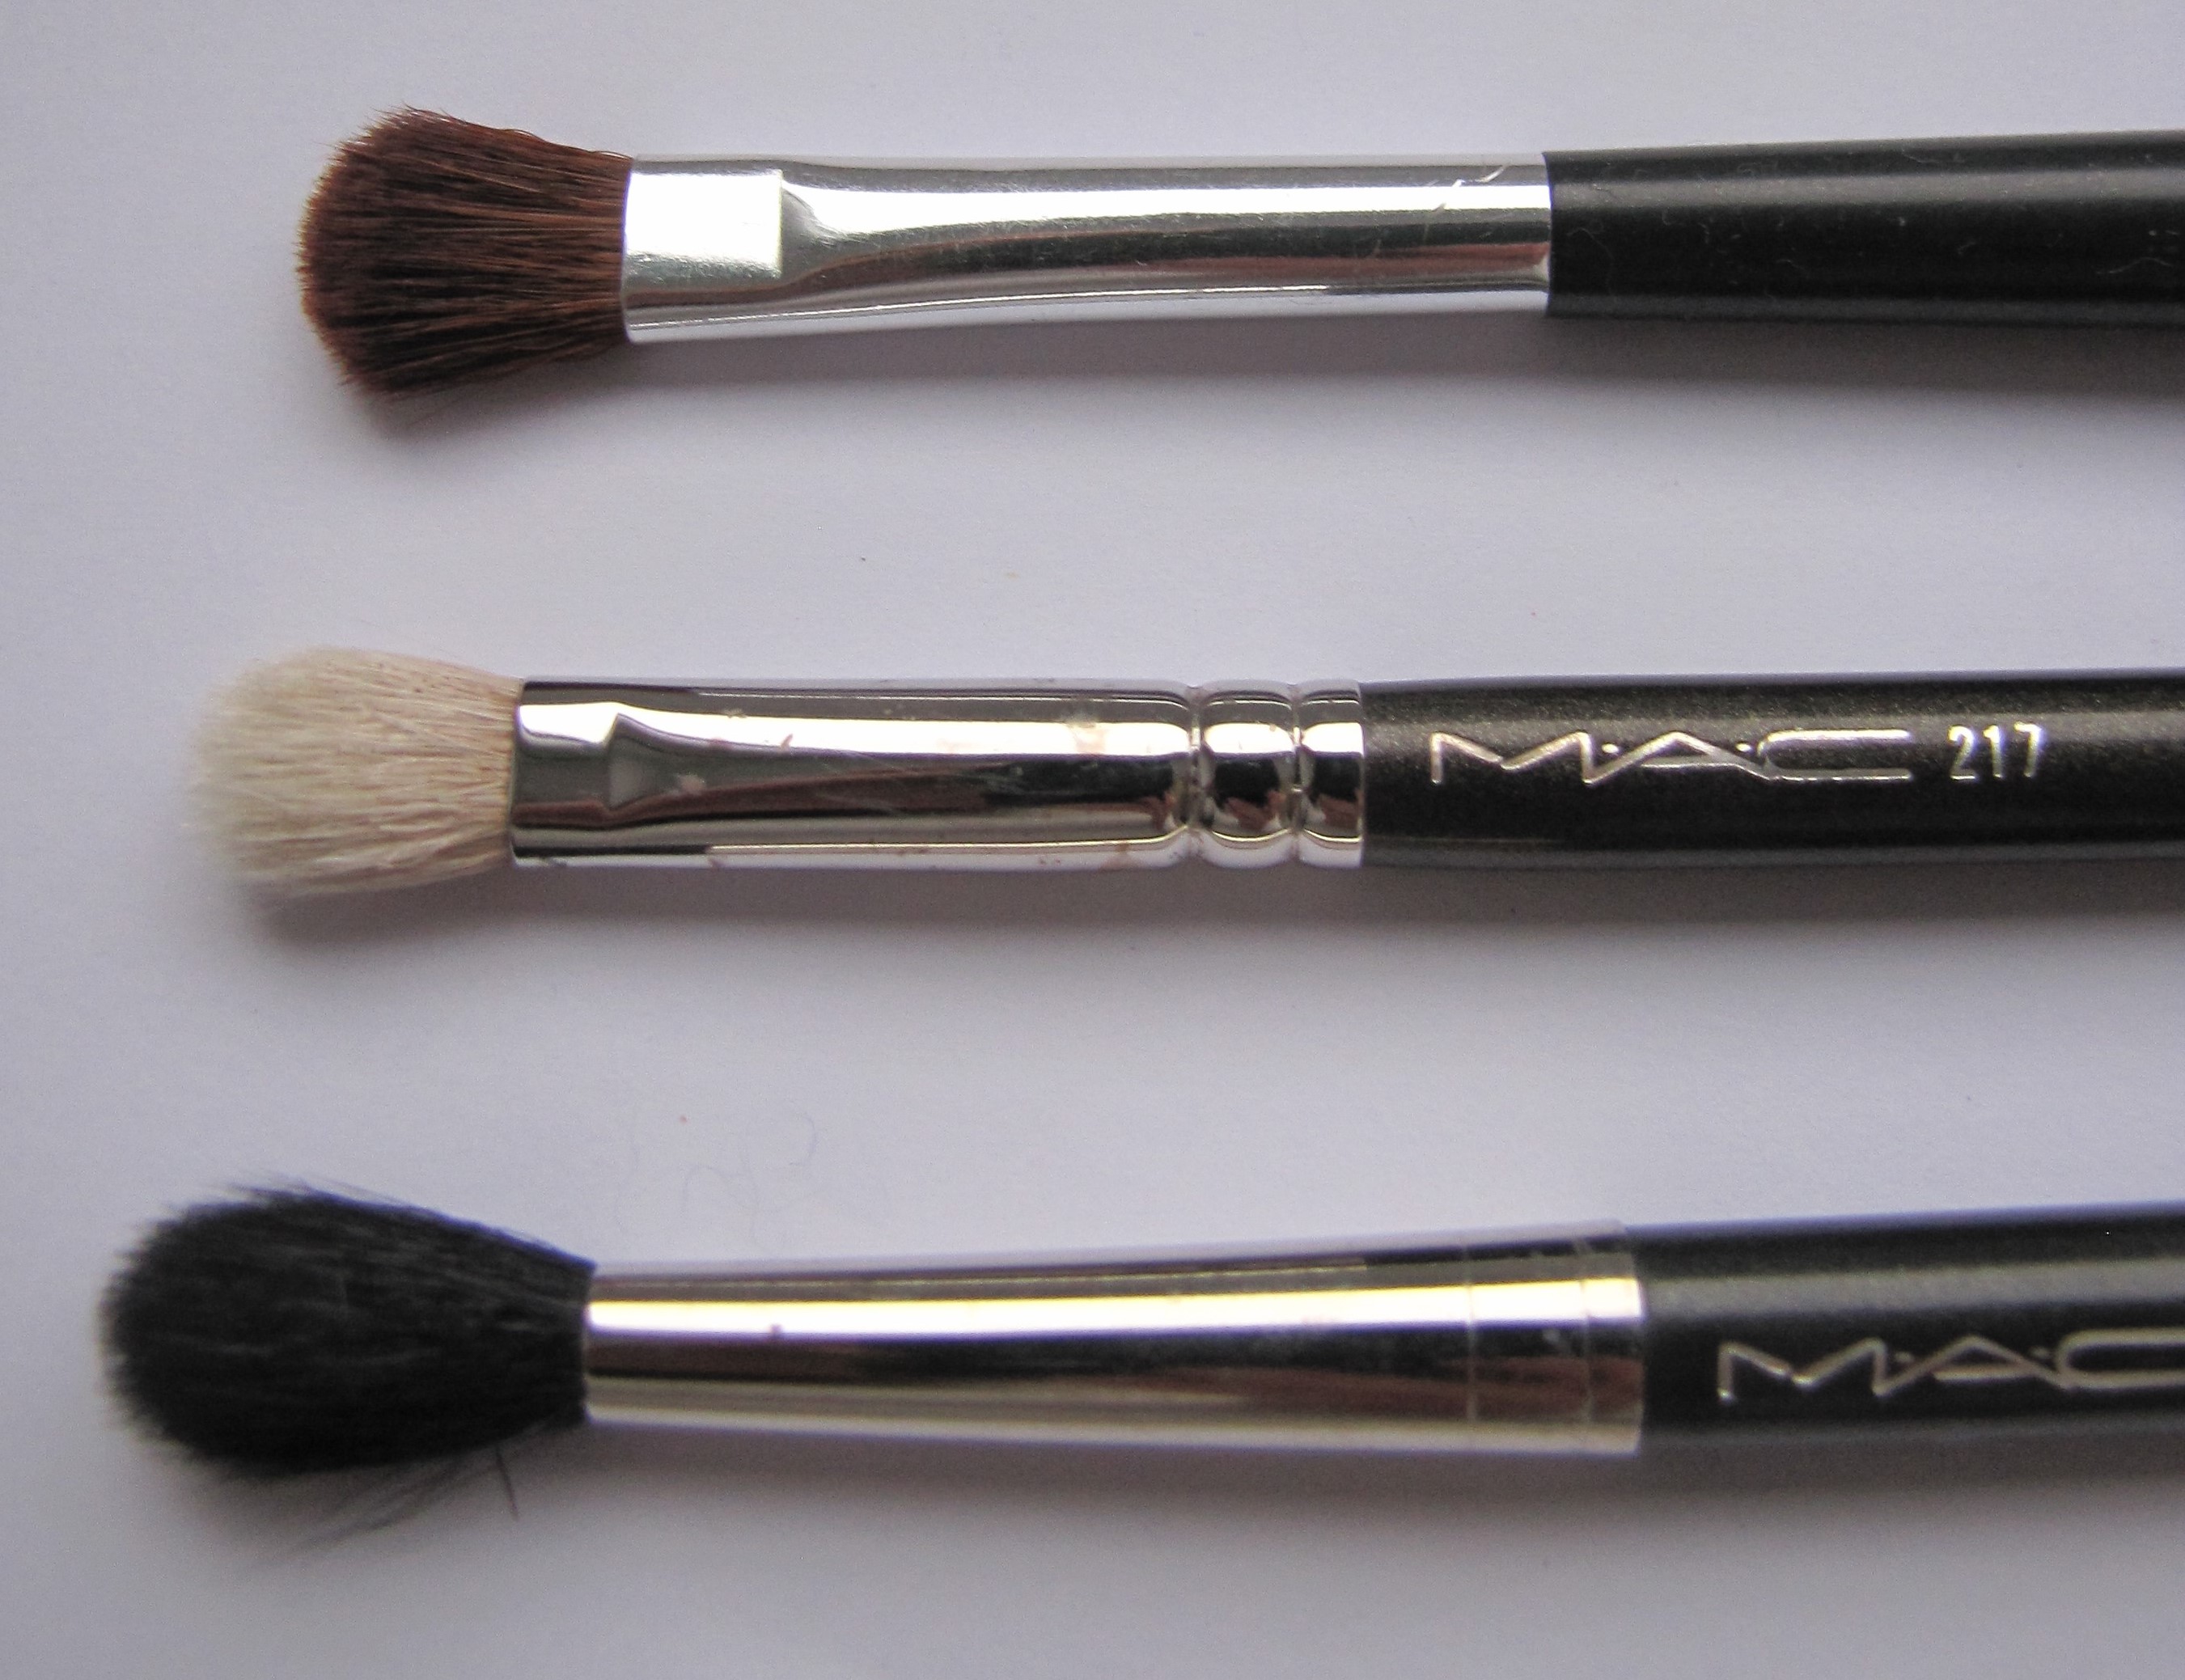
Blender Brushes
When you have finished applying your eyeshadow colours, sweeping a fluffy blending brush (see examples above) over the finished look can help to ensure all colours are blended smoothly together and soften any edges.
If you find it hard to blend the lid, crease and highlight colours together, lightly sweep a blending brush over each newly applied colour to ensure the excess product is swept away before using a new colour.
Finishing Touches
It is important to apply mascara when you wear eyeshadow. Mascara helps to define the eyes and will finish off the look you have created. You can apply just to the top lashes for a wide-awake look. You can also apply mascara to both top and bottom if you prefer the whole eye to be framed.
