
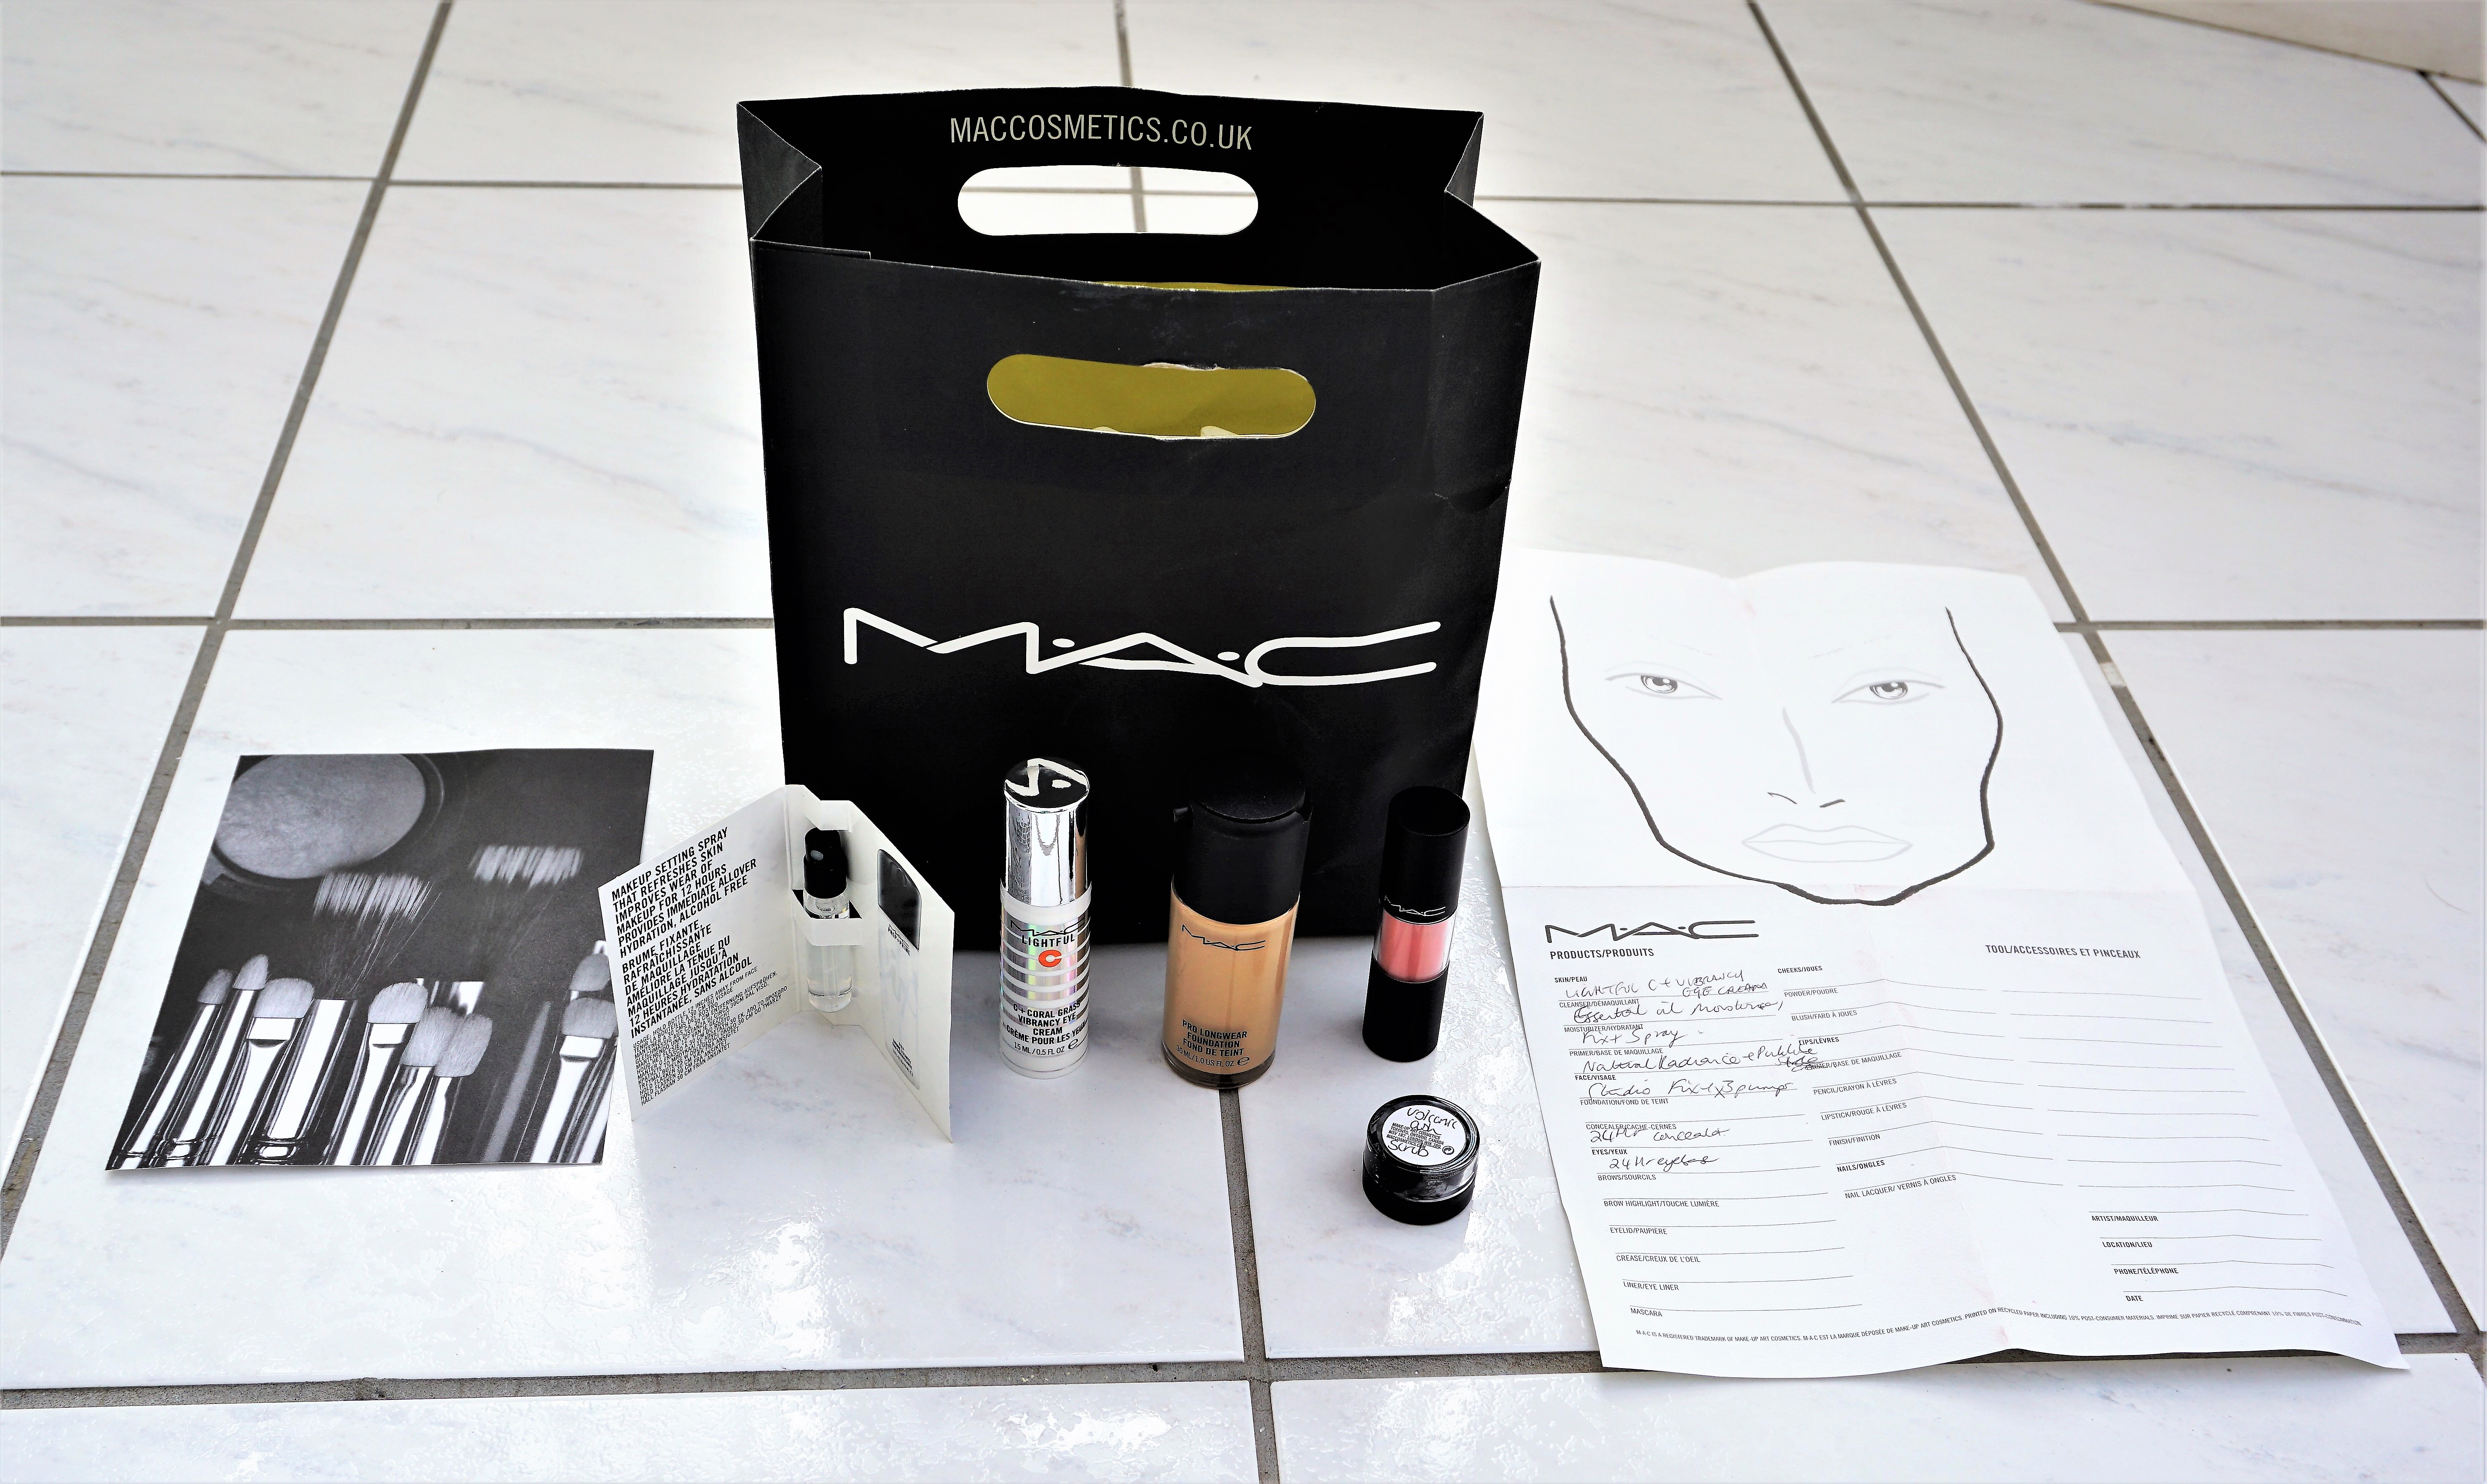
MAC Masterclass Event: Some of the free goodies and purchases
A couple of months ago, I attended a MAC Masterclass event focusing on ‘Ageless Beauty’. You can read my first post providing background on the event here.
This particular post focuses on the content covered in the Masterclass. The Masterclass was called ‘Ageless Beauty’, with the focus on achieving beautiful skin at all ages. The post gives more details on the class content, skin care routine, day look and evening look.
I have written a series of posts about the event which I will be posting on the site. Each part focuses on a specific aspect, so you can either read them all or go to the one that you are specifically interested in. Part One (read more here) provides Background to the Masterclass (what is a MAC Masterclass, cost and booking, structure, goodie bag, after the event). Part Two (this post) covers the Masterclass Content and Look Overview (skin care, day time look, evening look). Part Three will provide details on the tips and techniques I learned from the event.
Interested in reading more about MAC? You can read more posts on products, looks and find inspiration under the ‘Spotlight on MAC’ series tab here (you can also find the series tab on the menu bar under ‘Favs, Hauls & Brands) or under the ‘MAC’ tab here (on the menu bar under Favs, Hauls and Brands/Brands) or by searching for ‘MAC’ in the search box.
‘Ageless Beauty’ Master Class Content
The Masterclass was delivered by one of the MAC artists, Sharyn (also the Assistant Manager in the House of Fraser store). Her model, Charlene, also seemed to be a MAC artist.
The event was themed around ‘Ageless Beauty’. Sharyn said the focus was very much on creating beautiful skin at any age. As part of the Masterclass, she created a daytime look and then built upon it to take it into nighttime. Sharon mentioned that we could ask questions at any point during the session. There were also various other MAC artists on hand who chipped in during the session with their tips, tricks and answers to questions, or adding to points from Sharon.
A nice feature of the session was that Sharyn passed around products for us all to see once she had used them. I really liked that aspect of the session, as it allowed me to briefly test out the products and see what I thought of them on my skin tone and skin type. The model, Charlene, had blonde hair, blue eyes and golden-beige skin, so her colouring was very different from mine. It was nice to think, “Yes, I like that on me” or consider, “No, I don’t think that suits my colouring”.
Sharyn mainly focused on using skin care products from the Lightful C Coral Grass collection and make-up products from the newly launched Electric Wonder collection. The Electric Wonder collection launched in the UK on 3 April 2019 and launched in the USA on 6 June 2019. I’m not sure when the collection launched in other countries; a quick Google search should hopefully give you more details if it is now available in your specific country.
Part 1: Skin Care Routine
Sharyn started by taking us through a beautiful skin care routine showcasing products from MAC’s Lightful C Coral Grass collection. I haven’t really paid much attention in the past to MAC skincare as my attention is always taken up by all of the amazing make-up on display.
Sharon started by prepping the skin with the skincare products. She first used the Lightful C+ Coral Grass Cleanser (you can see this product here) to remove the model’s existing make-up. She then applied the Lightful C+ Coral Grass Softening Lotion Spray as a toner (you can see this product here), followed by the Prep and Prime Essential Oils Grapefruit and Chamomile (you can see this product here). I was busy looking at the oil when she passed it around so I missed a little of the next step, but I think she may have applied one of the Lightful C+ Coral Grass Moisturisers to the model’s face.
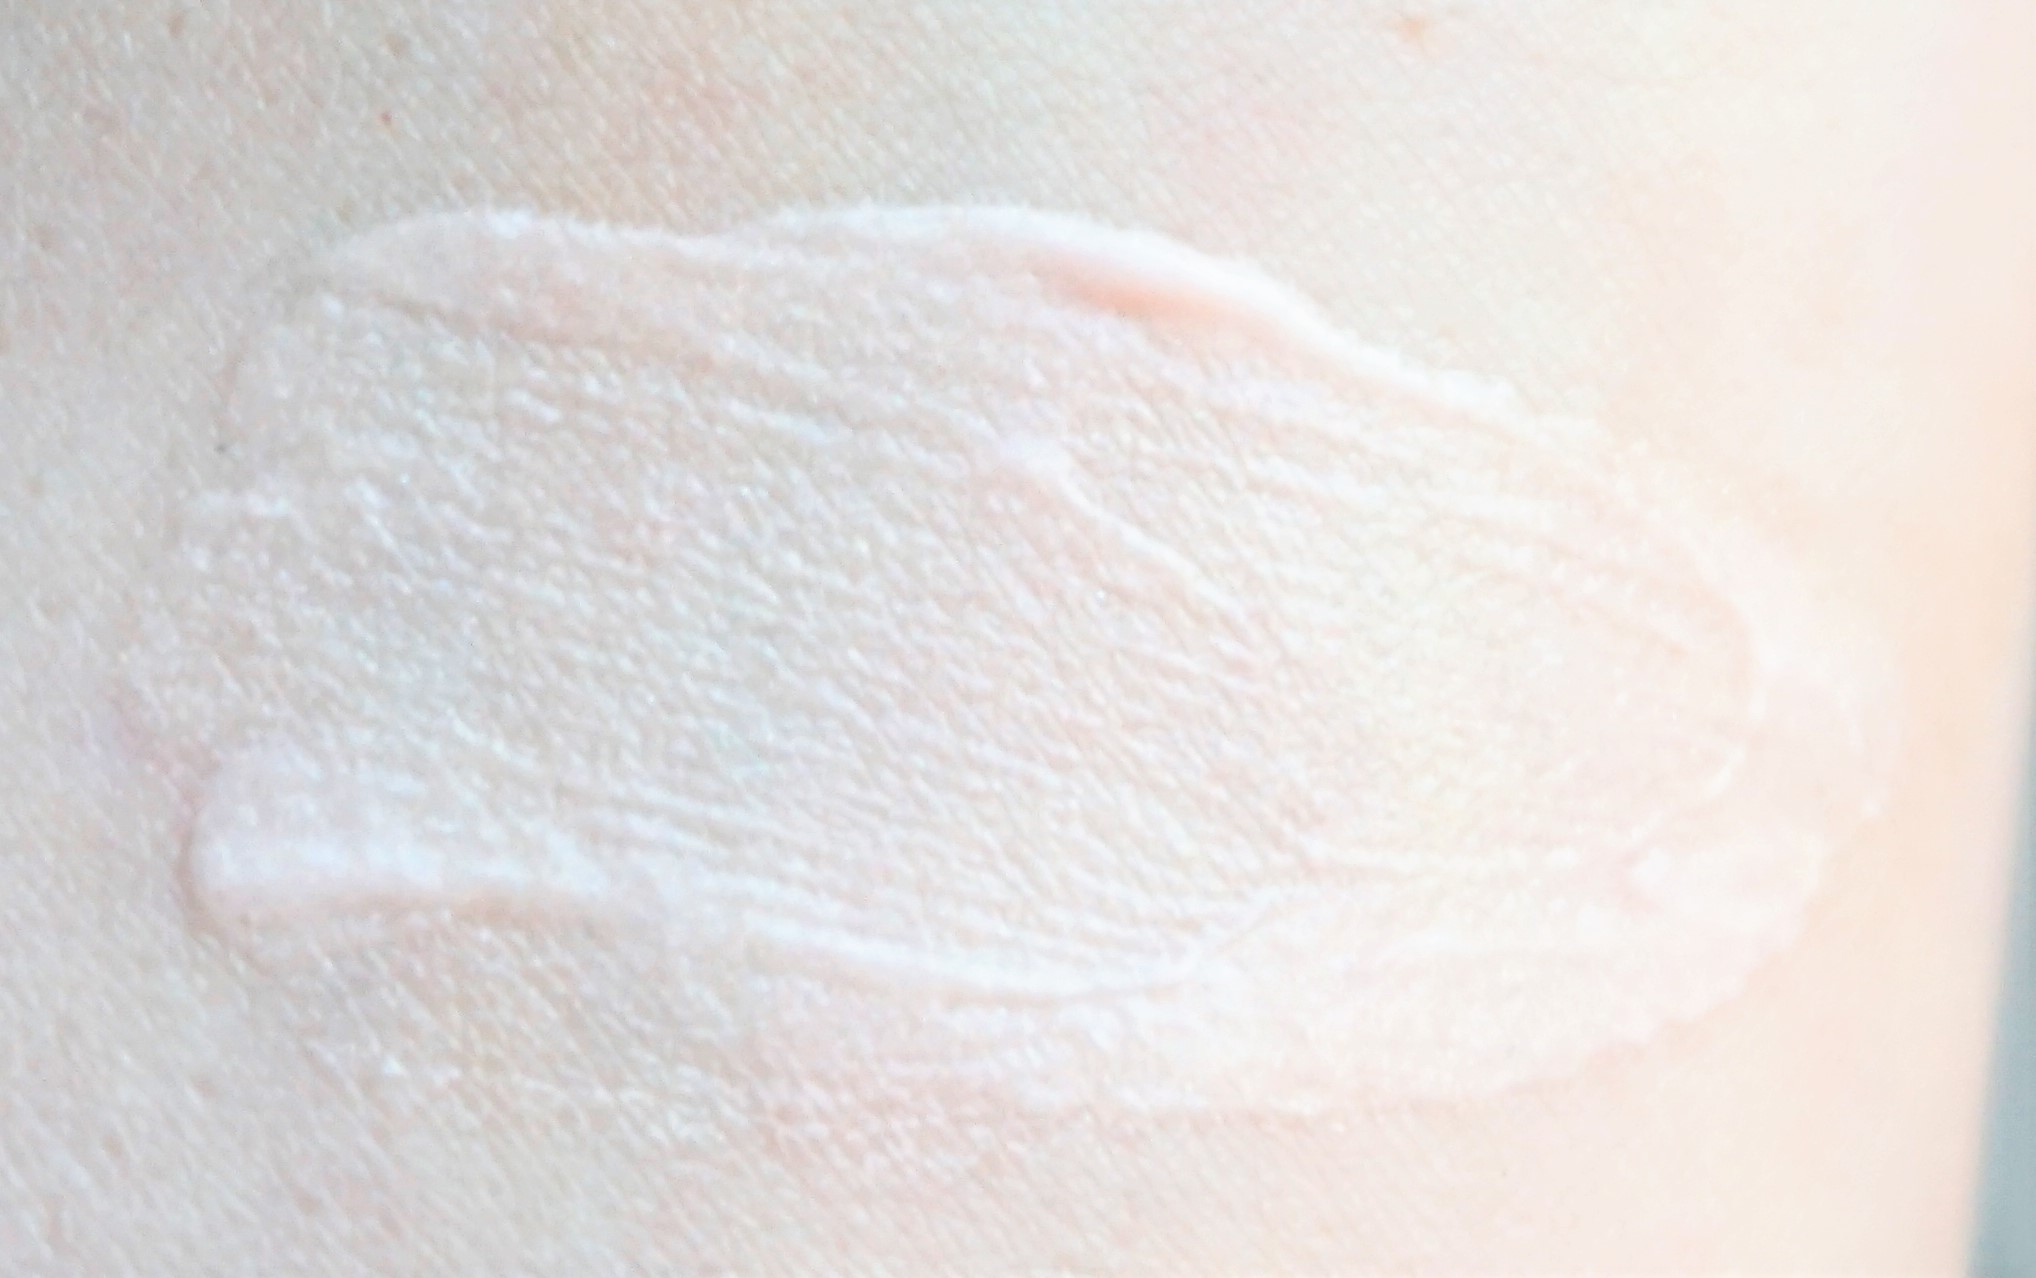
Sharyn applied the Lightful C+ Coral Grass Vibrancy Eye Cream to moisturise under the model’s eyes (you can see this product on the MAC site here and view photos below). I I ordered the eye cream as it had a beautiful slight pearlescent sheen, which looked like it would really brighten the under eye area. I really liked the product but unfortunately, I can’t keep on using it as I found it stung whenever I applied it. My skin is quite sensitive, so it may be that the ingredients don’t work with my skin type.
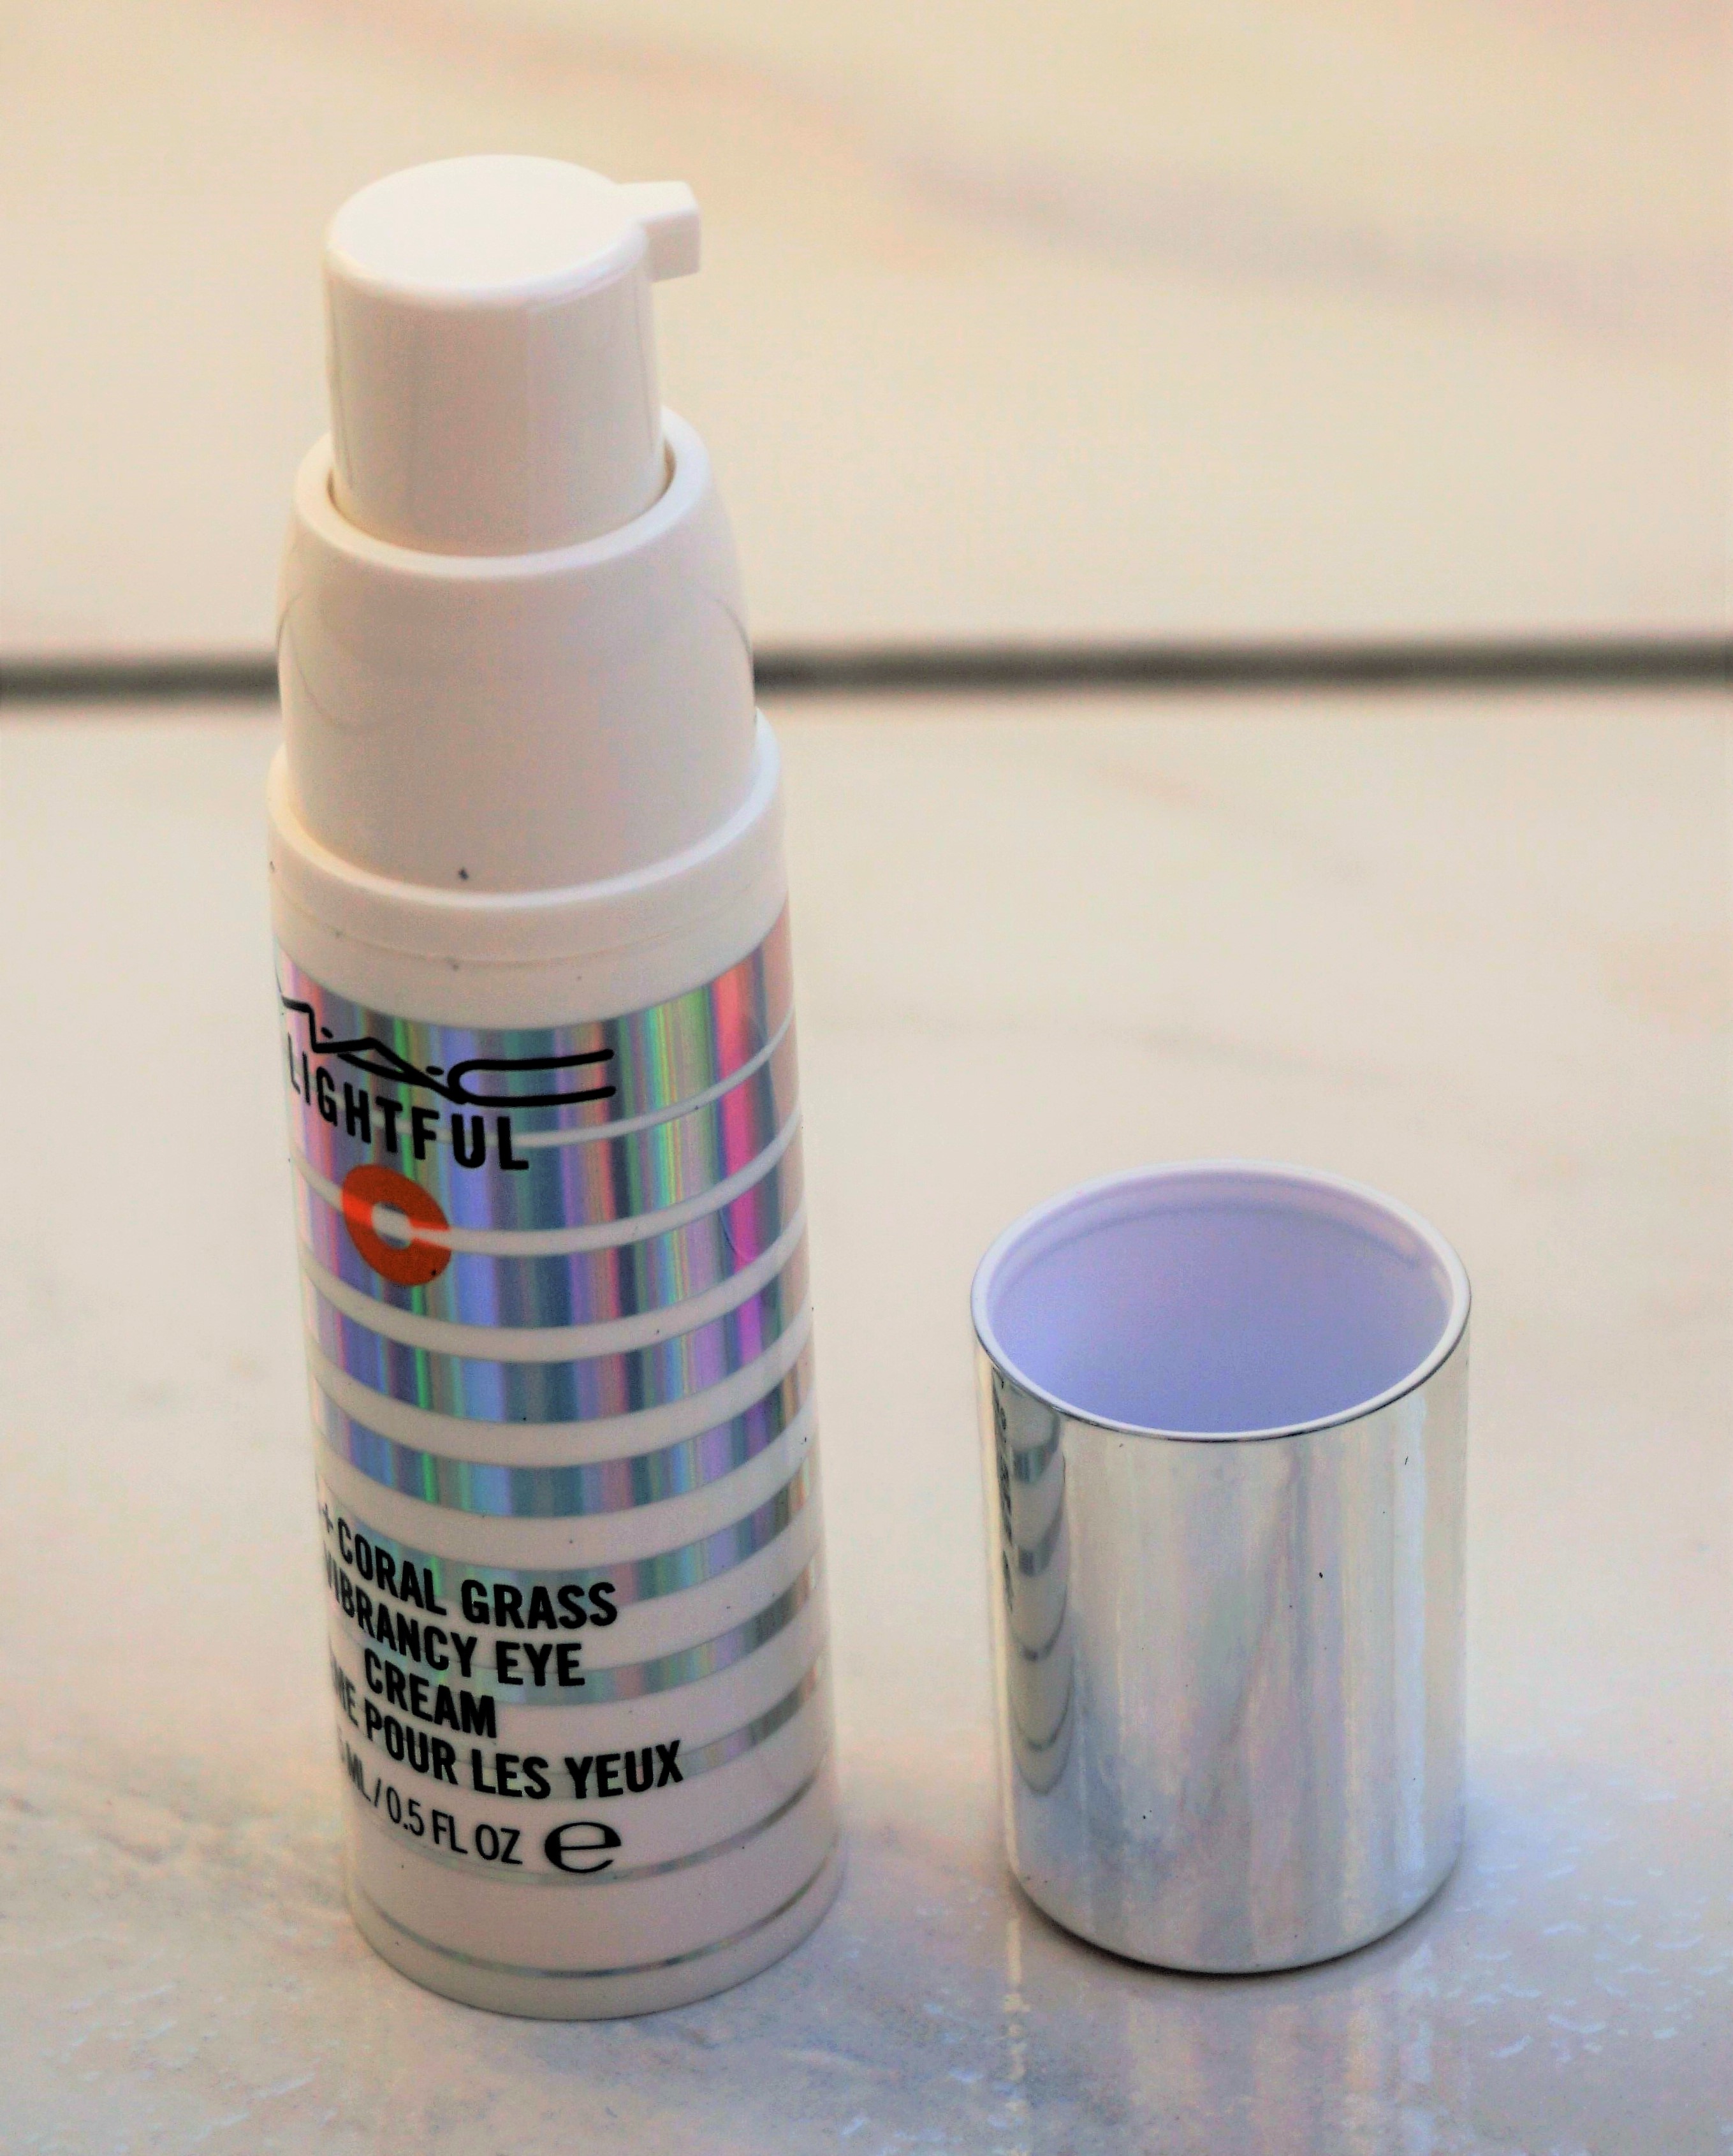
Lightful C+ Coral Grass Vibrancy Eye Cream

Lightful C+ Coral Grass Vibrancy Eye Cream
Lightful C+ Coral Grass Vibrancy Eye Cream
Sharyn applied the Prep and Prime Natural Radiance Primer in Radiant Pink (you can see this product here), followed by Strobe Cream in Pink Lite. She said that applying Strobe Cream over the primer would enable the glow to come through more readily, whilst also keeping it locked in place. Sharyn and the other make-up artists gave some tips for using Strobe Cream (which comes in various shades). These included mixing it with your foundation, applying it to the tops of cheekbones and mixing it with body lotion for a glow on the body. I purchased Strobe Cream in Gold Lite at the event and you can read my post, see photos and view swatches of this product here.
Sharyn applied a mist of Prep and Prime Fix+ in the Rose scent to the model’s face (you can see this product here). She said that this step would refresh, hydrate, prime and give the skin a beautiful glow.
Part 2: Day Time Look
Sharyn used several of the new Electric Wonder products to create the day time look. The finished look was very polished, natural and glowy, with subtle definition on the eyes.
Foundation: Sharyn applied Studio Fix Fluid Foundation to the model’s face. She was going for more of a natural look, so she used a large stippling brush for application (MAC 187S Duo Fibre Face Brush; see photo below). She kept the undereye area free of foundation, as she said she would apply concealer to that area.
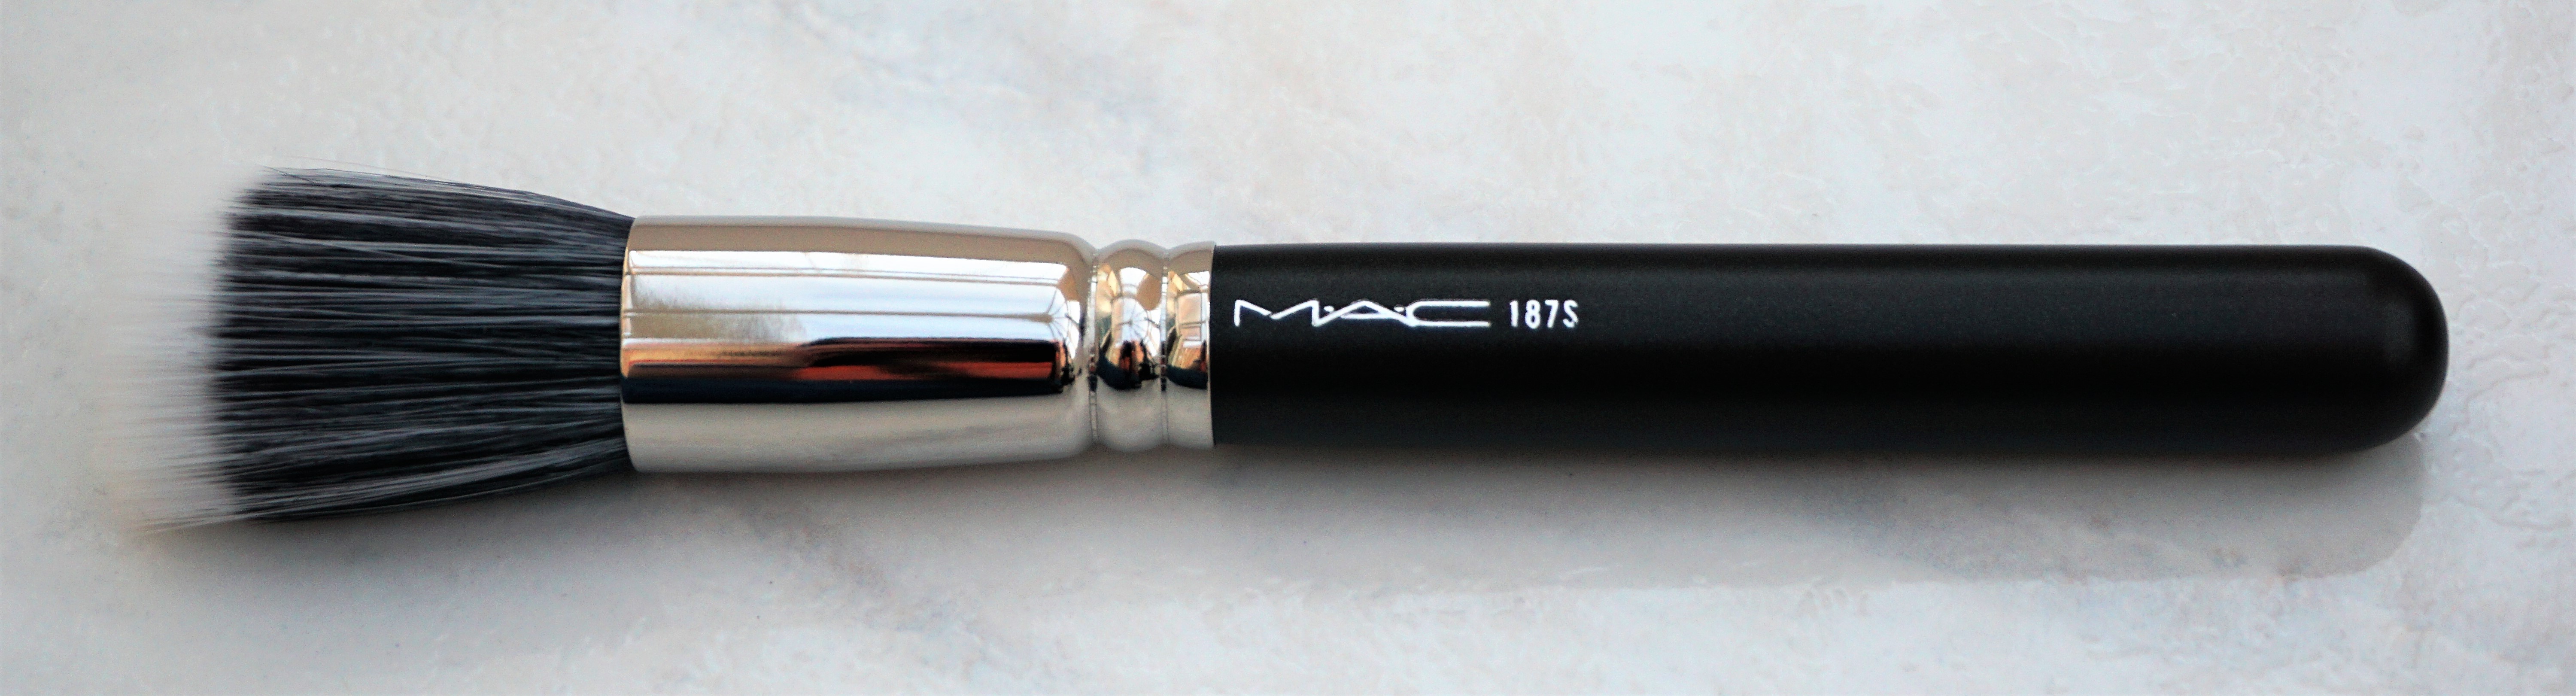
MAC 187S Duo Fibre Face Brush
Concealer: Sharyn used Studio Fix 24 Hour Smooth Wear Concealer to conceal and brighten under the model’s eyes.
Powder: Sharyn used a light dusting of Prep and Prime Transparent Finishing Powder, Pressed (you can see this product here) to set the t-zone.
Bronzer: Sharyn used the Next to Nothing Bronzing Powder (from the Electric Wonder collection, which you can view here) to softly sculpt the cheekbones, forehead and chin area. She used the 138S Tapered Face Brush for bronzer application.
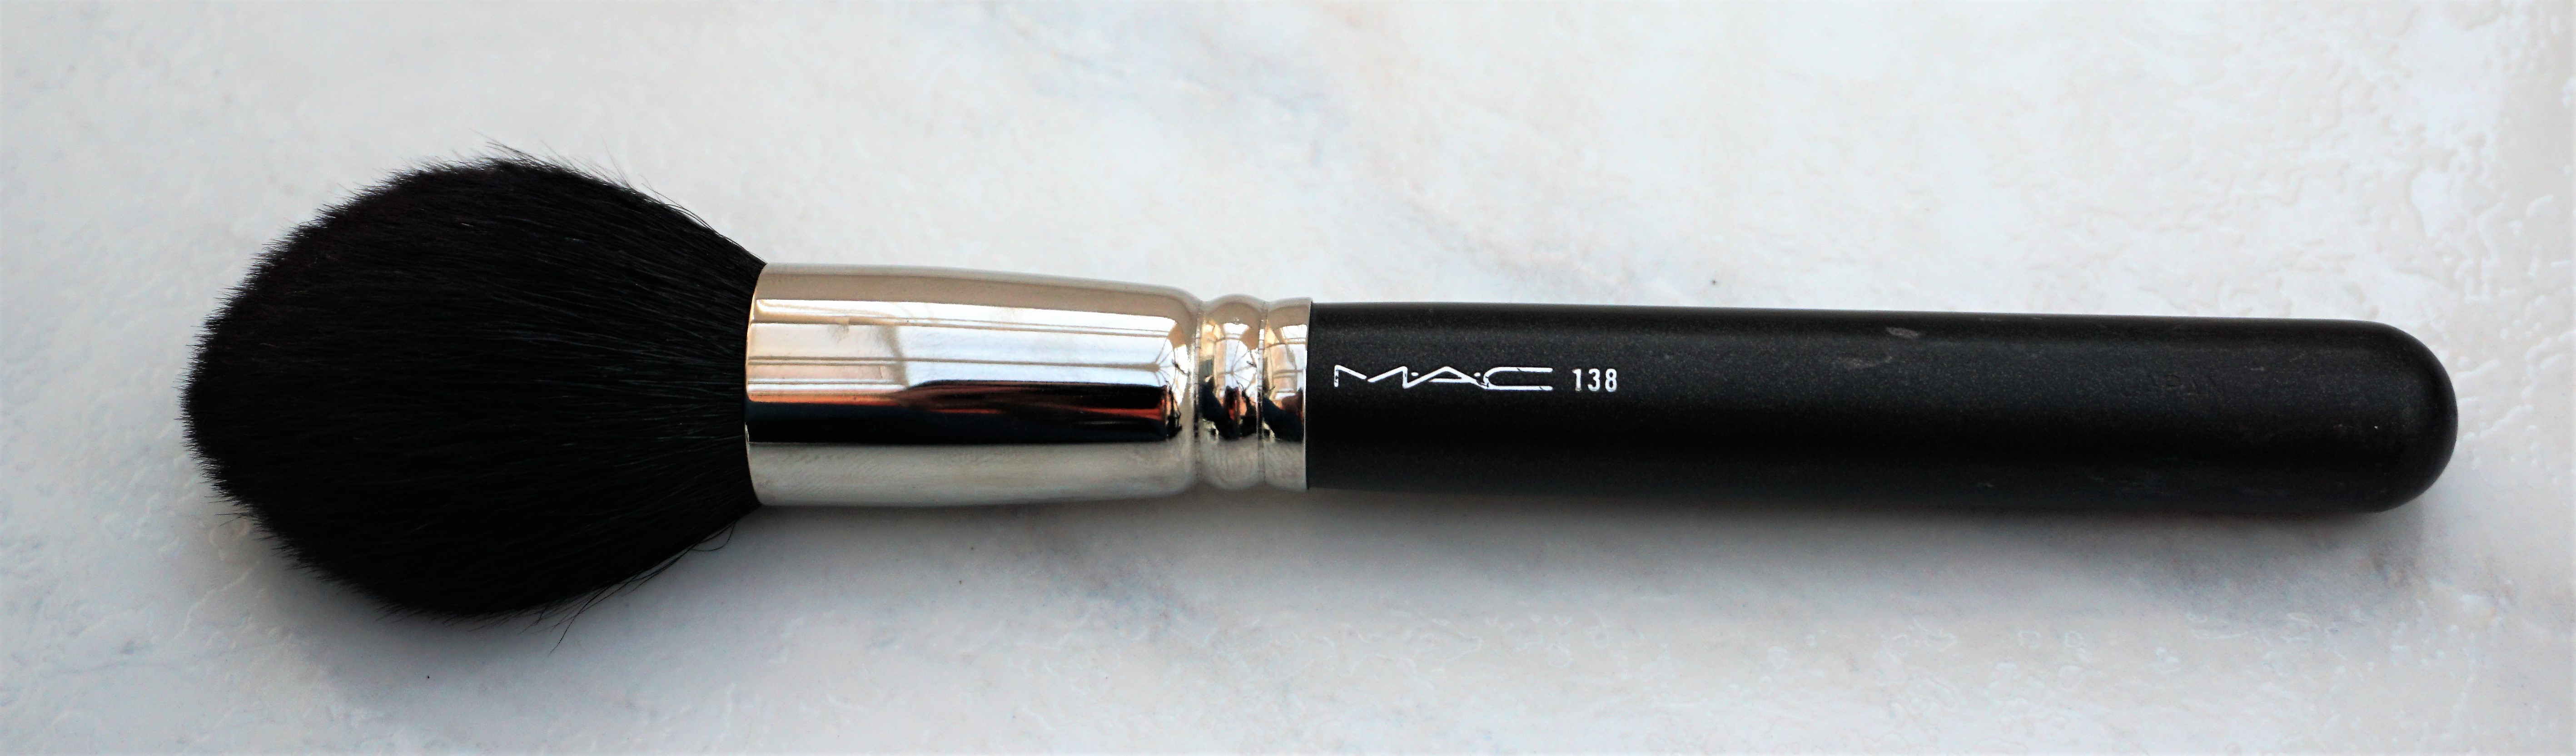
138 Tapered Face Brush (I have the older non S version)
Cheeks: Sharyn used the Ignite Wonder Face Palette (from the Electric Wonder collection, which you can view here) and the 138S Tapered Face Brush (see photo above) to apply blusher to the cheeks (see photo below). I can’t remember which shade she used but I think it was one of the bottom two shades (in the middle or to the right).
Highlight: Sharyn used the Ignite Wonder Face Palette (from the Electric Wonder collection, which you can view here) and the 138S Tapered Face Brush to apply highlighter to the face. She applied highlighter to the tops of the cheekbones, a little to the cupid’s box and a little down the centre of the nose. I can’t remember which shade she used, unfortunately.
Brows: Sharyn used Cork eyeshadow from the Electric Wonder Eyeshadow x 12 Palette in Natural Vice (the palette seems to be out of stock in most places but you can see what it looks like here) and a slanted eyeliner brush (I’m not sure which one) to define the eye brows. She used the brush horizontally to define the brows and then held it vertically to blend out and create naturally looking brow hairs.
Eyes: Sharyn first applied the Prep and Prime 24 Hour Extend Eye Base to prime the eyelids (you can see this product here). She then used the Electric Wonder Eyeshadow x 12 Palette in Natural Vice for the eyeshadow look ((the palette seems to be out of stock in most places but you can see what it looks like here), along with the MAC 286S Duo Fibre Tapered Brush, to create the eye look. Sharyn applied a light matte apricot shade on the lid (Valley of Goodness, 2nd row, 1st shade in palette), followed by a medium matte brown shade (Cork, 2nd row, 2nd shade) in the crease. She then applied a little of a dark matte brown in the outer crease of the eye (Natural Vice, 3rd row, 2nd shade) to define and open up the eye. Sharyn took a small eyeliner brush, misted it with Prep and Prime Fix+ Spray and gently stamped a dark matte brown (Natural Vice, 3rd Row, 2nd shade) along the upper lashline to darken the lashline and add some subtle definition. She finally took a MAC 239 Eye Shader Brush, dipped it into one of the lighter highlight shades in the Ignite Wonder Face Palette and highlighted the browbone to finish off the look.
Lips: Sharyn lined the lips with Stripdown Lip Pencil (you can view this product here) and filled them in with Let’s Mesa Around Lipstick from the Electric Wonder Collection.
Part 3: Evening Look
Sharyn used the existing day look (outlined above) as a base and made subtle tweaks to deepen the look. The overall effect was beautifully smoky, yet still very soft and natural looking.
She used the same brush as in the daytime look for creating a smokier look on the eyes (MAC 286S Duo Fibre Tapered Brush), the same brush for the face and cheek products (138S Tapered Face Brush) and the same lip brush (I don’t have the name) for applying a deeper lipstick and lip glass to the lips.
Eyes: Sharyn applied Natural Vice on the lids (over the matte apricot shade applied in the day look). She said that a transition shade was important to balance out the darker lid and applied Valley of the Goddess in the crease.
Cheeks: Sharyn took the Ignite Wonder Face Palette (from the Electric Wonder collection; link above) and applied Wonder Years blusher to the cheeks. She used the 138S Tapered Face Brush to apply blusher to the cheeks.
Lips: Sharyn deepened the lips by applying MAC Natural Born Leader Lipstick from the Electric Wonder Collection (out of order online but you can still see what it looks like here). She topped the lipstick off with MAC Make Me Mercurial Lip glass from the Electric Wonder collection (you can view the lip glass here).
Product Details, Swatches and Dupes
Ignite Wonder Face Palette Details: I don’t have the Ignite Wonder Face Palette. However, Charlotte Holdcroft, a UK YouTuber, has a great video featuring and swatching the palette here. You can also see the face palette on the official MAC site here.
Electric Wonder x 12 Natural Vice Eyeshadow Palette Details: I don’t have the eyeshadow palette but you can see swatches of the shades on the Really Ree blog here and view the palette here.
You could easily re-create the same eyeshadow look using products from MAC’s permanent collection or similar shades from other brands. MAC Samoa Silk would be a good dupe for Valley of Goodness (lid colour), MAC Cork (crease) is a permanent shade and MAC Embark would be a good dupe for Natural Vice (outer crease). Samoa Silk looks a lot darker and more orange in the photos below due to the lighting but is lighter and more peachy in person.
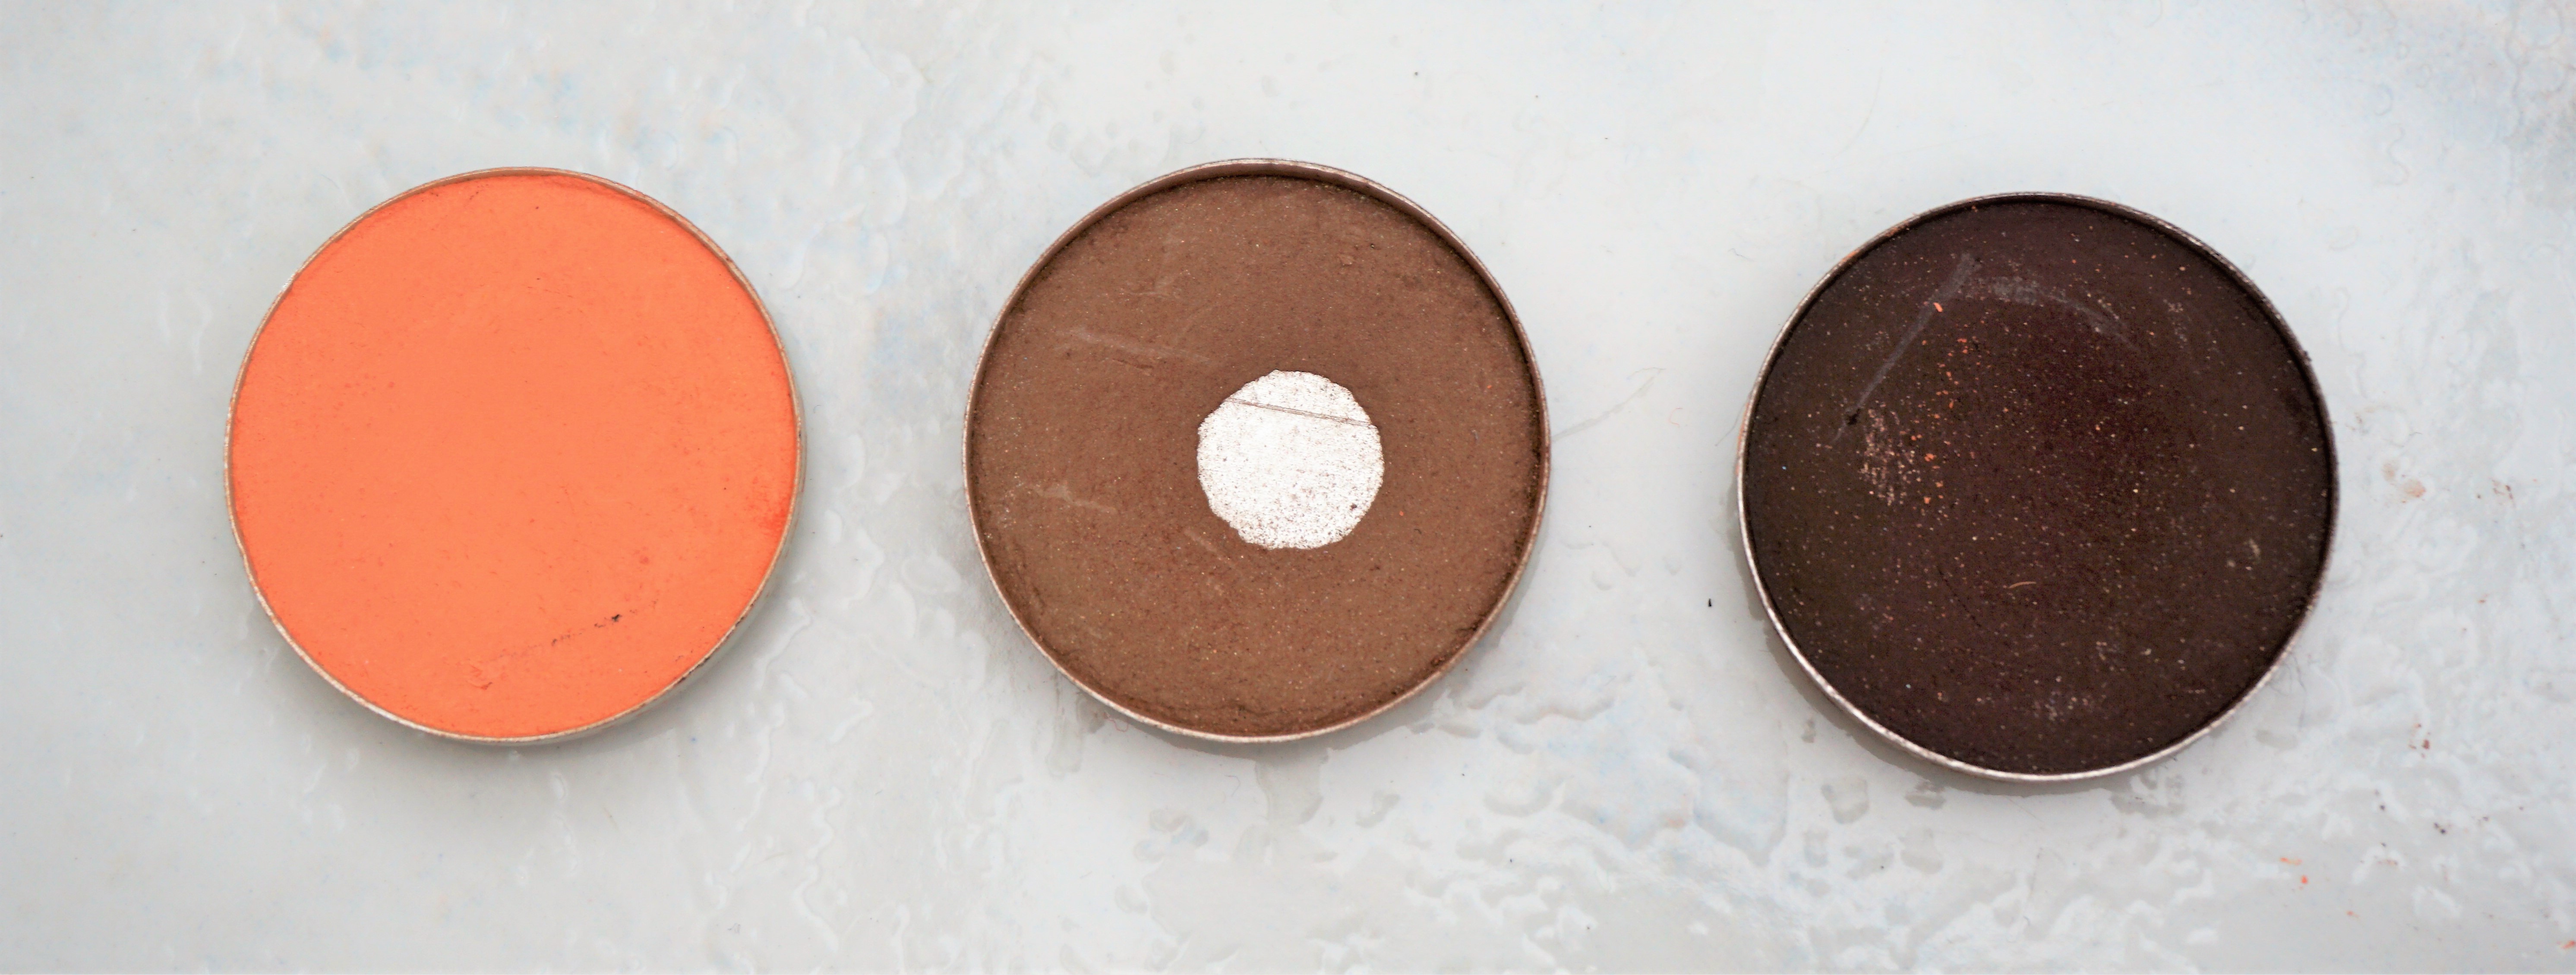
Left to Right: MAC Samoa Silk, MAC Cork, MAC Embark

Left to Right: MAC Samoa Silk, MAC Cork, MAC Embark
Lipstick details: I don’t have the lipsticks but you can see swatches of the lipsticks (as well as the other products from the collection) on Temptalia here and view the lipsticks on the official MAC site here.
Lipglass details: I don’t have the lip glasses from the collection but you can see swatches of the lipglasses(as well as the other products) on Temptalia here and view the lip glasses on the official MAC site here.
Part Three, the next post in this series, will focus on the tips and tricks I picked up from the Masterclass.
I hope you enjoyed this post! I wish I had some photos from the event but hopefully the look breakdowns will give you some ideas for how to re-create the looks.
