

Contouring the eye is a classic technique for shaping the eyes and making them look bigger. I tend to contour my eyes in the majority of looks as I find that it adds depth to the eye and makes them look bigger.
This eyeshadow style generally suits most eye shapes, particularly those with a discernible crease or visible eyelid space. It is worth trying out contouring to see whether it suits you. If you have flatter eyelids, then you might have to ‘create’ a crease with eyeshadows to achieve the contouring effect.
This article provides detailed explanations on ‘How to locate the eye contour’, ‘Choosing eyeshadow colours for contouring’ and a step-by-step guide on ‘How to contour the eye with eyeshadow’. There are also various photos of examples of different to provide some inspiration (click on the links to read more details on each look).
How to locate the eye contour
Everyone has a different different face structure and so it is helpful to observe your eye shape to determine where to place the contour. Your lid area might be very pronounced and so it is easier to see that the crease is in the area where the lid recedes and where the eye socket is located. You might, however, have a smaller lid area when your eyes are open (mine are a bit like that) and so you might need to study closely where the eye socket edges are.
You can use your fingers to locate where exactly to place the contour eyeshadow on your eyes. To start off, place two clean fingers on a closed eyelid. Gently touch along your eyelid to get a feel for the structure of your eye. The area at the edge of the eye socket (i.e. just under where you feel the socket bone and just above the eyeball) is generally where the contour shadow shade is placed.
You might find it helpful to view the ‘Parts of the Eye’ article on this site to get a better idea of where these areas are on the eye.
Tip: Using your fingers to feel your facial bone structure is a good way of determining how to apply make-up to the rest of your face. For instance, locating your cheekbones with your fingers can help establish where to place blusher, contour and cheek highlighter (blusher is generally on the bone itself; contour under the bone; highlight at the top of the bone).
Choosing eyeshadow colours for contouring
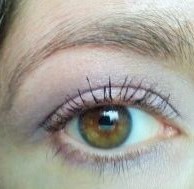
For the contouring eyeshadow style, eyeshadows are generally placed in three areas: one shade on the lid, one shade in the crease area and one shade to highlight the browbone.
You can choose to use either (a) a lighter shade on the lid and a darker shade in the crease to contour or (b) a darker shade on the lid and a lighter shade in the crease to contour. Lighter shades open up an area, whilst darker tones make them recede, which means that (a) and (b) styles of application create a slightly different effect on the eyes.
- Using a lighter/medium shadow on the lid and contouring with a darker shadow in the crease generally makes the eyes look bigger.
This style of application (as viewed in the ‘Beige Neutrals’ look below) brings the eye area forward and creates the illusion of more space on the lid.
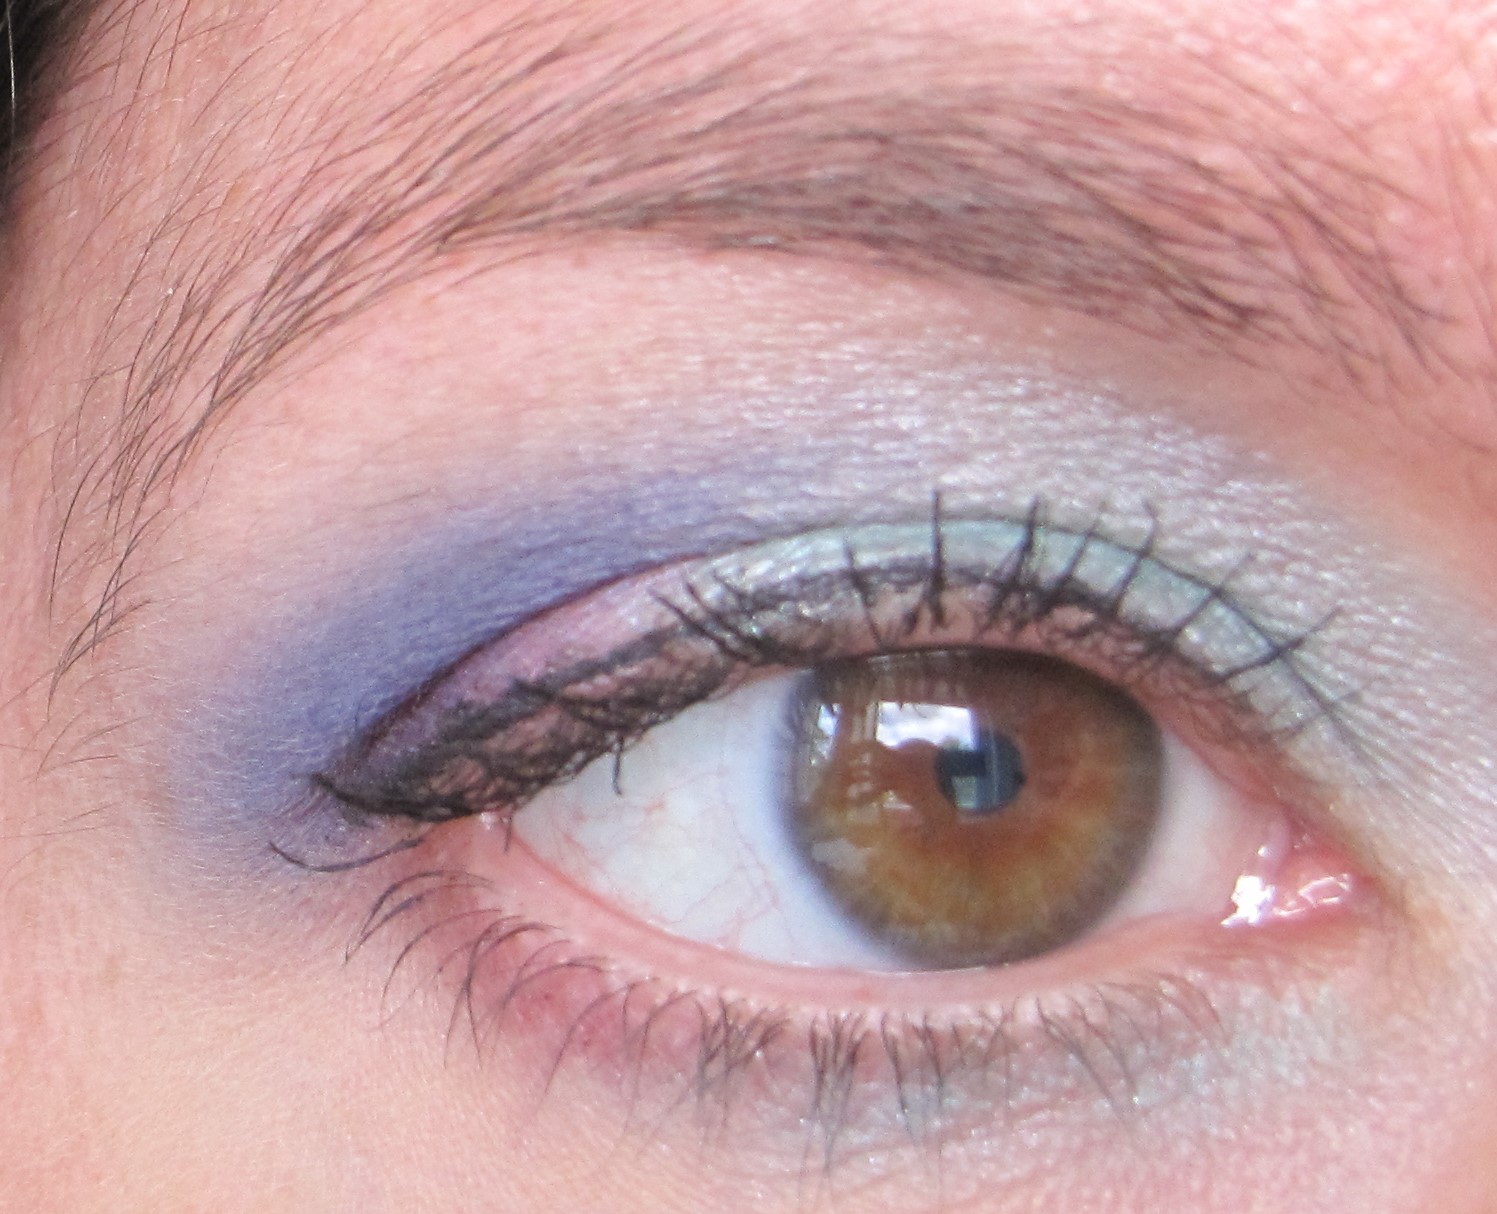
- Using a darker shade on the lid and contouring with a lighter shade in the crease creates a smokier effect on the eyes.
Using a darker shade on the lid (as viewed in the ‘Purple Smoke’ look below) focuses more attention right around the eye lashlines. The lighter crease shade helps to blend out any harsh edges from the darker lid colour and helps to softly shape the eye.


- To make blending easier, stick to similar colour families for lid and crease/lashline colours.
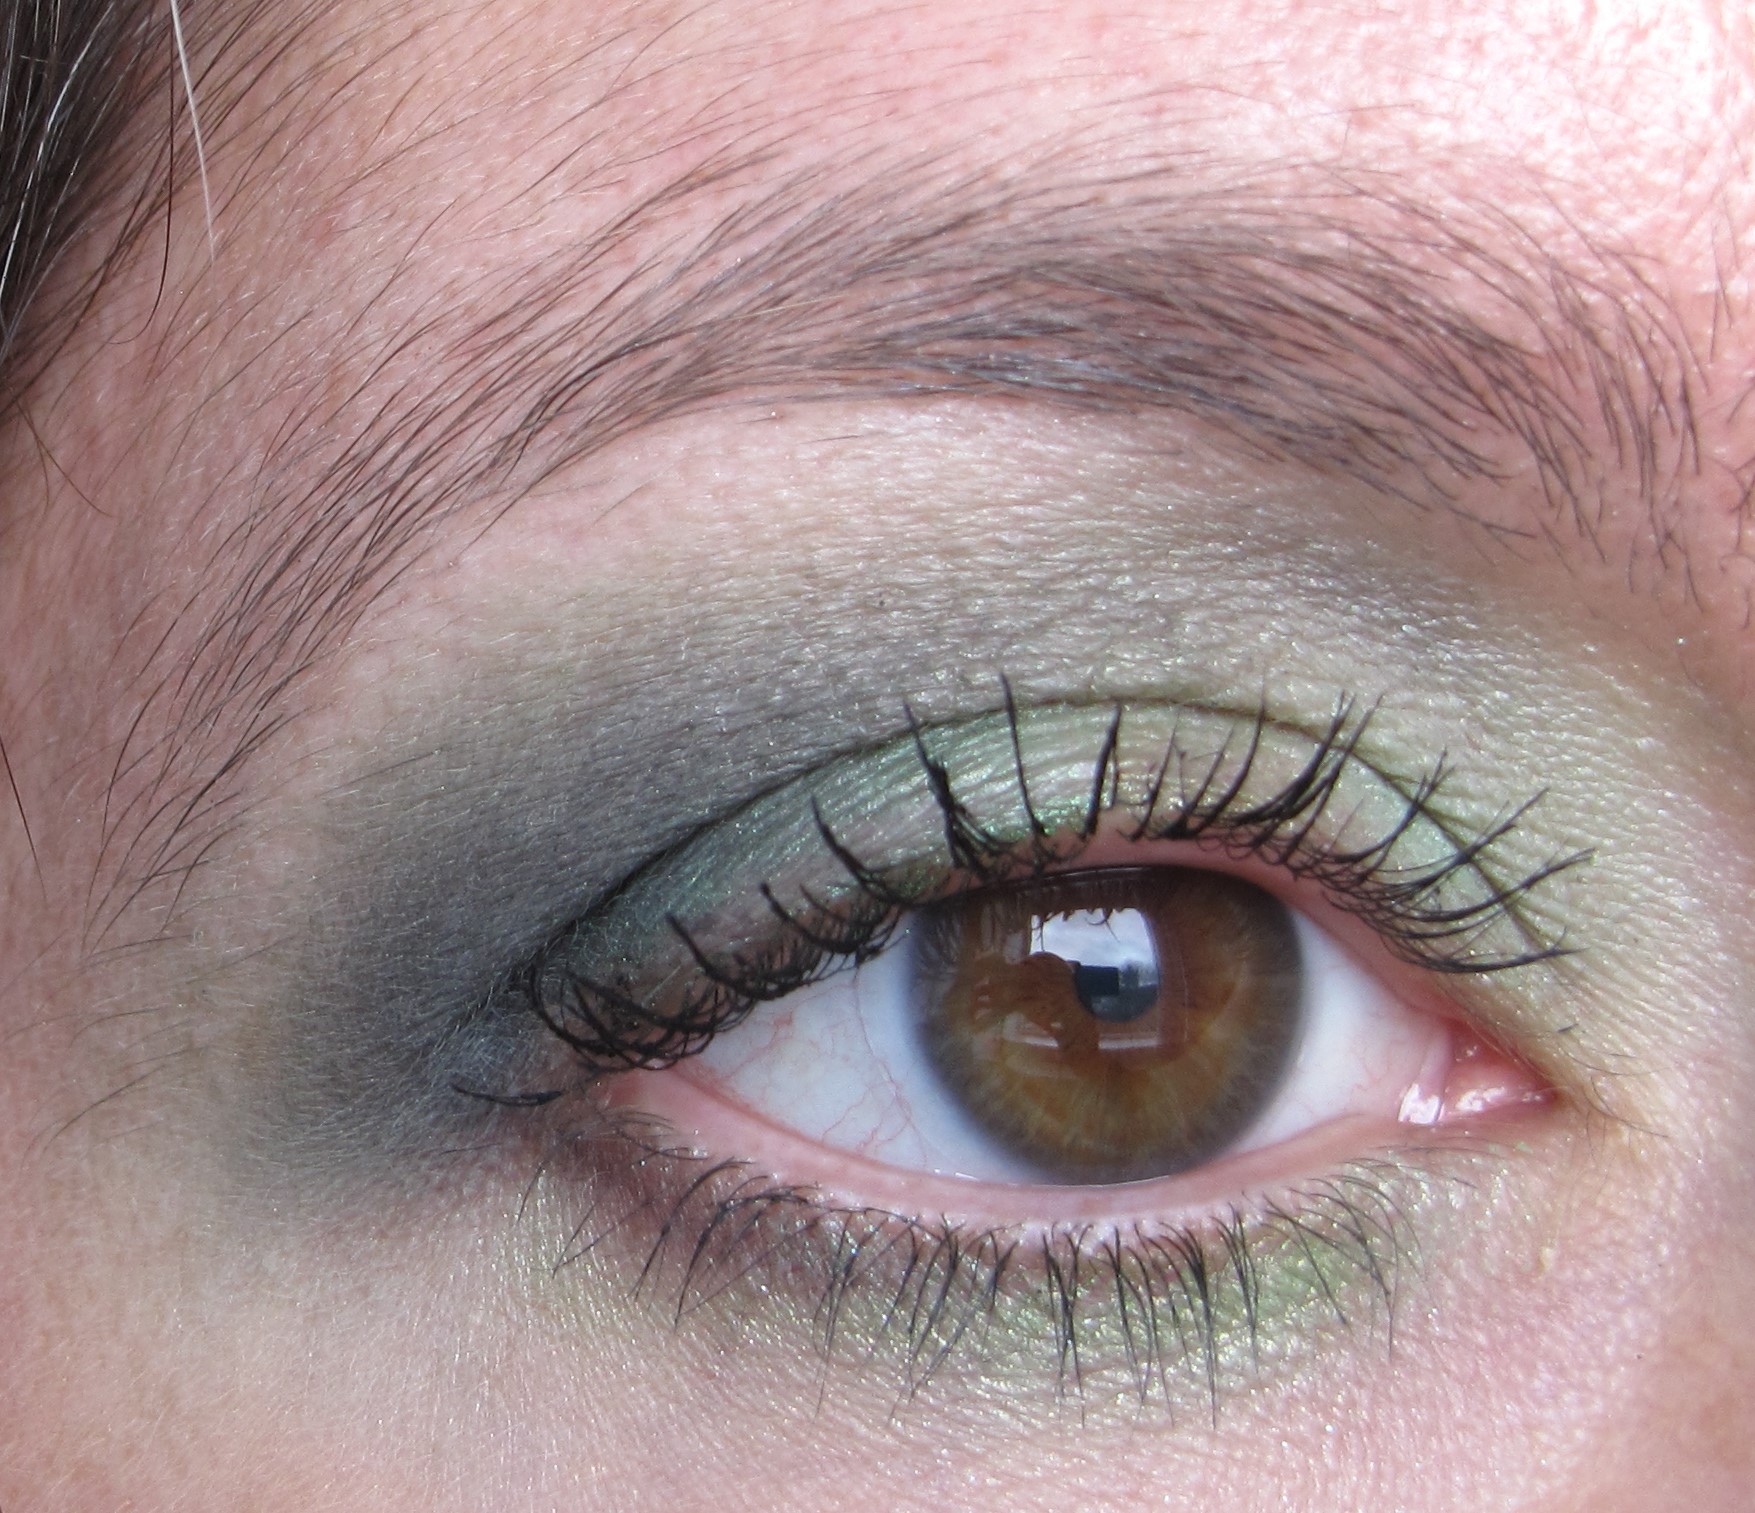
For example, the ‘Wearable Purples’ look (see below) uses shades of purple, while the ‘Shades of Green’ look (see below) combines different green eyeshadows.
- Alternatively, you can combine eyeshadows which are in the similar colour family (e.g.blues with aquas and greens; yellows with oranges and coppers) or ones which contrast with each other
For example, the ‘Gilded Gold’ look (see below) combines shades of gold, brown and burgundy to create a warm, autumnal effect on the eyes.

The ‘Mint Cobalt Punch’ look combines aqua, hot pink and cobalt blue eyeshadows to create some fun contrast on the eyes.

How to contour with eyeshadow
So once you have chosen your eyeshadow shades, how do you then contour the eye? I have outlined some steps below to help explain the contouring technique. Before you start, you have the option of which order to apply your lid and crease colours. Both ways are completely fine and work effectively; it just depends on your personal preference and what works best for you.
- You can choose to apply your lid colour first, followed by your crease contour.
- You can choose to apply your crease contour and then pat on your lid colour.
- I often contour my crease first as I find if I do it the other way round, I have to sometimes go back and apply more colour on the lid as the crease colour has swept some away.
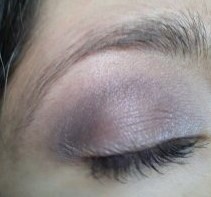
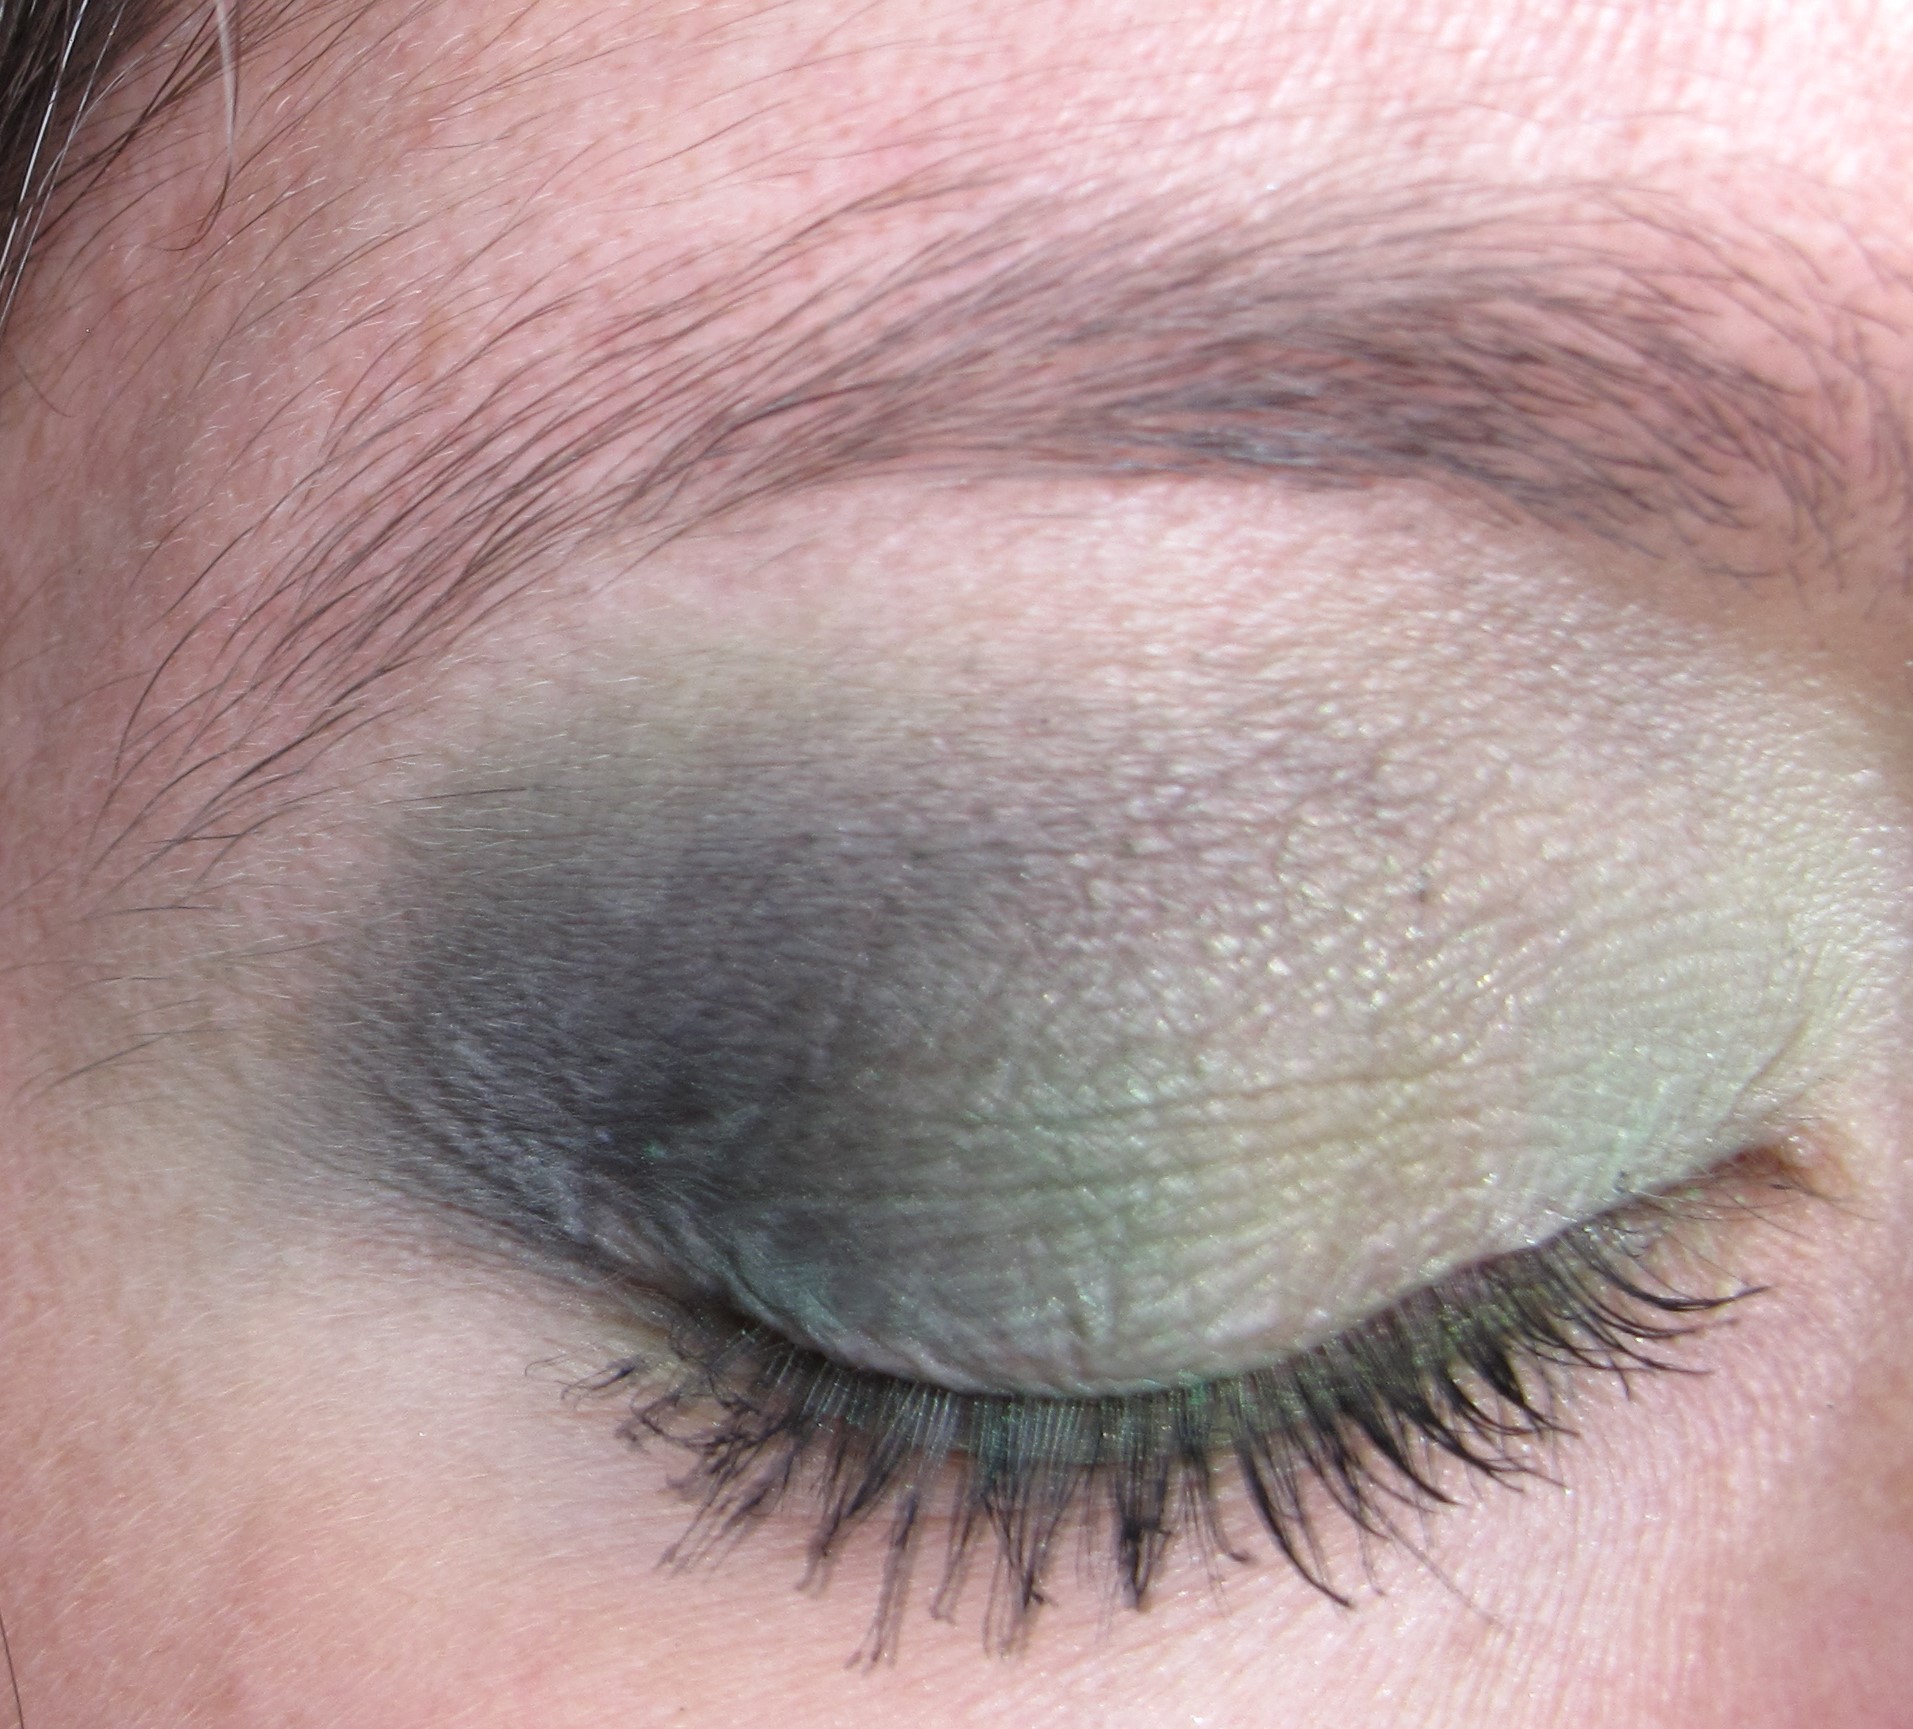
I will be using the ‘Cream and Rose’ look (see below) as an illustration of how to contour the eye. You can click on the link if you want to read more about the products used for this particular look.


1. Apply an eyeshadow base all over the lid. This step will prevent your eyeshadow from creasing and will also help the colour apply more smoothly on the lid.
2. Take your chosen crease colour on a crease/blender brush (e.g. MAC 217). Use a ‘windshield wiper’ motion to blend the crease colour back and forth. You can also apply some of the crease shade to the outer lid if you wish. I use a ‘windshield wiper’ motion to contour as it applies the crease colour more evenly and blends it out well. This technique also gives a softer effect. You can easily go back and add more to the crease if you want to have a stronger contour. Patting on the crease colour (like the lid colour) means you will get a more concentrated application of eyeshadow and it will be difficult to soften.
3. Take a flat shader brush (e.g. MAC 239) and pat your chosen lid colour on to the eyelid. Keep the colour most intense in the lid area and blend/diffuse it up to the crease area.
4. Take a crease/blender brush (e.g. MAC 217, MAC 224, MAC 226) and apply a highlight shade (shade close to your skin tone) to the area just under your browbone, overlapping slightly where the lid colour hits the crease. Applying a highlighter helps to blend and finish off the overall look, as well as adding brightness to the eye.
5. Apply mascara to the top and bottom lashes.
Note: I also applied a glitter eyeliner along the upper lashline in this particular look to add a little extra sparkle to the eyes.
I hope you found this article in the ‘Eyeshadow Styles’ series helpful. Let me know if you have any questions in the comments section below.
