

Red Rainbow
Red Rainbow
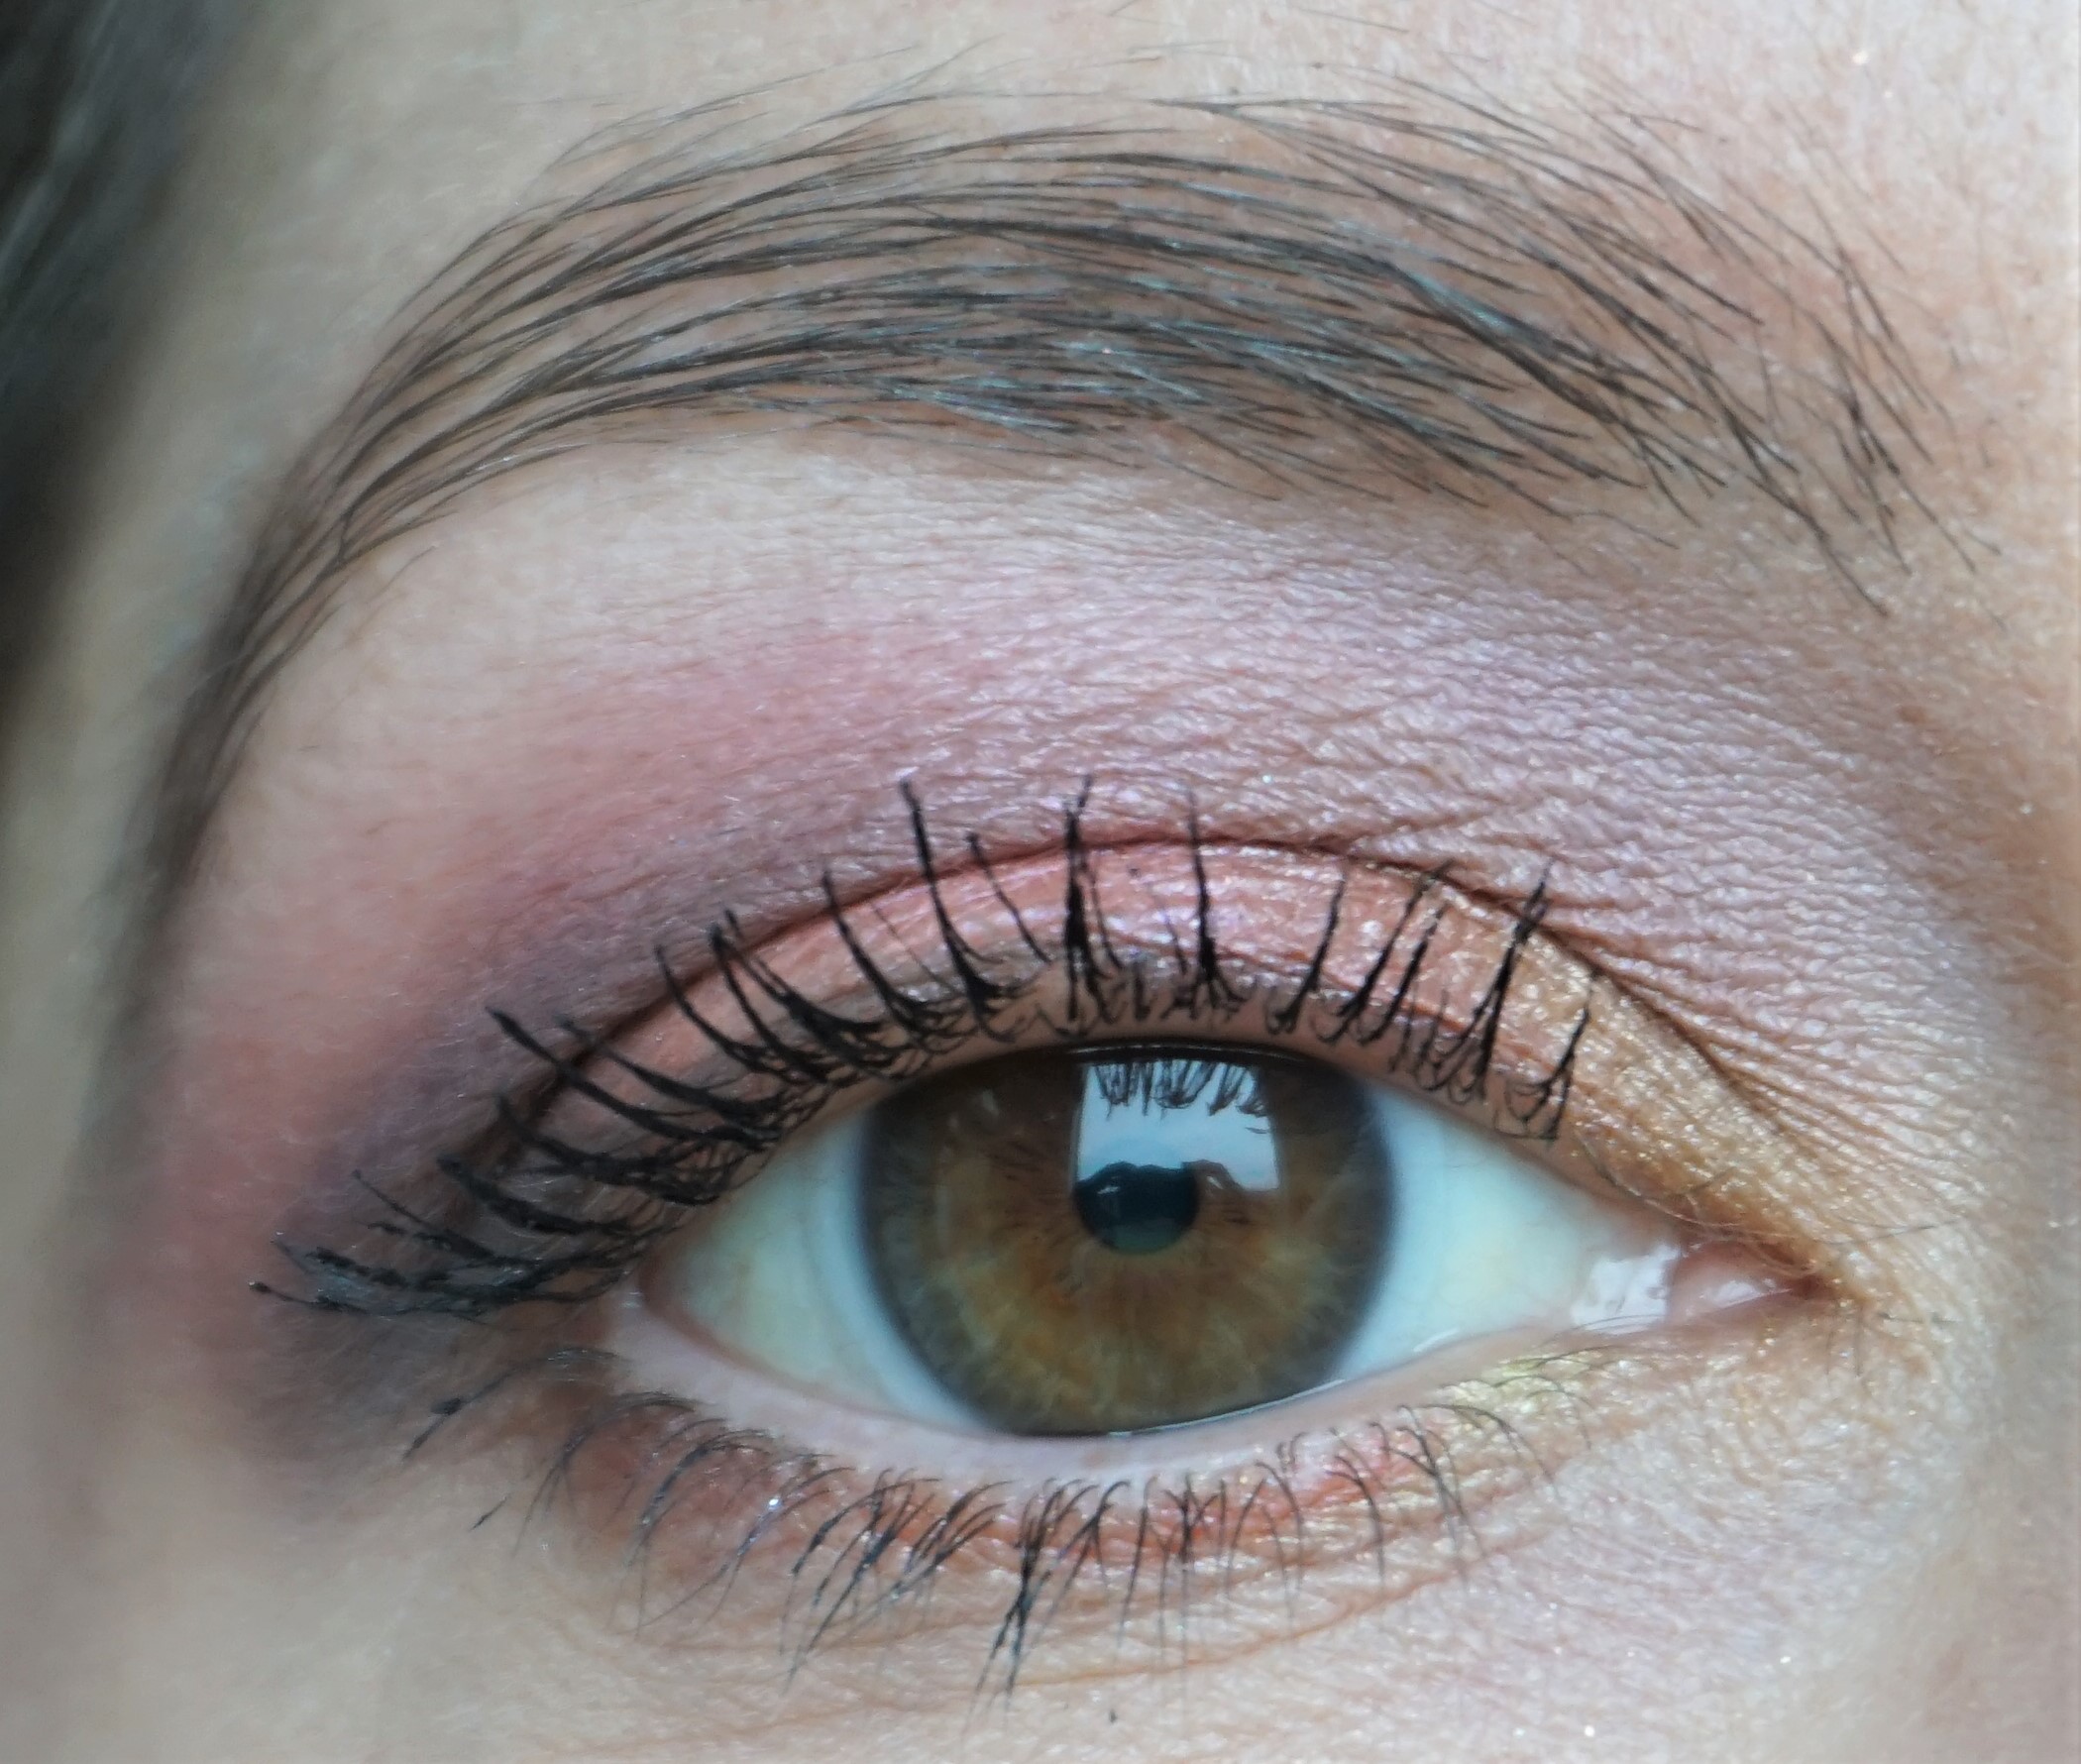
Today’s look for the Rainbow Series is based around RED, the first colour in the rainbow. I always gravitate towards yellows or oranges when using red eyeshadows, so this time, I combined the red with hot pink, lime green and blackened-brown. The tones I used are a bit more subtle, so you could use similar shades which are bolder for an amp-ed up version of the look. You can view full face shots, along with the cheek and lip colours I used, in this post.
The Rainbow Series includes looks based around each of the colours of the rainbow. You can read about the series and view more posts here.
Tip: I’m using the Urban Decay Full Spectrum Palette for all of the looks but you can substitute in eyeshadows from any brand. The NYX Ultimate Shadow Palette in ‘Brights’ is a great dupe for the Urban Decay Full Spectrum and cheaper (£16 instead of £43). You can view the NYX Palette here.
Click here to read my article ‘Parts of the Eye’ for help on where to place eyeshadow colours.
Products
Base: Urban Decay Eyeshadow Primer Potion in Eden (matte beige)
Lid: Urban Decay Seize eyeshadow (medium-deep satin coral-red)
Crease: Urban Decay Gossip eyeshadow (deep satin bright fuschia-pink)
Deepen Crease/Outer v: Urban Decay Midnight Blaze (deep black-based brown with gold sparkles)
Inner Lid: Urban Decay Mean eyeshadow (light satin lime)
Highlight: MAC Blanc Type eyeshadow (light matte cream beige)
Upper Lashline: Urban Decay Platonic eyeshadow (shimmery dark soft black)
Lower Lashline: Urban Decay Mean, Seize, Midnight Blaze and Platonic eyeshadows (as above)
Black mascara (upper and lower lashes)
Steps
1. Apply Eden all over the lid as a base. You can either use your fingers or a flat synthetic brush (e.g. MAC 242).
2. Take a flat shader brush (e.g. MAC 239) and pat Seize on the lid.
3. Sweep Gossip into the crease using a windshield wiper motion (e.g. MAC 217).
4. Take a crease/blender brush (e.g. MAC 226, MAC 217) and use Midnight Blaze to deepen the crease. Apply Midnight Blaze into the outer v as well to add some extra shape to the eyes.
5. Take a small flat shader brush (e.g. MAC 228) and pat Mean on the inner part of the eye. This shade adds some brightness and a ‘pop’ of colour to the look.
6. Using a crease/blender brush (e.g. MAC 217) or a pointed crease brush (e.g. MAC 226), sweep Blanc Type on to the browbone to highlight.
7. Take an angled eyeliner brush (e.g. MAC 266) and apply Platonic along the upper lashline. This step adds some soft definition to the eyes.
8. Take an eyeliner brush (e.g. MAC 266) and apply Mean to the inner part of the lower lashline. Use the same brush to apply Seize to the middle-outer part of the lower lashline and Midnight Blaze to the outer part of the lower lashline. Take the same brush and very lightly apply Platonic to the lower lashline to add some extra smokiness.
9. Apply plenty of black mascara to the top and bottom lashes.
Here’s another close-up of the eyes:
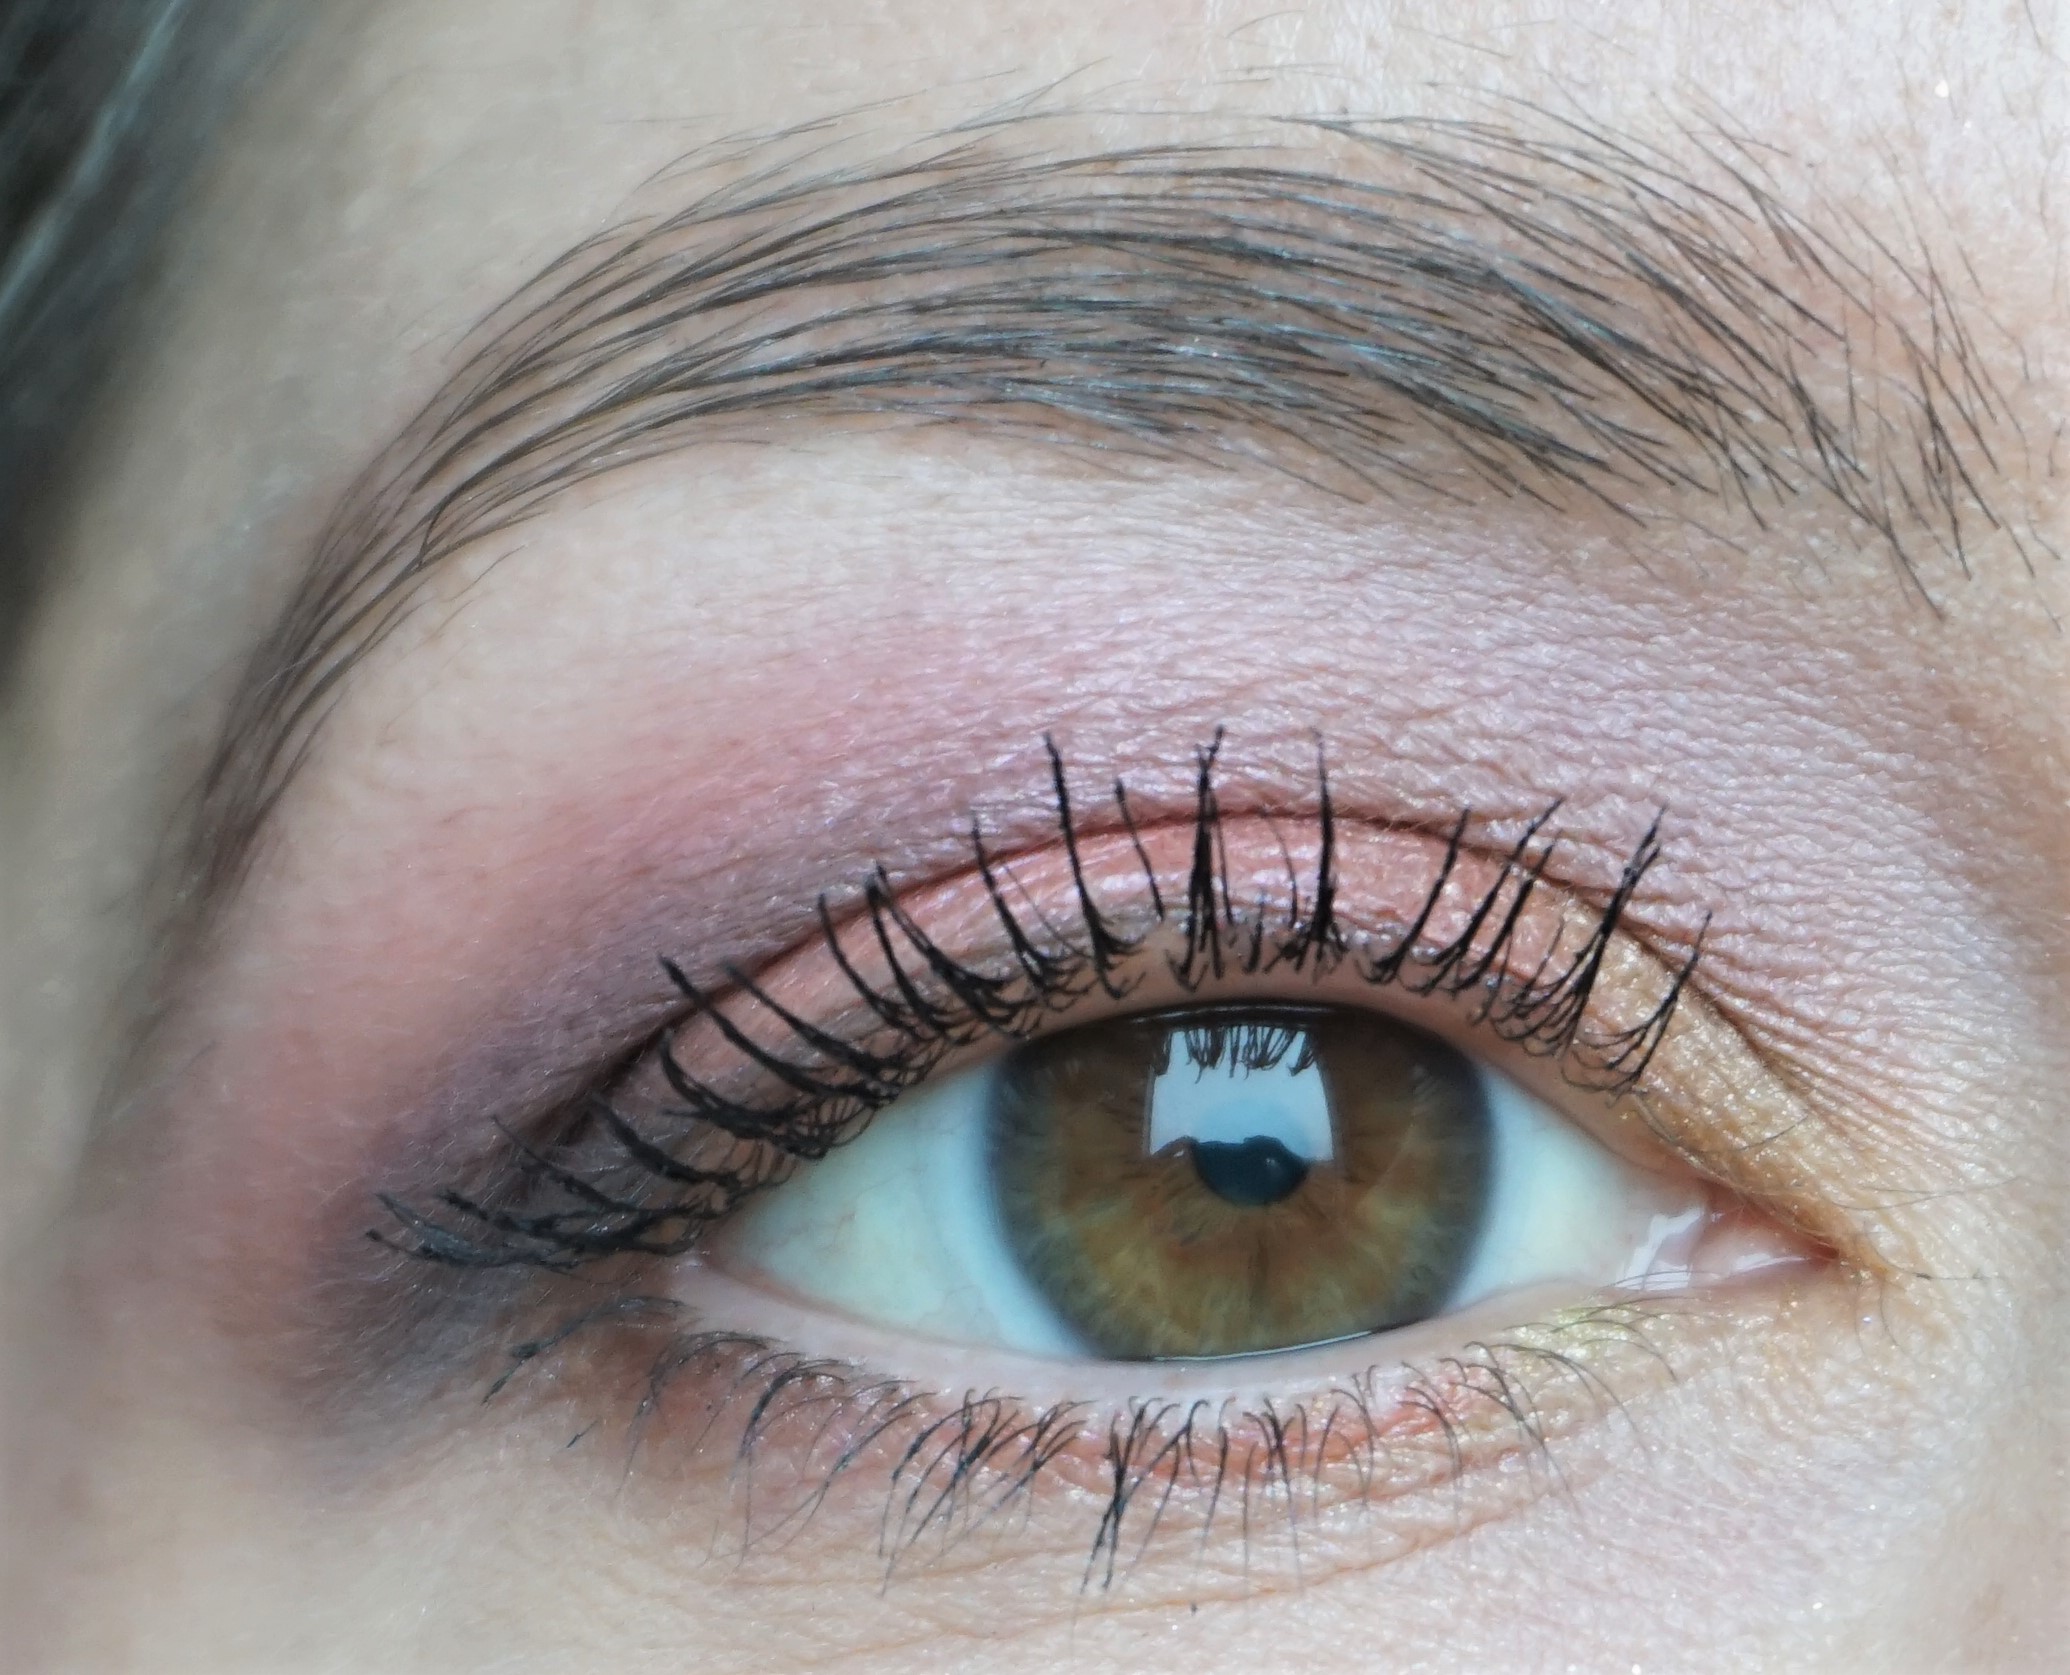
Red Rainbow
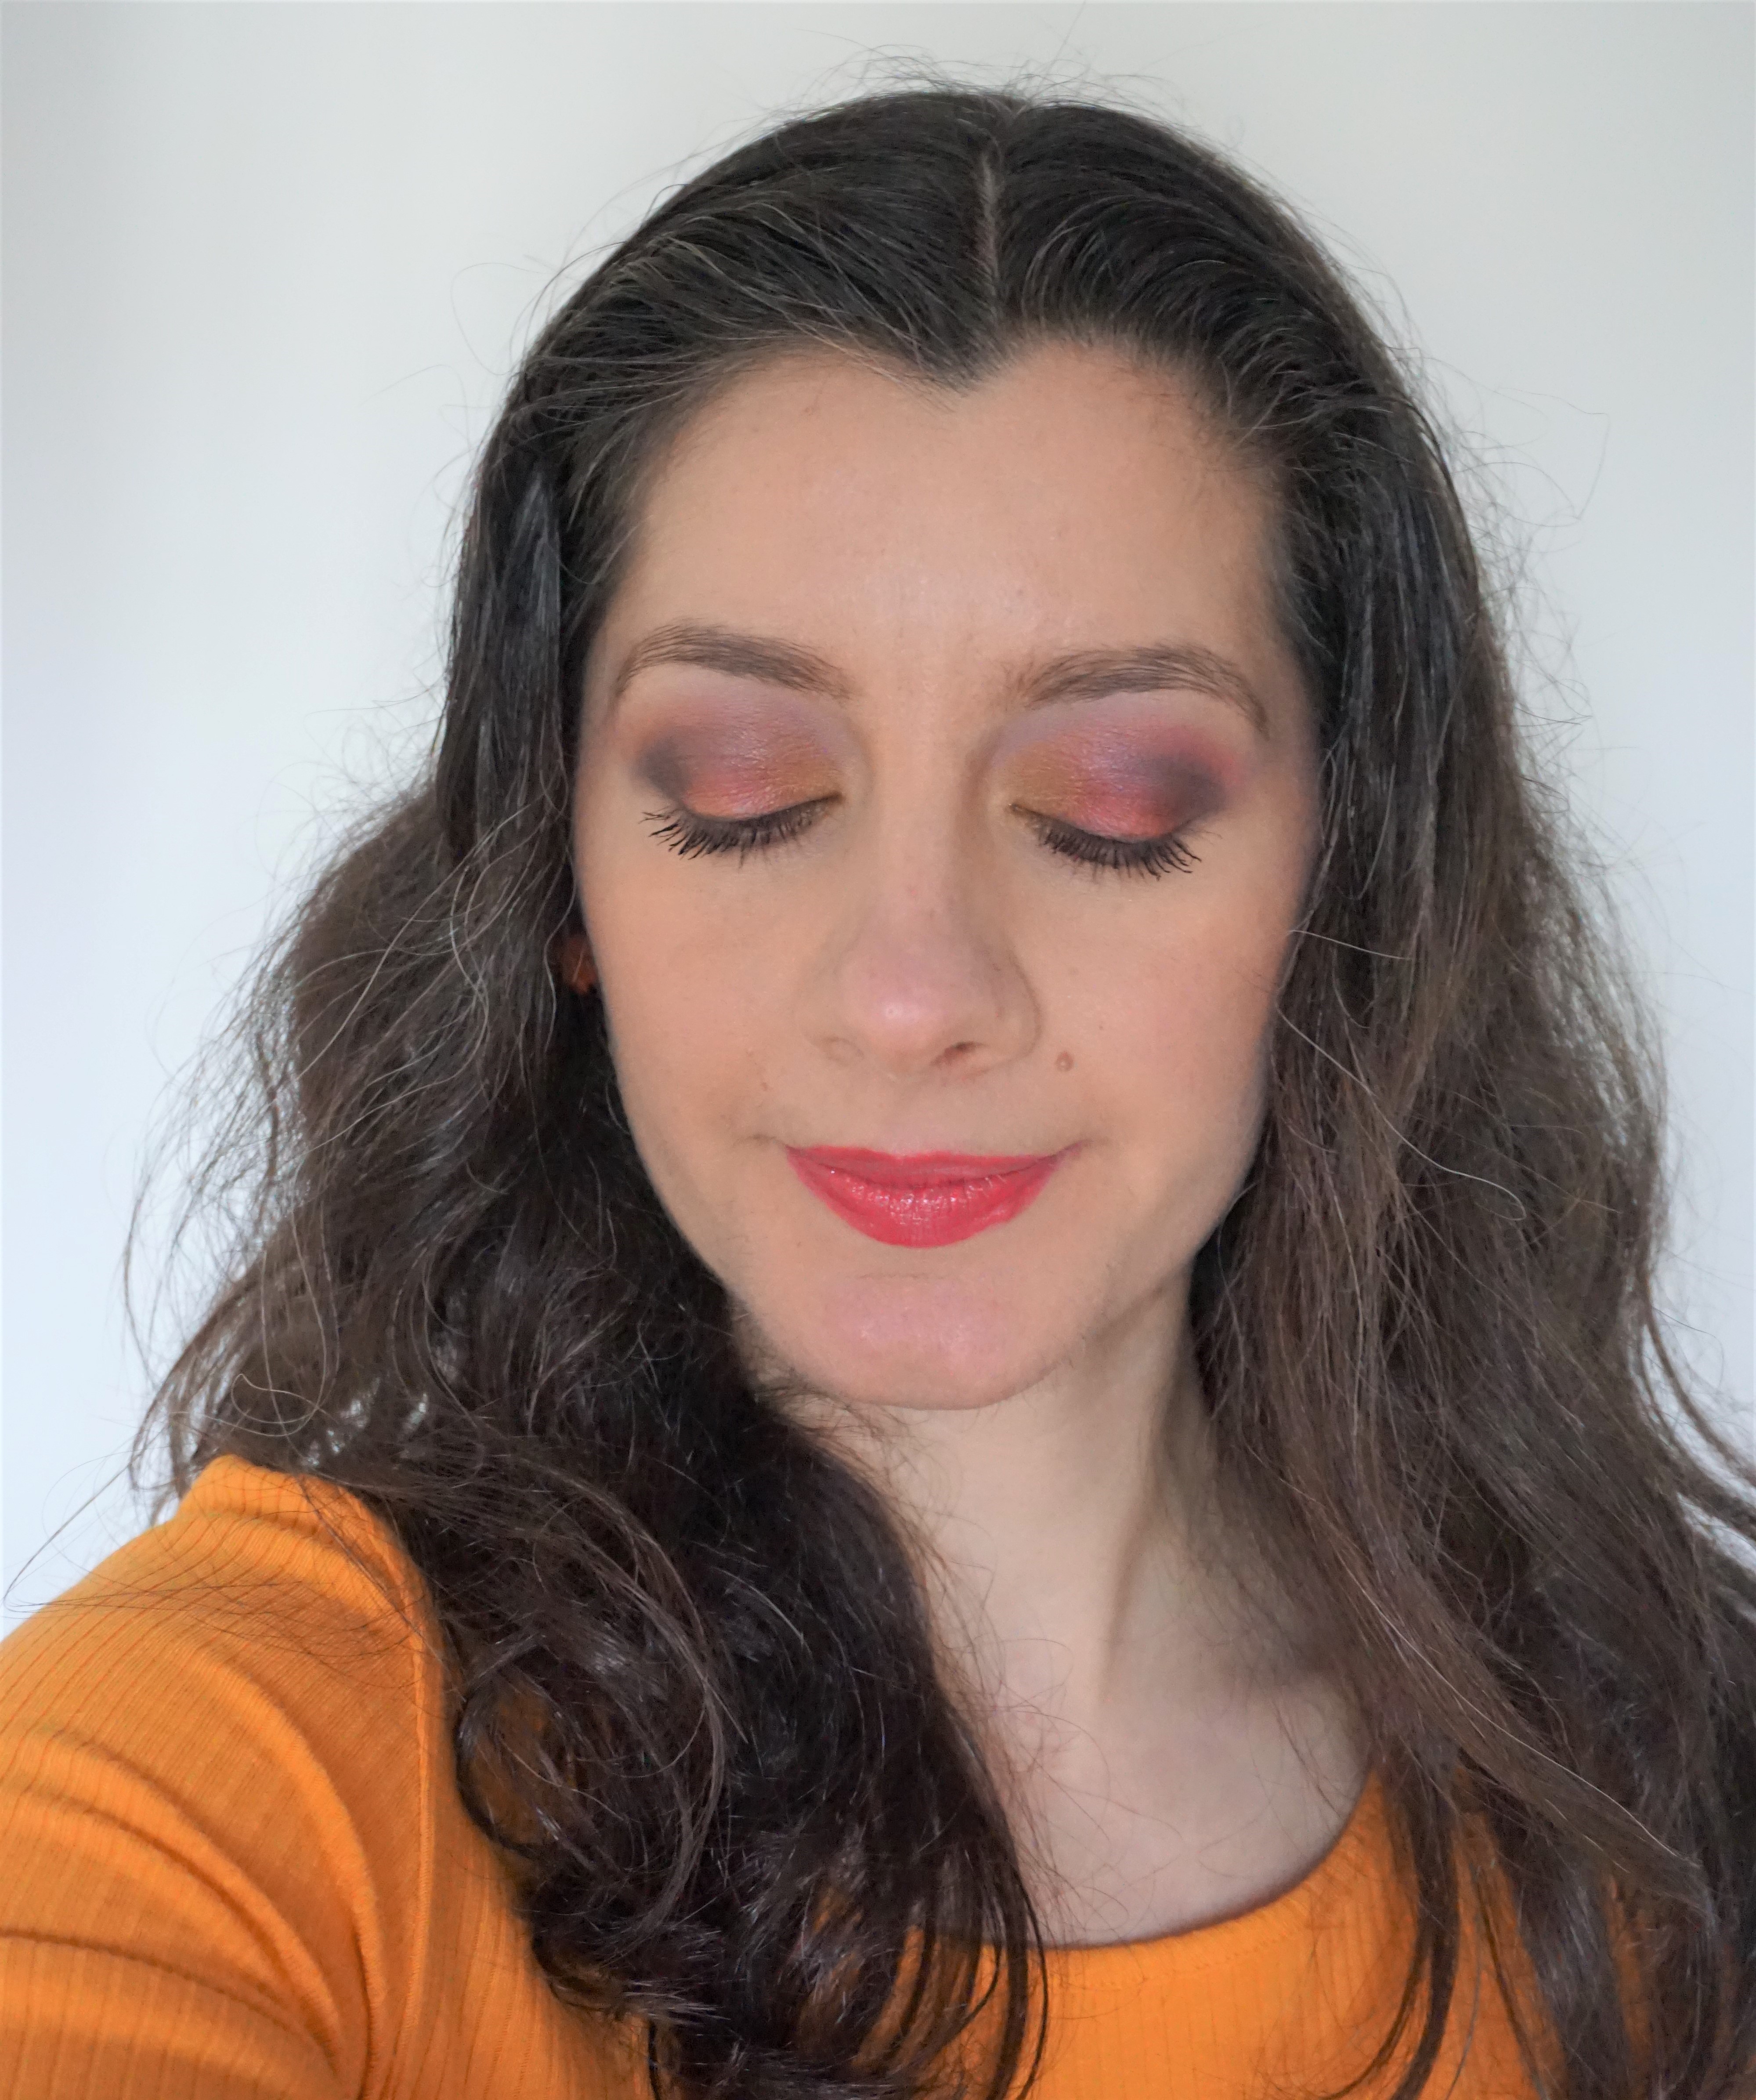
Here are some full face photos of the look:

Red Rainbow (full face with MAC Brave on lips)

Red Rainbow (full face with MAC Brave on lips)
To complement the look: I used Fenty Beauty Killawatt Freestyle Highlighter Duo in Moscow Mule as a blusher, Kiko Glow Fusion Powder Highlighter in 01 Champagne (you can read more about this product, see photos and view swatches here) to highlight my cheekbones and MAC Satin Lipstick in Brave on the lips.
Optional: if you want to tie in with the reddish theme for the eyes, you can use a red-based lipstick on the lips. I used the Max Factor Colour Intensifying Balm in Luscious Red (you can read more about this product here) in the face photos below:

Red Rainbow (full face with red lips)
Red Rainbow (full face with red lips)
Next up: Orange Rainbow! Keep a look out for the next installment in my new Rainbow Series!
