

Green Rainbow

Green Rainbow
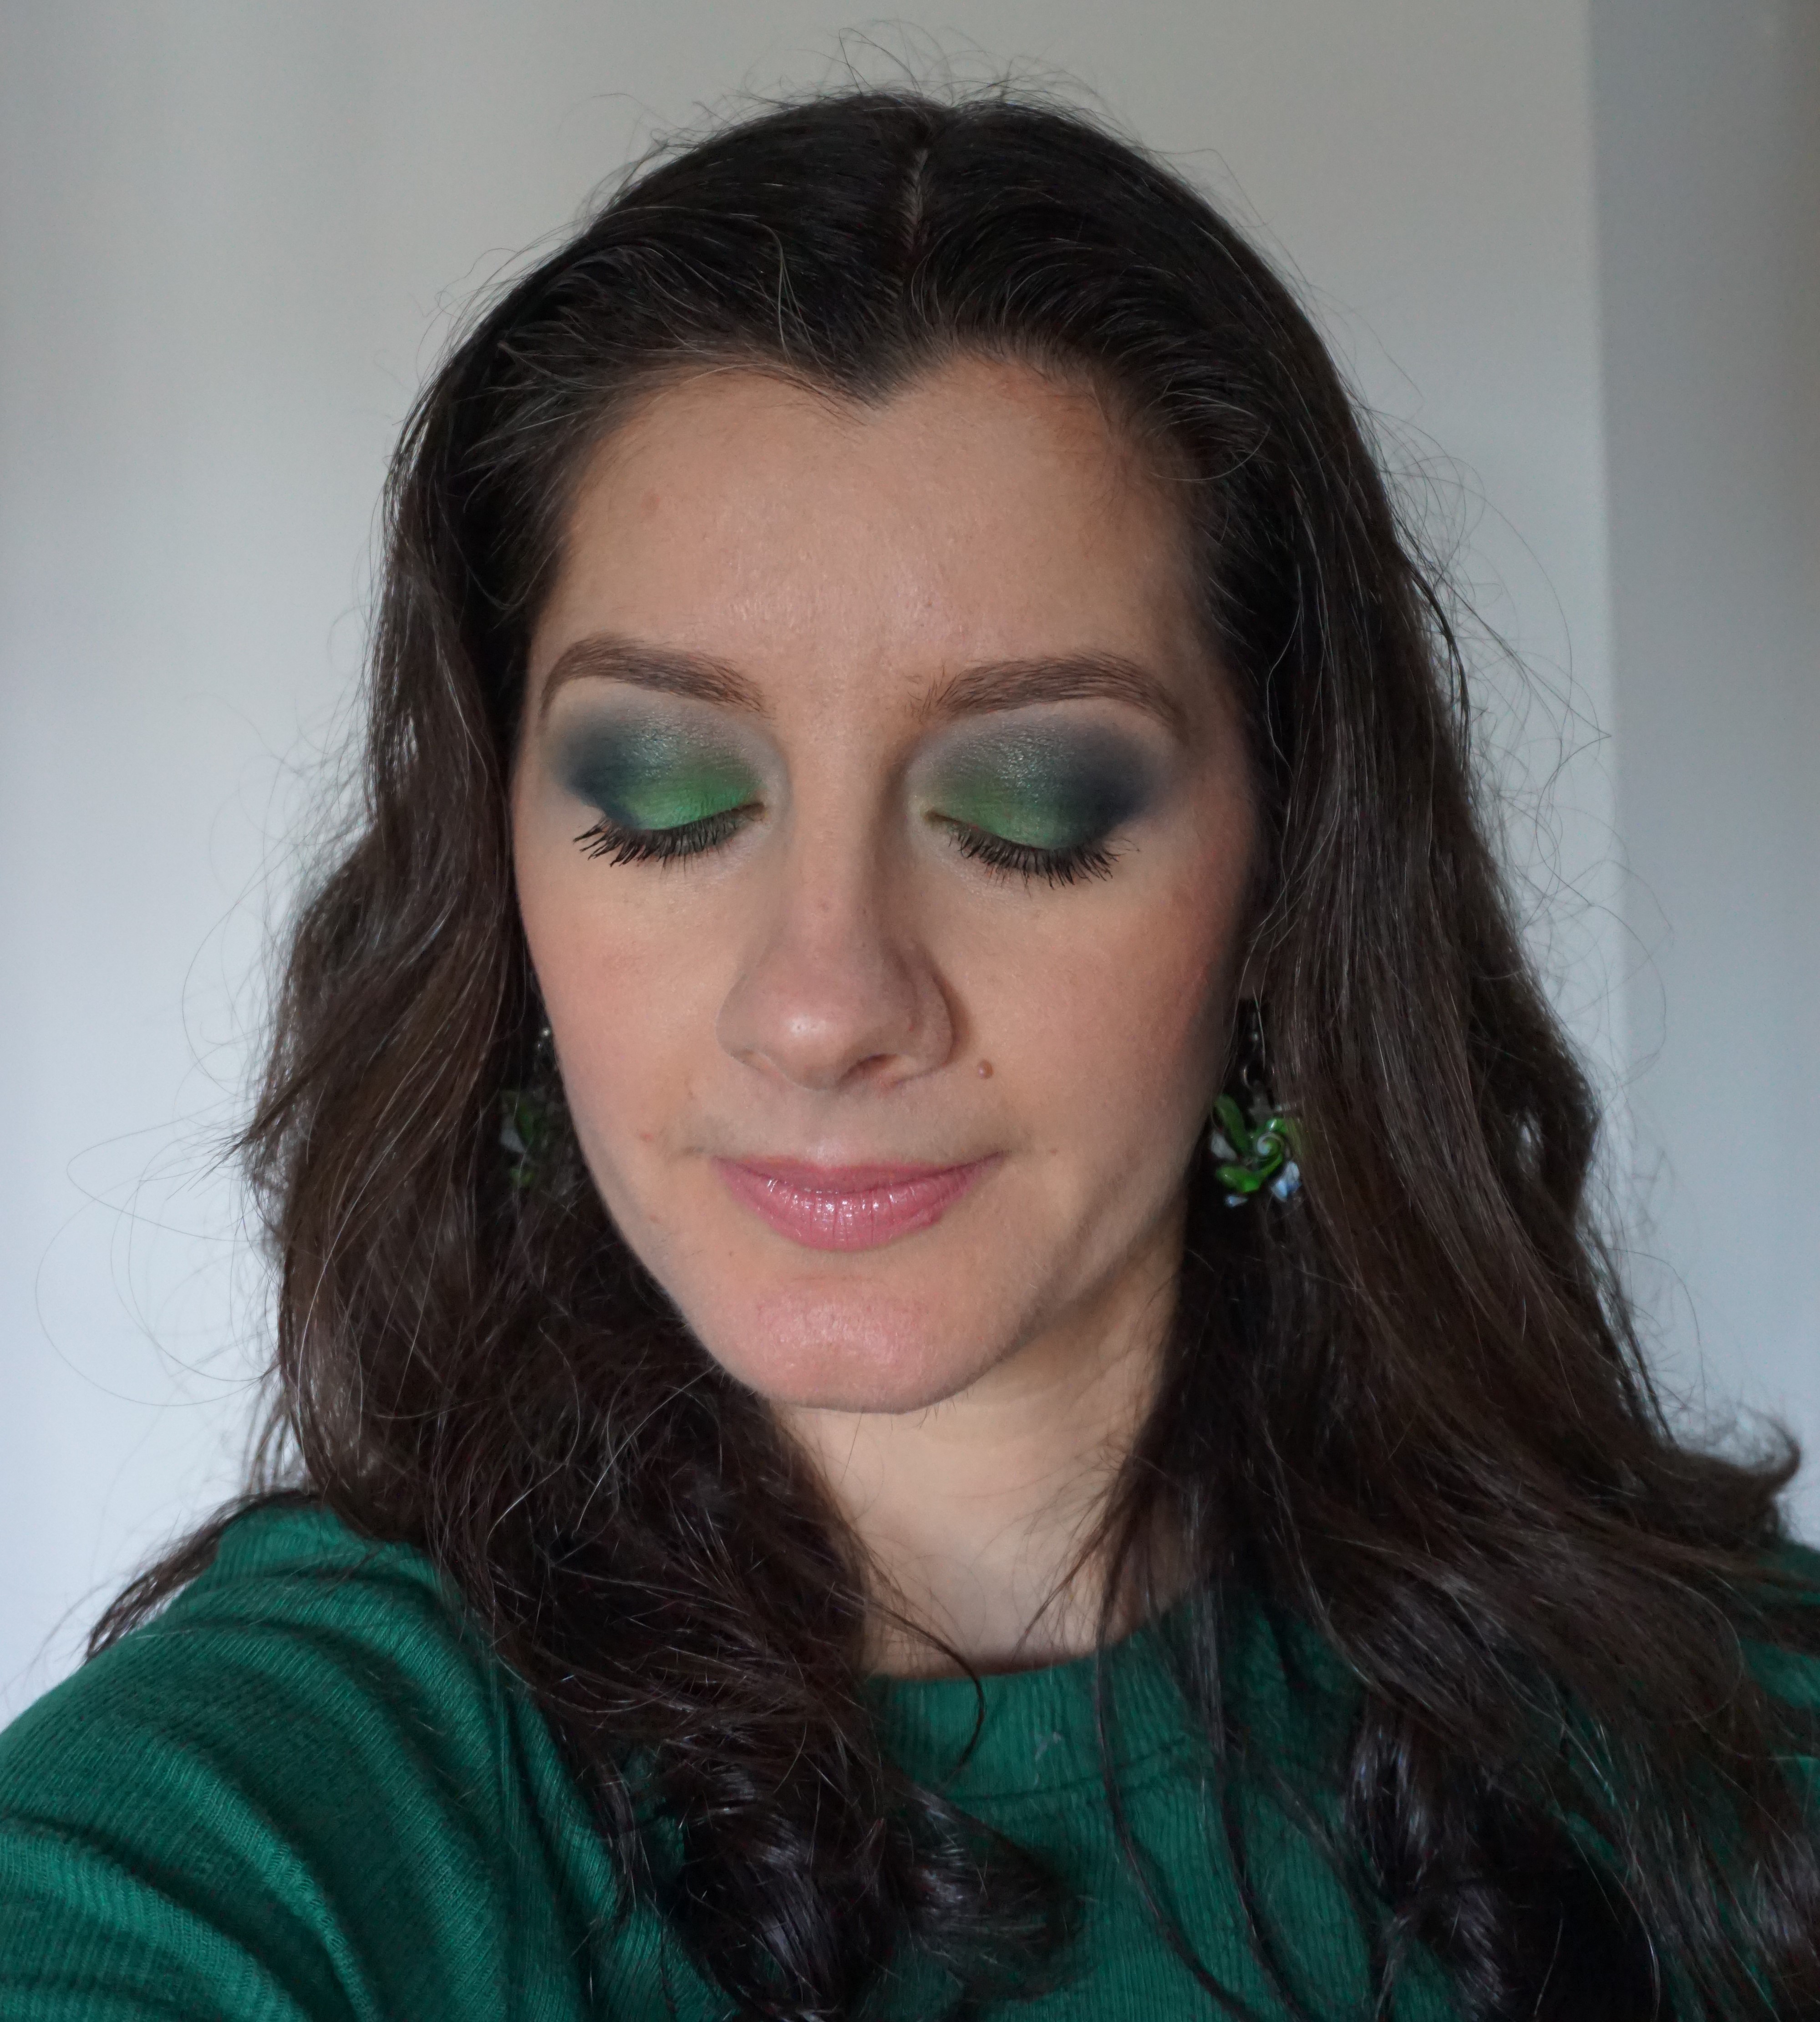
Today’s look for the Rainbow Series is based around GREEN, the fourth colour in the rainbow. I decided to combine the greens with dark indigo in the outer v for this look, as I usually veer more towards wearing greens with yellows. I’m enjoying how this series is encouraging me to try out new colour combinations! You can view full face shots, along with the cheek and lip colours I used, in this post.
The Rainbow Series includes looks based around each of the colours of the rainbow. You can read about the series and view more posts here.
Tip: I’m using the Urban Decay Full Spectrum Palette for all of the looks but you can substitute in eyeshadows from any brand. The NYX Ultimate Shadow Palette in ‘Brights’ is a great dupe for the Urban Decay Full Spectrum and cheaper (£16 instead of £43). You can view the NYX Palette here.
Click here to read my article ‘Parts of the Eye’ for help on where to place eyeshadow colours.
Products
Base: Smashbox Photo Finish Lid Primer in White (matte white)
Crease: Urban Decay Hundred eyeshadow (deep pearly forest green)
Outer V: Urban Decay Minx eyeshadow (deep satin indigo)
Lid: Urban Decay Hatter eyeshadow (medium satin bright grassy green)
Blend Crease: Urban Decay Mean eyeshadow (light satin lime)
Highlight: MAC Brule eyeshadow (light matte cream beige)
Lower Lashline: Urban Decay Hatter, Minx and Mean eyeshadows (as above)
Black mascara (upper and lower lashes)
Steps
1. Apply Eden all over the lid as a base. You can either use your fingers or a flat synthetic brush (e.g. MAC 242).
2. Sweep Hundred into the crease using a windshield wiper motion (e.g. MAC 217).
3. Take a crease/blender brush (e.g. MAC 226, MAC 217) and apply Minx to the outer v part of the eye.
4. Take a flat shader brush (e.g. MAC 239) and pat Hatter on to the lid
5. Take a crease/blender brush (e.g. MAC 217) and use Mean to lightly blend out the edges of Hatter in the crease.
6. Using a crease/blender brush (e.g. MAC 217) or a pointed crease brush (e.g. MAC 226), sweep Blanc Type on to the browbone to highlight.
7. Take an eyeliner brush (e.g. MAC 266) and apply Mean to the inner part of the lower lashline. Use the same brush to apply Hatter to the middle-outer part of the lower lashline and Minx to the outer part of the lower lashline.
8. Apply plenty of black mascara to the top and bottom lashes.
Here’s another close-up of the eyes:

Green Rainbow
Here are some full face photos of the look:
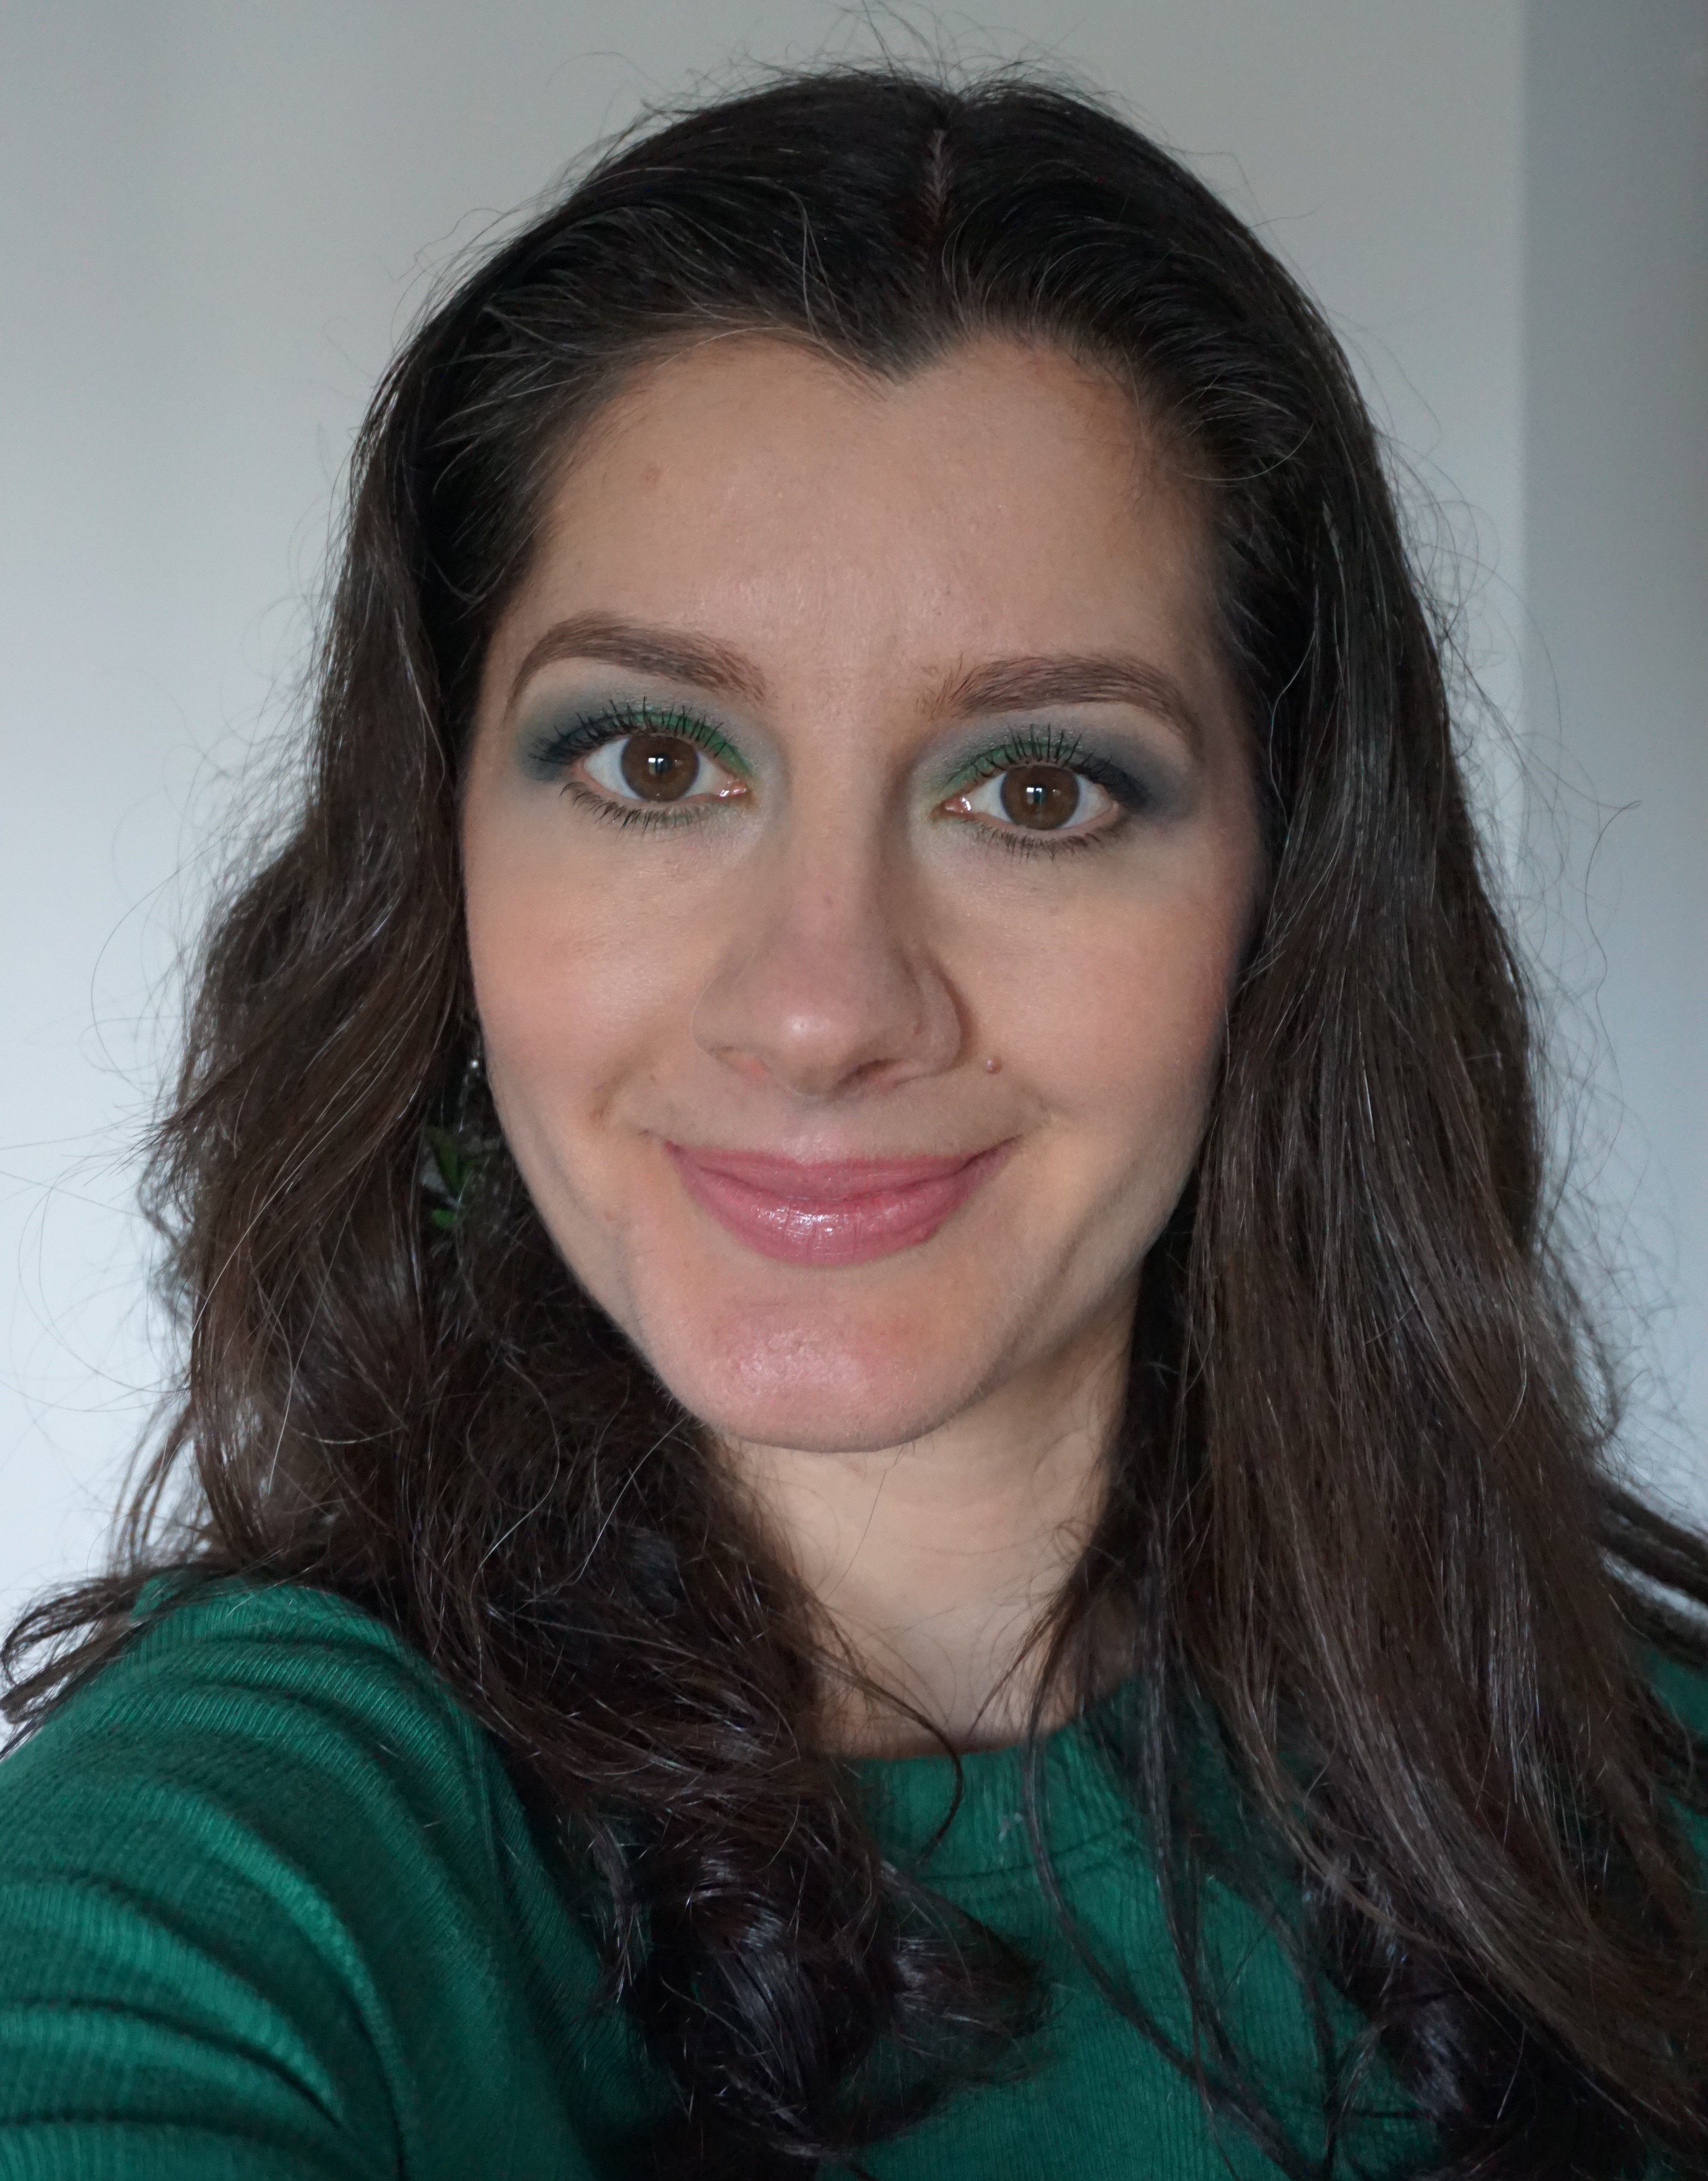
Green Rainbow (full face)
Green Rainbow (full face)
To complement the look: I used Kiko Baked Blush in 01 Marmoreal Biscuit on the cheeks (you can read more about this product, see swatches and view photos here), Kiko Glow Fusion Powder Highlighter in 01 Champagne (you can read more about this product, see photos and view swatches here) to highlight my cheekbones and Bare Minerals Gen Nude Lipstick in Kitty on the lips.
Next up: Blue Rainbow! Keep a look out for the next installment in my new Rainbow Series!
