

Teal and Brown Flying Hummingbird Look
Teal and Brown Flying Hummingbird Look
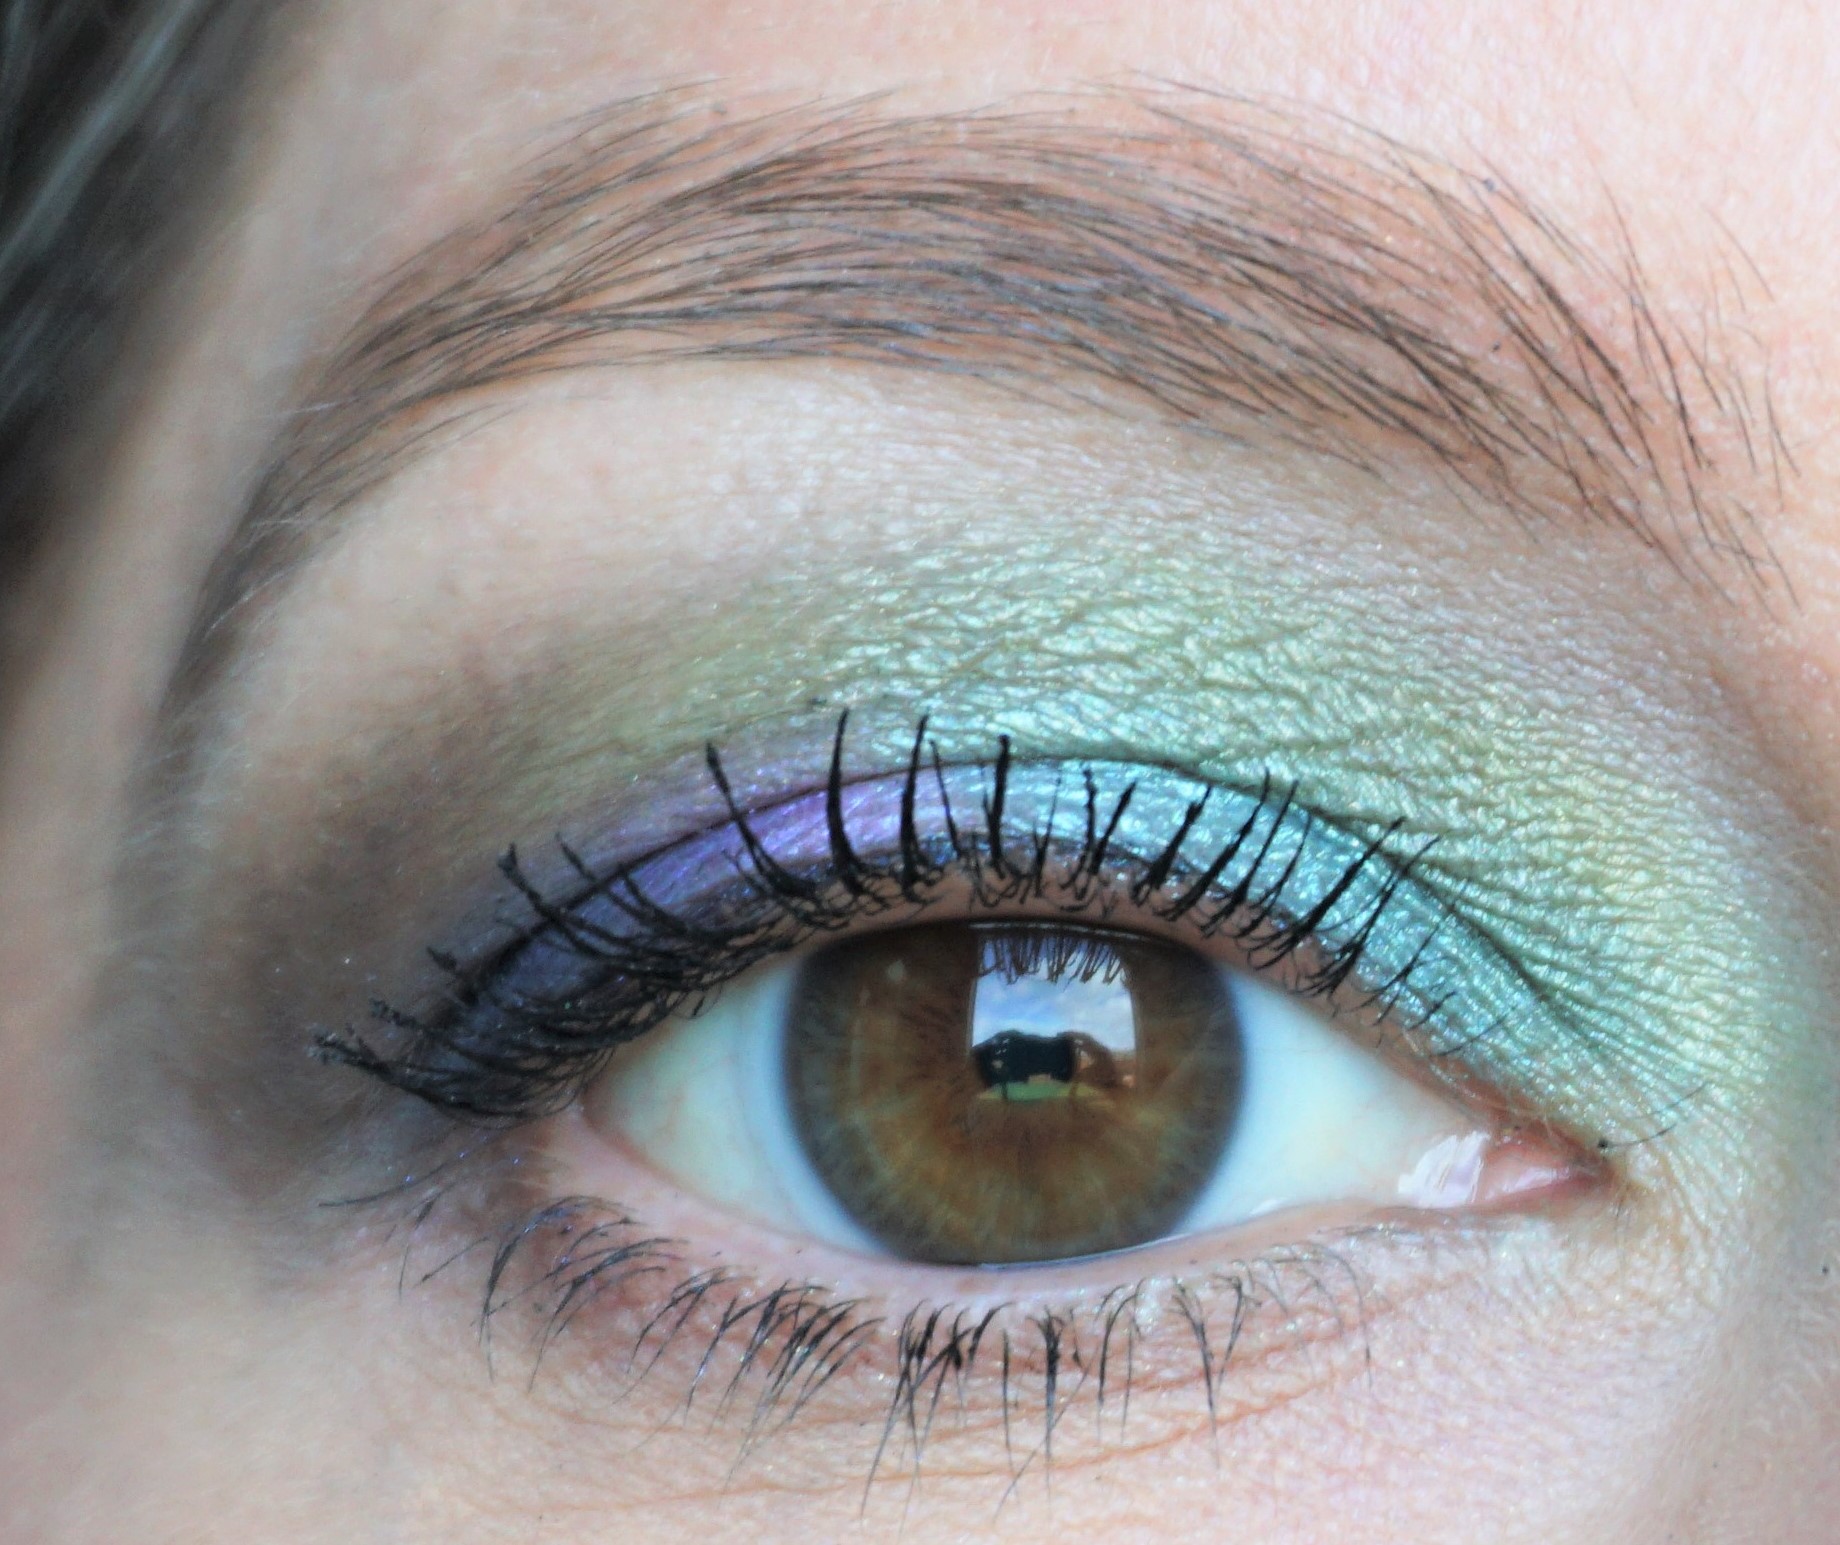
The fourth look in my Bird Series (you can read more about the series here) is based around the Teal and Brown Flying Hummingbird. There are so many different shades in this bird’s colour scheme – teal, green, bright blue, bright purple, brown, glints of black and white – which I thought would make for a really interesting look. The look was a challenge for me, as it’s been a while since I’ve attempted to combine such a wide range of colours all just on my eyes! I really like how it turned out and think it is one of my favourite looks in the series.
You can view full face shots, along with the cheek and lip colours I used, in this post.
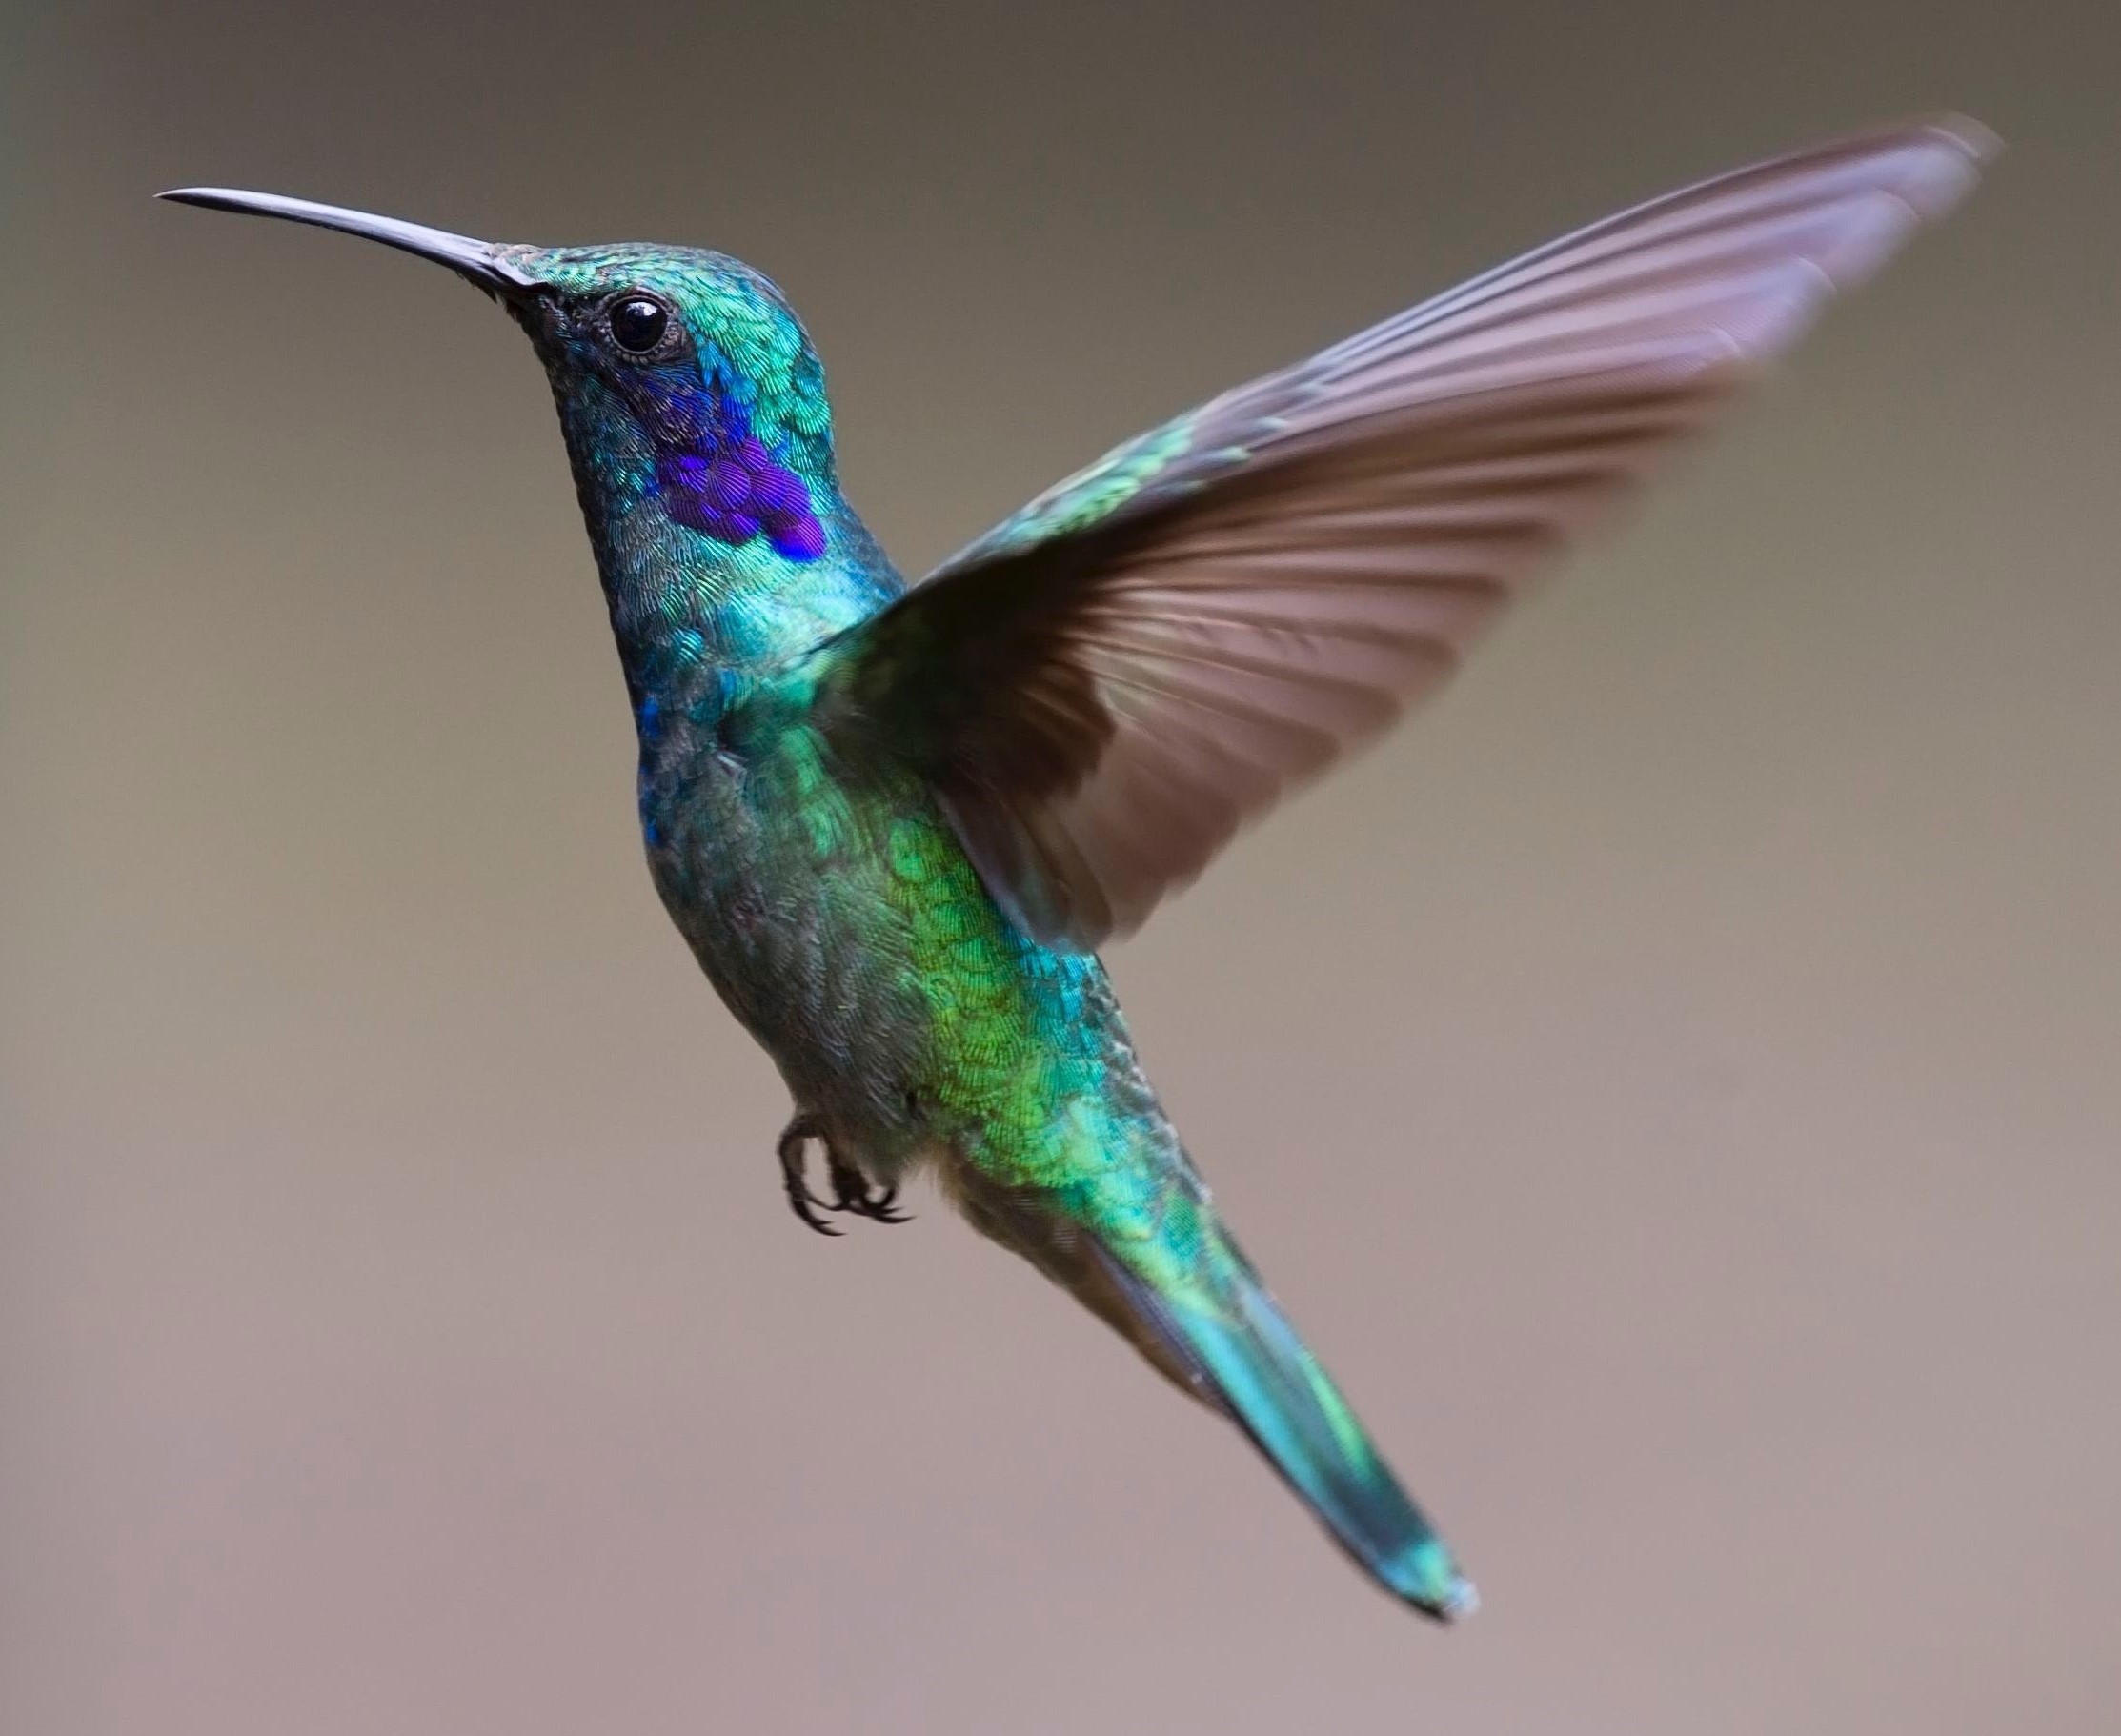
Teal and Brown Flying Hummingbird Photo From Pexel (free photo site)
The Bird Series includes looks based around different types of birds and their colour schemes. You can read more about the series and view posts here.
Tip: I used a wide variety of eyeshadow singles and shades from palettes for this look, as there were so many different colours to combine together. You can read more about the shades I used below in the ‘Products’ section.
Click here to read my article ‘Parts of the Eye’ for help on where to place eyeshadow colours.
Products
Base: MAC Painterly Paint Pot (light matte beige)
Crease: Kat Von D Crucifix eyeshadow (medium matte warm brown)
Outer Lid: Kat Von D Ministry eyeshadow (deep metallic jewel blue)
Middle Lid: Urban Decay Flash eyeshadow (shimmery bright violet-purple)
Inner-Middle Lid: Kiko Water 212 Emerald Green eyeshadow (shimmery, medium aquamarine-green)
Inner Crease: MAC Bio Green eyeshadow (satin bright green)
Highlight: Kat Von D Amen eyeshadow (light matte beige)
Lower Lashline: Kat Von D Ashes eyeshadow (light cool olive-taupe with gold, green and silver sparkles))
Inner Lower Lashline: Kat Von D Amen eyeshadow (as above)
Upper Lashline: Maybelline Eyestudio Lasting Gel Eyeliner in Black
Black mascara (upper and lower lashes)
Kiko Water Eyeshadows: you can read my post, as well as view photos and swatches, on these eyeshadows here.
Kat Von D Eyeshadows: the Kat Von D shades I used came from the Kat Von D Saints and Sinners Palette. You can read my post, as well as view photos and swatches, on the palette here.
Steps
1. Apply Painterly Paint Pot all over the lid as a base. You can either use your fingers or a flat synthetic brush (e.g. MAC 242).
2. Sweep Crucifix into the crease using a windshield wiper motion (e.g. MAC 217).
3. Take a flat shader brush (e.g. MAC 239) and pat Ministry on to the outer part of the lid. The trick with steps 3 to 5 is to keep the colour focused on each part of the lid, as well as giving a very small overlap with the next shade. Overlapping very slightly will help each of the shades blend together but still make them stand out on their own.
4. Take a flat shader brush (e.g. MAC 239) and pat Flash on to the middle part of the lid. Follow the tips set out for step 3 above to keep the colours distinct and blended.
5. Take a flat shader brush (e.g. MAC 239) and pat Kiko 212 on to the inner lid and just to the edge where it meets Flash on the middle part of the lid. Follow the tips set out for step 3 above to keep the colours distinct and blended.
6. Take a crease/blender brush (e.g. MAC 226, MAC 217) and apply Bio Green to the inner crease of the eye. This step adds a beautiful pop of bright green to the look and really brings everything together.
7. Using a crease/blender brush (e.g. MAC 217) or a pointed crease brush (e.g. MAC 226), sweep Amen on to the browbone to highlight.
8. Take an angled eyeliner brush (e.g. MAC 266) and apply Ashes along the lower lashline. I used a cool taupe shade as I wanted to give the lower lashline some definition but I still keep things very simple due to there being so much colour on the upper lids.
9. Take the same eyeliner brush (e.g. MAC 266) and apply Amen to the inner lower lashline.
10. Take a thin eyeliner brush (e.g. Real Techniques Fine Liner Brush) and apply a very thin line of black gel liner along the upper lashline. I kept the line very thin as I wanted to add definition to the lashline but still keeping the focus of the look on the eyeshadows.
11. Apply plenty of black mascara to the top and bottom lashes.
Here’s another close-up of the eyes:
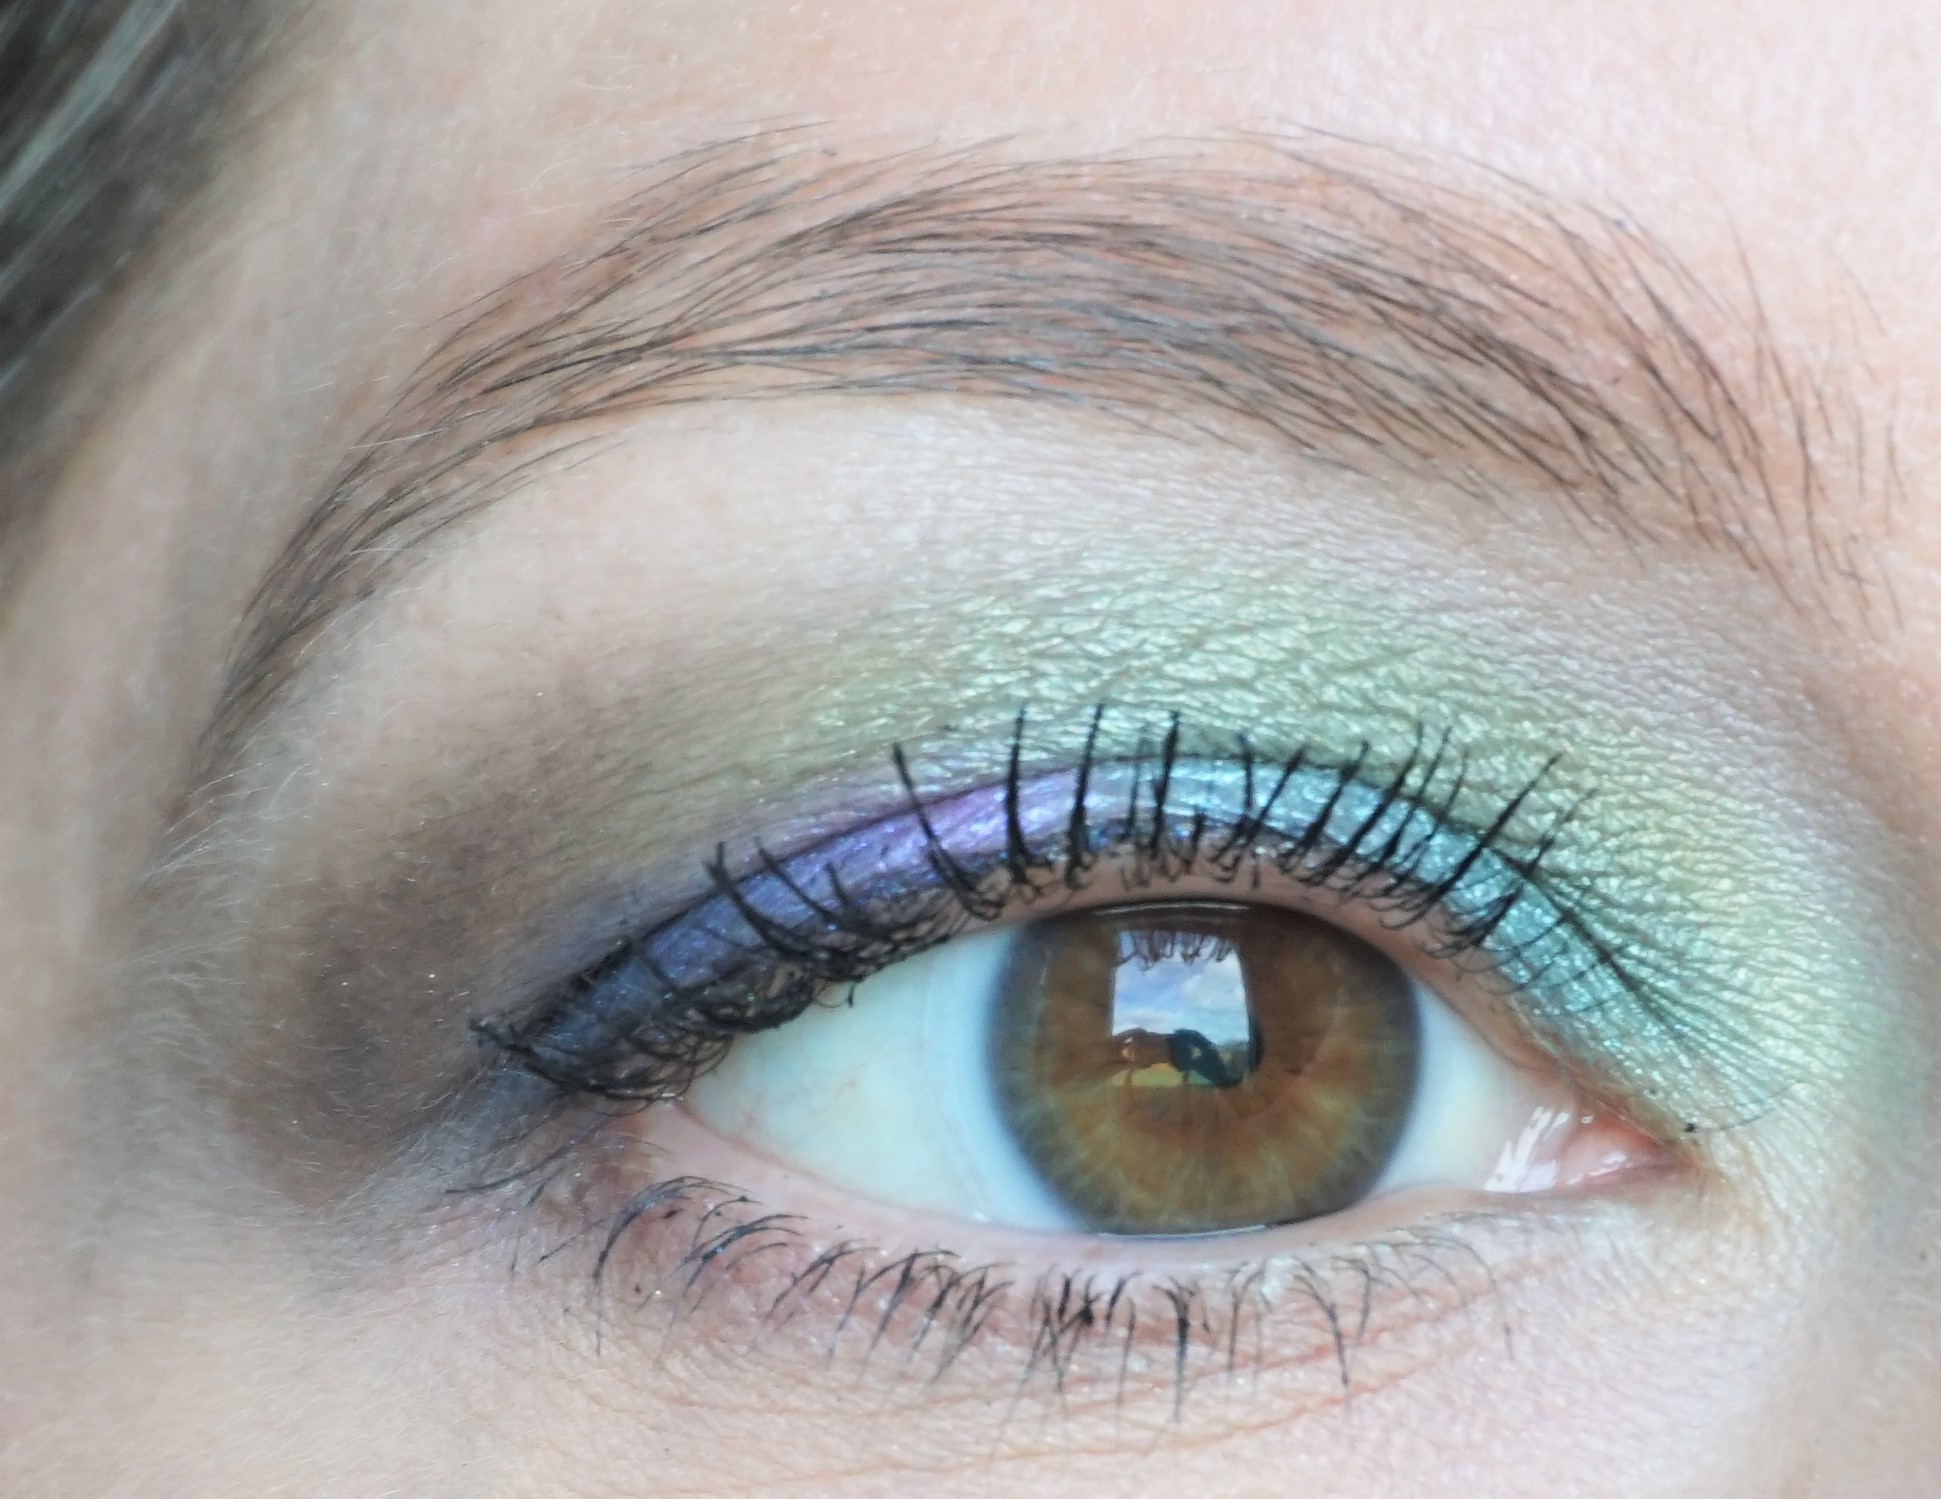
Teal and Brown Flying Hummingbird Look
Here are some full face shots of the look:

Teal and Brown Flying Hummingbird Look (full face)
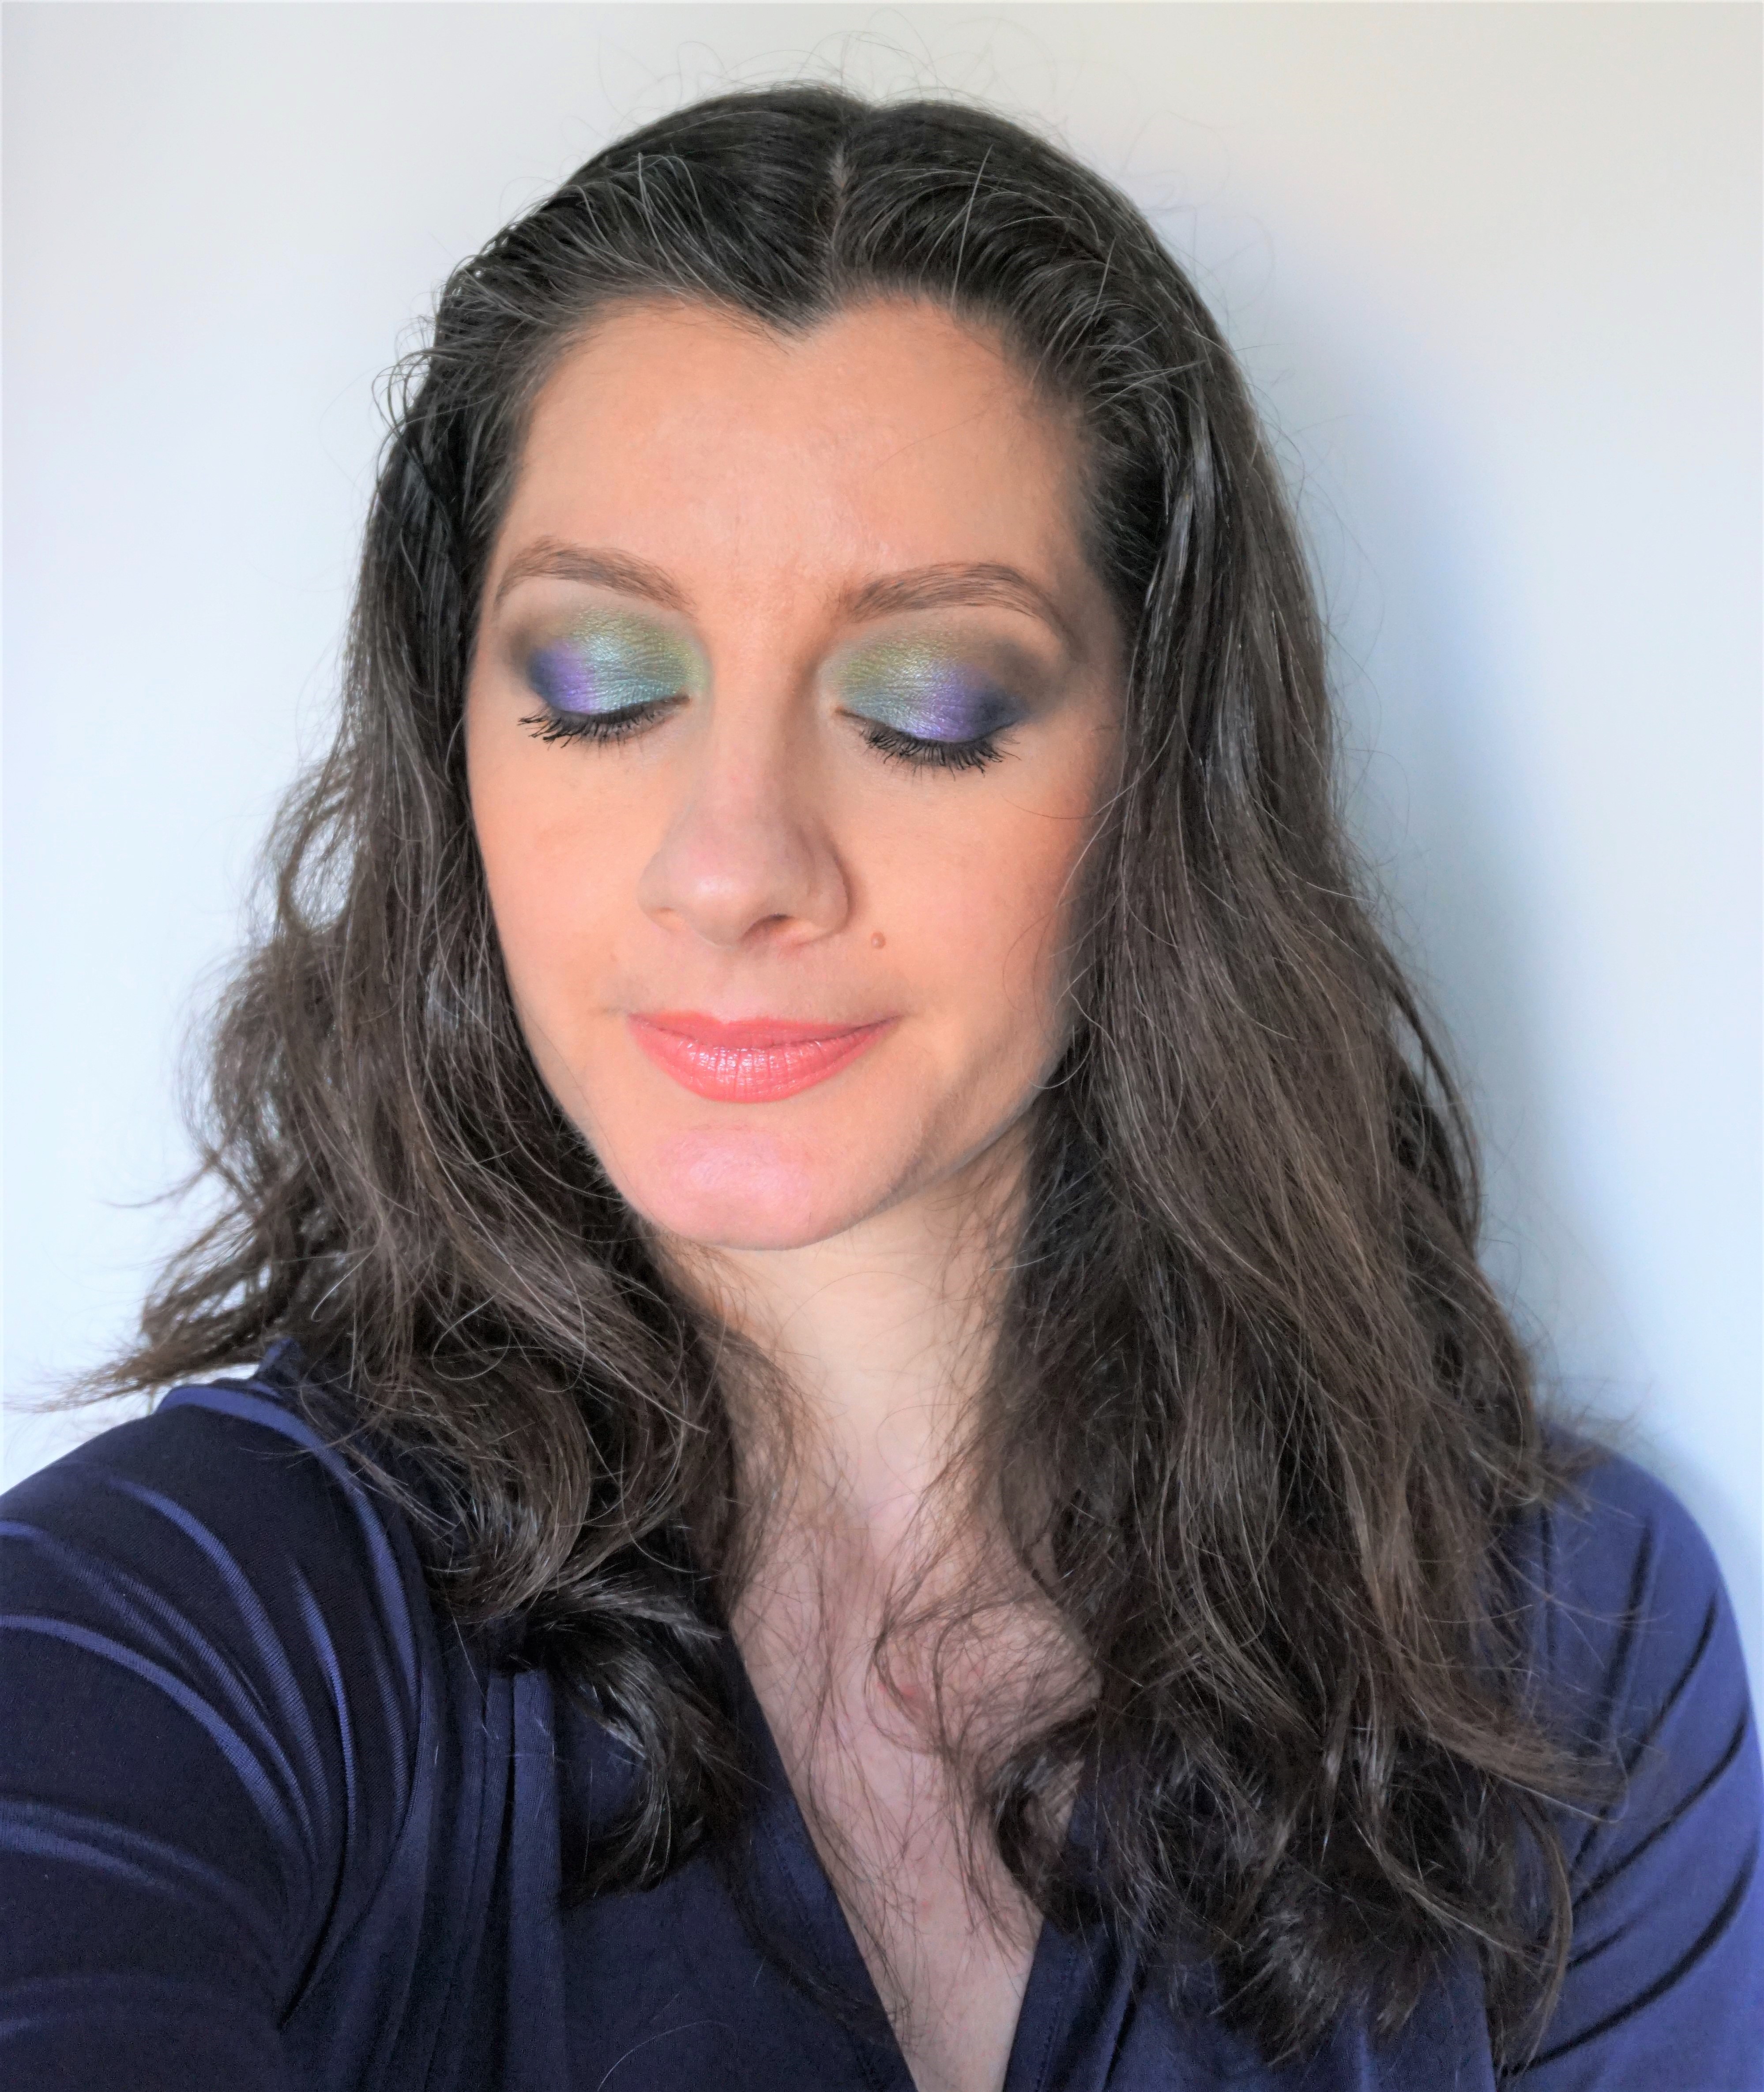
Teal and Brown Flying Hummingbird Look (full face)
To complement the look: I kept the rest of the face quite simple, as I wanted the focus to be on the eye look. I used Bare Minerals Invisible Bronze Powder Bronzer in Fair-Light (you can read more about this product here) to add warmth to the cheekbones, Benefit Gold Rush Blusher on the cheeks and Kiko Glow Fusion Powder Highlighter in 01 Champagne (you can read more about this product, see photos and view swatches here) to highlight my cheekbones. I used MAC Shanghai Spice to add some subtle warmth to the lips, without detracting from the rest of the look.
